
Starting your fishing journey in Singapore is an exciting venture, but as your collection of rods, reels, and tackle begins to grow, finding a dedicated storage solution becomes essential. A proper fishing rack is not just about keeping your living space tidy; it is a crucial tool for protecting your gear from structural damage, warping, and accidental breakage. For beginners navigating compact living environments, the ideal fishing rack must balance affordability, ease of assembly, and space efficiency.
By choosing a storage system tailored to your specific home layout and gear collection, you can extend the lifespan of your rods while keeping them organized and ready for your next outing. Whether you are casting from local jetties or exploring freshwater reservoirs, organizing your equipment starts with understanding what makes a storage solution practical and durable.
Core Selection Criteria for Beginner Fishing Racks
When purchasing your first fishing rack, it is easy to get overwhelmed by the variety of designs available online. To make an informed decision, you must first define your primary storage goals and evaluate how your gear will be used.
Products mentioned in this guide
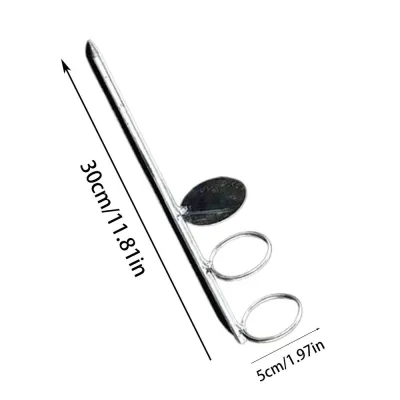
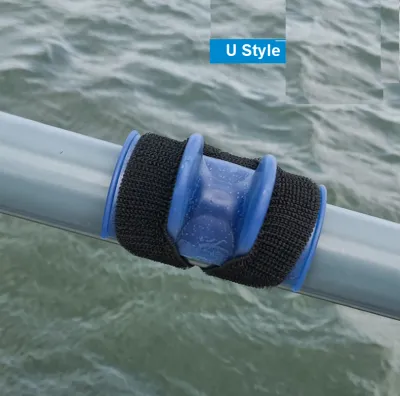
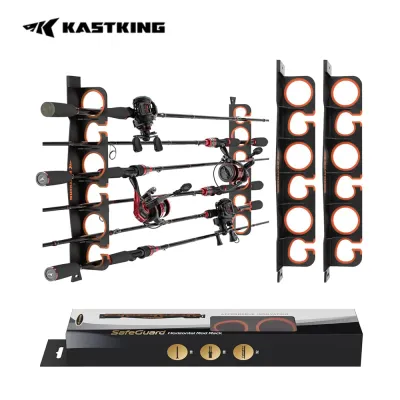
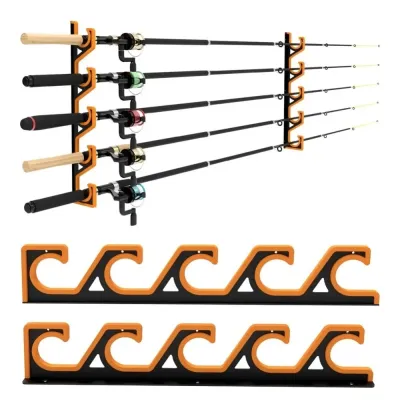
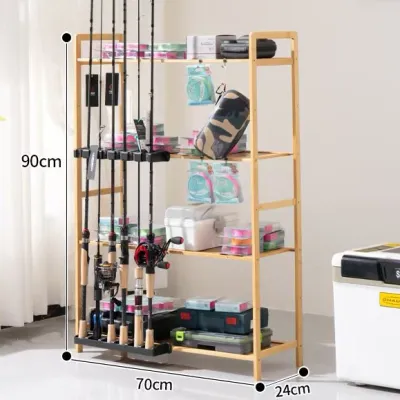
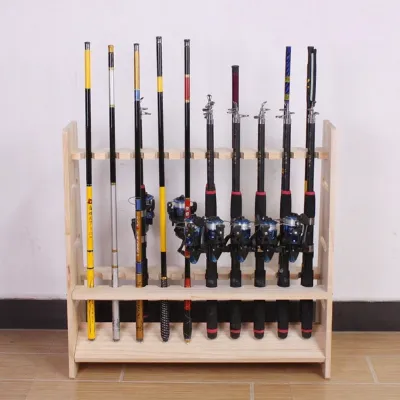
Prices are valid at publication and may change. Please refer to the product page for the latest price.
Defining Your Primary Use Case
Before browsing online marketplaces, determine where your rods will spend most of their time. Indoor storage is highly recommended in Singapore due to the tropical climate, as leaving sensitive graphite or fiberglass rods on open balconies exposes them to intense ultraviolet (UV) rays and rain, which can degrade the blank’s protective epoxy coating over time. If you plan to store your gear in a living room, utility closet, or bomb shelter, a compact vertical rack is often the most practical choice. For those who frequently travel to fishing spots by car, a portable vehicle-based rod carrier or a highly mobile freestanding rack might take priority, though a stable home base remains the foundation of good gear care.
Balancing Affordability and Durability
As a beginner, there is no need to invest in premium, furniture-grade solid oak displays that cost hundreds of dollars. Excellent entry-level options are available on local ecommerce platforms for under S$30 to S$50. The key is to look for basic structural integrity rather than aesthetic embellishments. A budget-friendly rack should stand firmly without wobbling when loaded and must feature secure joints that do not loosen under the weight of your reels. Avoid ultra-cheap, flimsy plastic models that flex excessively, as a collapsing rack can lead to fractured rod tips and bent guide frames.
Determining the Right Capacity
It is common for new anglers to start with just one or two rods—perhaps a versatile spinning setup for pond fishing and a sturdier rod for saltwater jetty casting. However, the fishing hobby has a way of expanding quickly. Purchasing a rack with exactly two slots will leave you searching for a replacement within months. For most beginners, a rack with a capacity of 6 to 12 slots represents the ideal sweet spot. This size remains compact enough to fit into tight corners while providing a comfortable buffer for future gear acquisitions without requiring a massive upfront financial investment.
Evaluating Rack Types and Installation Methods
The layout of your home is the single greatest factor dictating the type of fishing rack you should buy. Different designs offer distinct advantages in terms of space optimization, ease of access, and installation complexity.

Freestanding Floor Racks
Freestanding floor racks are highly popular among beginners, especially those renting their homes. These units require zero drilling or permanent modifications to your walls. They typically feature a double-sided design that holds rods vertically, utilizing a sturdy base plate and a top alignment template.
- Pros: Highly mobile, easy to reposition, and simple to assemble with basic hand tools.
- Cons: They occupy physical floor space, which can be a premium in smaller apartments. If placed in high-traffic corridors, they run the risk of being bumped into by family members or pets.
Wall-Mounted Racks
Wall-mounted racks are an exceptional space-saving solution that lifts your gear off the floor entirely. These can be configured to hold rods either vertically or horizontally.
- Vertical Wall Mounts: These hold the rods upright against the wall, with the butts resting in a bottom cup and the upper shafts secured by foam or plastic clips. They are highly efficient but require sufficient vertical wall clearance.
- Horizontal Wall Mounts: These display your rods horizontally, resembling a gun rack. This is an excellent way to showcase your gear as a design feature in a room, but it requires a wide, unobstructed stretch of wall space. It also makes retrieving a single rod slightly more cumbersome if other items are placed nearby.
Ceiling-Hung Racks
For those facing severe space constraints, ceiling-mounted racks utilize completely dead space. These racks hold rods horizontally against the ceiling, keeping them entirely out of sight and out of reach of children.
- Pros: Maximum space saving; ideal for long, one-piece rods that cannot fit vertically in standard rooms.
- Cons: Accessing your gear requires a step stool or a reach, making daily use less convenient. Installation is also the most demanding of all types, requiring secure anchoring into concrete ceilings to prevent the rack from falling.
Installation Requirements and Landlord Considerations
Before purchasing a wall or ceiling rack, consider the tools and skills required for installation. Mounting a rack securely onto concrete walls—common in Singapore’s residential construction—requires an impact drill, masonry drill bits, wall plugs (anchors), and screws. If you are renting and cannot drill holes, freestanding racks are your best option. Be cautious of wall racks that claim to hold multiple rods using only adhesive strips; the weight of several rods combined with heavy spinning or baitcasting reels can easily exceed the shear strength of the adhesive, leading to a catastrophic fall.
Material and Build Quality Checks
An affordable price tag should not mean compromising on basic material quality. Understanding the trade-offs of common manufacturing materials will help you select a rack that survives the local climate.
Molded Plastics (ABS and Polypropylene)
Molded plastic racks are highly practical for entry-level anglers. High-impact plastics like ABS are completely immune to the effects of high humidity, moisture, and salt air. They will never rust, rot, warp, or require painting.
- What to check: Inspect the thickness of the plastic panels. Flimsy, thin-walled plastic will warp under load. Look for reinforced ribbing on the underside of shelves and bases, which adds structural rigidity without increasing weight.
Wood and Wood Composites (MDF)
Many budget-friendly racks feature an attractive wood-grain finish, but these are often constructed from Medium-Density Fibreboard (MDF) or particleboard covered in a thin laminate veneer.
- The humidity risk: In Singapore's humid environment, untreated or poorly sealed MDF acts like a sponge. If you place a damp rod onto an unsealed MDF rack, moisture will seep into the joints, causing the wood fibers to swell, crumble, and lose structural integrity.
- What to check: If choosing a wood composite rack, ensure all edges are fully sealed with laminate or water-resistant paint. Solid wood options, though slightly more expensive, offer far superior longevity if they are treated with a clear polyurethane coat to repel moisture.
Metals (Aluminum and Powder-Coated Steel)
Metal racks offer excellent structural strength and a modern, industrial look.
- Aluminum: Naturally rust-resistant and incredibly lightweight, aluminum is an outstanding material for rod storage. It is highly durable but can carry a slightly higher price tag.
- Steel: Steel racks must be treated to survive. Look specifically for powder-coated finishes rather than simple spray paint. A powder coat creates a thick, durable barrier that resists scratching. If the metal is scratched or left bare, the high humidity and salt carried by coastal breezes will quickly initiate rust, which can transfer to your reels and rod guides.
Crucial Physical Stability Checks
When assembling or inspecting your rack, perform these quick checks to ensure your gear remains safe:
- Base Weight and Footprint: A freestanding rack must have a low center of gravity. The base should be wider than the top section to prevent tipping when top-heavy rods (with reels attached) are inserted.
- Joint Tightness: Shake the assembled frame gently. There should be no noticeable play or swaying at the connection points. If screws strip easily during assembly, the structural integrity is compromised.
- Soft Protective Padding: The areas of the rack that make direct contact with your rod blanks must be lined with soft material, such as EVA foam, neoprene, or soft rubber. Hard plastic or bare metal edges will scratch the rod's finish, creating micro-fractures that can cause the rod to snap under tension while fighting a fish.
Adapting Storage to Compact Living Spaces
Living in a compact apartment requires smart spatial planning. Before clicking “buy” on any fishing rack, take precise measurements of your intended storage area to avoid common compatibility issues.
Measuring Vertical and Horizontal Clearance
Do not guess your space requirements. Measure the height of your tallest rod when fully assembled. A standard 7-foot (approx. 2.1 meters) one-piece rod requires significant vertical clearance. If your apartment has standard 2.6-meter ceilings, a vertical floor rack will easily accommodate it. However, if you use longer surf casting rods that exceed 9 feet (approx. 2.7 meters), vertical storage may not be feasible indoors. In such cases, you must plan for horizontal wall storage or opt for multi-piece rods that can be broken down before being placed on the rack.
Managing Multi-Piece and Travel Rods
If you primarily use two-piece or multi-piece travel rods, you have more storage flexibility. You can store them broken down in their protective cloth sleeves, placing them in a dedicated corner basket, or you can keep them assembled on a standard vertical rack. If storing them assembled, ensure the joint (ferrule) is snug so the top section does not slide off. When placing multi-piece rods on a rack, position them so the line guides do not tangle with adjacent rods, which can lead to bent guide frames when pulling a rod out in a hurry.
Ventilation and Airflow
Singapore’s tropical climate creates prime conditions for mold and mildew growth, particularly on organic materials like cork rod handles. Avoid placing your fishing rack in dead-air zones, such as deep inside unventilated bomb shelters, tightly closed wardrobes, or damp utility rooms. Position your rack in an area with decent natural airflow or near a fan. If you must store your gear in a closed closet, place several disposable dehumidifier tubs (silica gel packs) inside the space and replace them regularly to keep the ambient moisture levels low.
Pre-Purchase Verification and Basic Maintenance
A successful purchase relies on verifying product details before spending your money, followed by consistent maintenance habits once the rack is in your home.
Pre-Purchase Checklist
Before finalizing your order on any online marketplace, run through these quick verification steps:
- Return Policies: Ensure the seller offers a straightforward return or exchange policy in case the rack arrives with cracked plastic panels, warped wooden parts, or missing assembly hardware.
- Included Hardware: Read the product description carefully to confirm that all necessary screws, wall plugs, and assembly tools are included in the box.
- User Reviews: Look at photos uploaded by other buyers in the review section. This gives you a realistic view of the product's actual color, material thickness, and how it looks when fully loaded with real fishing gear.
Inspecting for Manufacturing Defects
Once your rack arrives and is assembled, conduct a thorough physical inspection before placing your expensive rods onto it. Run your fingers along all the plastic clips, wooden slots, and metal edges. Check for sharp plastic burrs left over from the molding process, rough wooden splinters, or sharp metal edges. Use a piece of fine-grit sandpaper to smooth down any rough spots. Ensure that all foam padding inserts are securely glued in place; if they are loose, apply a small dab of household adhesive to secure them.
Simple Cleaning and Maintenance Routines
A fishing rack is only as clean as the gear you put on it. To prevent the accumulation of salt, grime, and mold, establish a strict post-trip routine:
- Wash Your Gear First: Never place a rod back onto the rack immediately after a saltwater session. Wash the rod, guides, reel seat, and reel thoroughly with fresh water to remove all salt residue. Dry the gear completely with a clean microfiber towel before storage.
- Wipe Down the Rack: Over time, dust and airborne salt particles will settle on your rack. Wipe down the entire structure once a month with a damp cloth mixed with a mild dish soap. Avoid using harsh chemical solvents or abrasive scrubbers, which can degrade plastic coatings or strip paint.
- Inspect for Wear: Periodically check the tightness of any assembly screws, especially on freestanding models that are moved frequently. Tighten any loose joints to maintain structural stability.
Frequently Asked Questions (FAQ)
Is it safe to store fishing rods on unpadded or improvised racks?
Storing fishing rods on unpadded, hard-surface, or improvised DIY racks is not recommended. Bare metal, hard plastic, or rough wood can easily scratch the protective epoxy coating on graphite and fiberglass blanks. These minor surface scratches create structural weak points, which can cause the rod to snap unexpectedly when placed under heavy load while fighting a fish. Always ensure your storage solution features soft EVA foam, rubber, or neoprene padding where the rod rests. If using an improvised setup, wrap the contact points with soft foam tape or silicone tubing to protect your gear.
How much capacity does a beginner fishing rack need?
For most beginners starting out in Singapore, a fishing rack with a capacity of 6 to 12 slots is highly recommended. While you may only own one or two rods initially, a slightly larger rack provides a practical buffer for future gear additions without taking up significantly more space. Purchasing a rack with a 6-to-12-rod capacity allows you to store your rods with reels attached while leaving empty slots in between, preventing the reels from knocking against each other and causing cosmetic or mechanical damage.
Community discussion
Share your experience or ask a question. Comments are reviewed before publication.