
Planning a family day out at East Coast Park or Marina Barrage does not require a massive financial investment to be memorable. A reliable, easy-to-fly kite can easily be found for under S$30 if you know which features to prioritize and which pitfalls to avoid. To get the most value out of a budget purchase, you should focus on durable materials and stable shapes rather than complex designs or professional-grade accessories.
By understanding how to evaluate specifications, calculate the true cost of online purchases, and perform basic safety checks, you can ensure a successful and frustration-free flying experience for the whole family. This guide outlines the essential steps to selecting an affordable kite that performs well in local wind conditions while keeping your outdoor activities safe and budget-friendly.
Setting Realistic Expectations for a S$30 Budget
When shopping within a strict S$30 budget, understanding the difference between non-negotiable quality and acceptable compromises is key to avoiding disappointment. At this price point, your primary focus should be on structural durability. Look for sails made from ripstop nylon or high-density polyester. These synthetic fabrics resist tearing when dragged across sand, grass, or the occasional tree branch, which is highly likely during family outings.
Products mentioned in this guide
![[SG SELLER] Outdoor Children Kites Flying Game Windspeed with Tail String Line Colorful Large Kite Toy Different Designs](https://img.lazcdn.com/g/p/0bf57f2a5db4baf70319140ec51ab722.jpg_400x400q80.jpg_.webp)
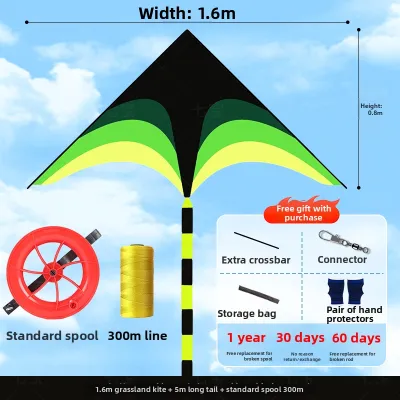

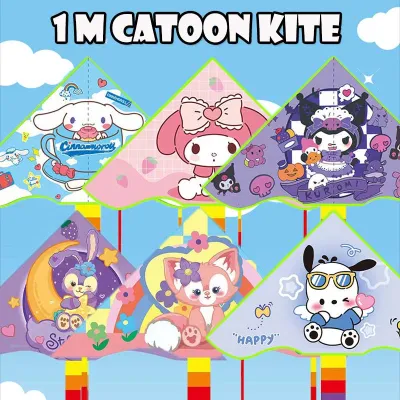
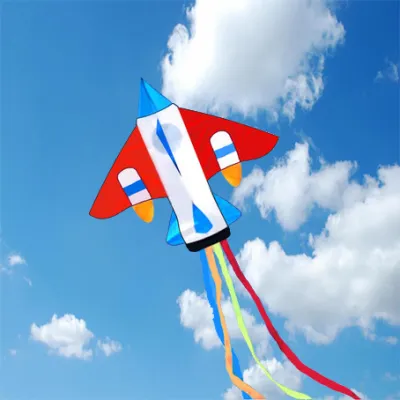
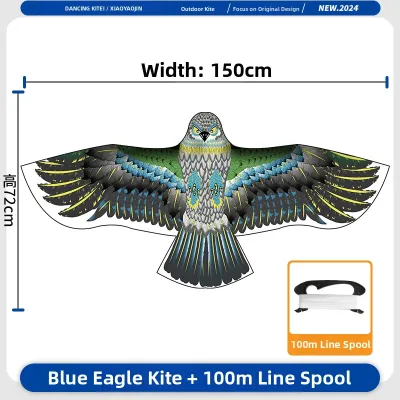
![[Ready Stock] DIY Colouring Kite](https://img.lazcdn.com/g/p/9608fbd0a2fb32622b85b8a4b230b563.jpg_400x400q80.jpg_.webp)
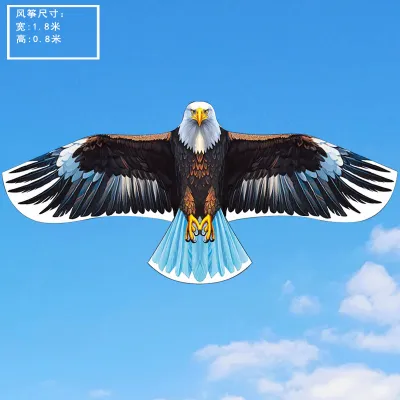
Prices are valid at publication and may change. Please refer to the product page for the latest price.
The frame, or spars, should ideally be made of flexible fiberglass. Fiberglass offers an excellent balance of strength and flexibility, allowing the kite to bend under sudden gusts without snapping. Avoid extremely cheap models that use rigid plastic or thin bamboo rods, as these materials tend to warp in high humidity or break permanently during a rough landing.
To keep manufacturing costs low, budget-friendly options will naturally feature simpler single-line designs and basic printed graphics rather than intricate stitched patterns or complex 3D structures. You should also expect standard polyester flying lines rather than premium braided alternatives like Dyneema. While these basic lines are perfectly adequate for casual flying, they may stretch slightly over time and lack the ultra-low drag of professional gear.
Additionally, do not expect premium carrying cases or advanced stunt capabilities within this price range. Most options under S$30 are designed for straight, stable flights rather than high-speed maneuvers or tricks. Accepting these minor limitations allows you to secure a durable, functional product that delivers hours of outdoor entertainment without unnecessary expenses.
Essential Specs to Check Before You Buy
Before finalizing any purchase, you must carefully evaluate the product specifications to ensure the kite is suitable for Singapore’s typical coastal breezes. Coastal areas like Pasir Ris Park and West Coast Park generally experience light to moderate winds, usually ranging from 5 to 15 knots. A kite with a wingspan between 1.0 and 1.5 meters is generally ideal, as it provides enough surface area to catch light winds without generating excessive pull that could overwhelm a child.

Always check the manufacturer’s recommended wind range, which is typically printed on the packaging or listed in the product description. Kites designed for high-wind environments will remain grounded in light coastal breezes, while oversized lightweight designs may become unstable or suffer structural damage if the wind picks up suddenly.
Another critical step is verifying the included accessories. Many budget listings display images of complete setups, but the fine print may reveal that the flying line, winder, or stabilizing tail must be purchased separately. Ensure the package explicitly includes a spool with at least 30 to 50 meters of line, as well as any necessary tails, which are crucial for maintaining flight stability in turbulent air.
Finally, examine the assembly mechanism. For family outings, look for designs featuring quick-connect plastic fittings or simple sleeve assemblies. Kites that require complex knotting or tensioning of multiple spars can quickly lead to frustration on a windy beach. A straightforward setup ensures that children can assist with assembly and begin flying almost immediately after arriving at the park.
Best Kite Shapes for Casual Family Flights
Selecting the right shape is the most effective way to guarantee a stable flight and an easy launch. Delta and Diamond shapes are the traditional standards for a reason. Their triangular and four-sided geometries provide natural aerodynamic lift and excellent stability in shifting winds. These shapes are highly forgiving, making them easy to relaunch from the ground if they happen to dive.
Delta designs, in particular, feature a wide wind range and require very little user input to stay aloft. Once launched, they tend to float stably in the sky, allowing younger children to hold the spool without constant supervision or adjustment. This makes them an excellent choice for teaching beginners the basics of wind awareness.
Parafoil, or soft kites, represent another outstanding option for family outings. Because they have no rigid spars, these kites rely entirely on the wind to inflate their pockets and create shape. This frameless design makes them virtually indestructible, as there are no fiberglass rods to snap during a hard crash. They are also incredibly safe for young children, eliminating the risk of injury from a falling rigid frame.
Furthermore, parafoil designs are highly portable. They can be stuffed directly into a small pouch or backpack, making them easy to transport on public transit or pack alongside picnic gear. Their lack of rigid parts also means there is zero assembly required at the beach; you simply unwind the line and let the wind catch the fabric.
Conversely, you should avoid complex dual-line stunt kites or large power kites when shopping on a budget. These designs require significant practice to control safely, pose physical risks to bystanders in crowded public spaces, and typically cost far more than S$30 once you factor in the necessary heavy-duty control gear and safety lines.
Calculating True Costs and Avoiding Pitfalls
Shopping on online marketplaces requires a discerning eye to avoid hidden costs that can push your total expenditure past the S$30 limit. Always factor in shipping fees and potential import charges when ordering from overseas sellers. A kite priced at S$15 might seem like a bargain until a S$12 shipping fee is added at checkout, bringing the total dangerously close to your budget ceiling.
Watch out for “accessory traps” where the base price only covers the fabric sail. Sellers often list multiple variations on a single product page, with the lowest price corresponding to a bare-bones replacement sail. Make sure you select the option that explicitly bundles the frame, line, handle, and tail to avoid having to make a second, costly purchase later.
It is also wise to assess the seller’s return policy and customer feedback regarding manufacturing defects. Look for reviews that mention missing parts, misaligned grommets, or uneven stitching, as these defects can prevent the kite from flying straight. A reliable seller should offer a straightforward return or replacement policy if the product arrives damaged or incomplete.
If you prefer to buy in person, local toy stores and beachside kiosks often stock budget-friendly options. While physical stores may have a slightly smaller selection than online platforms, they allow you to inspect the material quality and verify that all components are present before handing over your money, saving you the hassle of waiting for international shipping.
Pre-Flight Checks and Beach Safety
To ensure a safe and successful flying experience, always perform a quick pre-flight inspection before launching your kite. Unroll a few meters of the flying line and check for any fraying, knots, or weak spots that could snap under tension. Ensure that all spar connections are pushed firmly into their plastic connectors and that the bridle—the string harness attached to the kite—is free of tangles.
Selecting a safe flying zone is critical, especially at popular spots like East Coast Park or Marina Barrage. Always stay far away from power lines, busy roads, trees, and crowded pedestrian pathways. In Singapore, you must also remain mindful of aviation safety guidelines. Keep your activities well away from restricted military areas and airports, and ensure your kite stays below the standard 60-meter (200-foot) height limit to avoid interfering with low-flying aircraft.
Be highly responsive to changing weather conditions. Singapore’s tropical climate can produce sudden afternoon squalls, heavy downpours, and lightning. If you notice dark clouds approaching, hear thunder, or feel sudden, violent wind gusts, pack up your gear immediately. Wet flying lines can conduct electricity, making kite flying during a storm extremely hazardous.
Additionally, be mindful of offshore winds. If the wind is blowing directly from the beach out toward the sea, a snapped line could result in your kite being carried far over the water, where it cannot be safely retrieved. Flying when the wind blows parallel to the shore or gently inland is much safer and makes retrieving a grounded kite far easier.
Frequently Asked Questions (FAQ)
How do I repair a torn kite sail on a budget?
Minor tears in ripstop nylon or polyester sails can be easily repaired using specialized ripstop repair tape or heavy-duty clear packing tape. First, clean the damaged area with a damp cloth to remove any salt, sand, or moisture, and let it dry completely. Lay the sail flat on a hard surface, align the torn edges carefully, and apply the tape to both sides of the fabric, pressing firmly to remove air bubbles. If a tear occurs directly along a high-tension seam or near a bridle attachment point, the structural integrity may be compromised, making a full replacement safer.
Can I use a budget kite in very light winds?
Most budget-friendly kites require a minimum wind speed of around 7 to 10 km/h (about 4 to 6 knots) to stay aloft. Because budget models often use slightly heavier fabrics and standard fiberglass frames, they may struggle to fly in near-still air compared to ultra-lightweight professional models. If the wind is too light, avoid running continuously to force the kite up, as this usually results in repeated crashes and potential damage. Instead, wait for a steady breeze, or choose an open coastal location like Marina Barrage where elevated terrain helps capture consistent air currents.
Community discussion
Share your experience or ask a question. Comments are reviewed before publication.