
Navigating Singapore’s Park Connector Network (PCN) after sunset requires a specialized approach to bicycle safety. Unlike riding on open roads where speed and forward illumination are the primary concerns, cycling on shared paths demands a high level of situational awareness and clear communication with other path users. The best rear bike light for PCN riding is not necessarily the brightest one on the market, but rather one that balances wide-angle visibility, adaptive output, and reliable weatherproofing. Choosing an appropriate bike light rear setup ensures you remain visible to pedestrians, runners, and other cyclists without causing blinding glare in crowded spaces.
The PCN is a unique infrastructure system that transitions rapidly from bustling urban corridors near housing estates to quiet, unlit pathways cutting through nature reserves. This environmental variety means your lighting needs can change multiple times during a single ride. A light that performs excellently in a brightly lit park near an MRT station might prove inadequate in a dark coastal stretch, or conversely, a high-intensity strobe might blind a family walking directly behind you on a narrow bridge. To make an informed decision, you must understand the specific demands of the PCN and match them to the right category of safety equipment.
Why Park Connector Conditions Dictate Your Rear Light Choice
Singapore’s PCN is a shared-use network where cyclists, joggers, families with strollers, and personal mobility device (PMD) users coexist in relatively close quarters. Because these paths are narrower than public roads and feature two-way traffic, rear-end and side-impact visibility are equally critical. Standard rear lights often project a narrow, focused beam directly backward, which is highly effective for distant motorists but offers poor visibility to someone approaching from a side path or overtaking at an angle. A suitable rear light for these conditions must offer a wide beam angle, ideally with side cutouts or wrap-around lenses that project light to the left and right.
Products mentioned in this guide
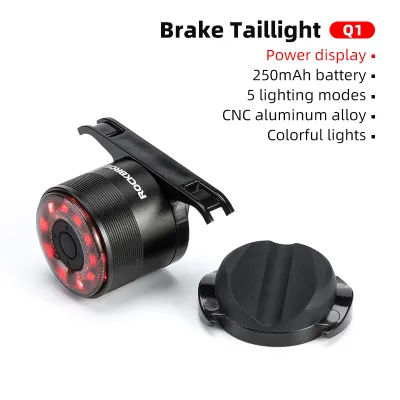
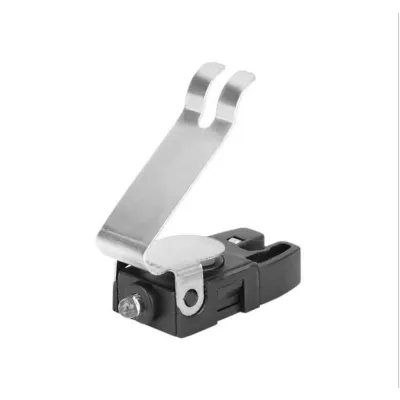
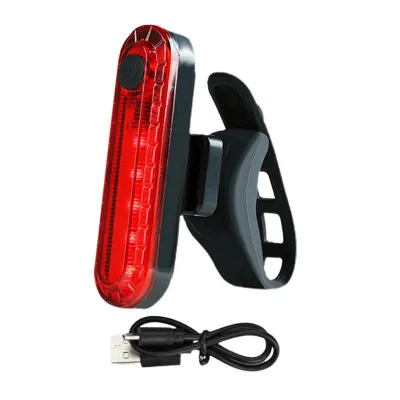
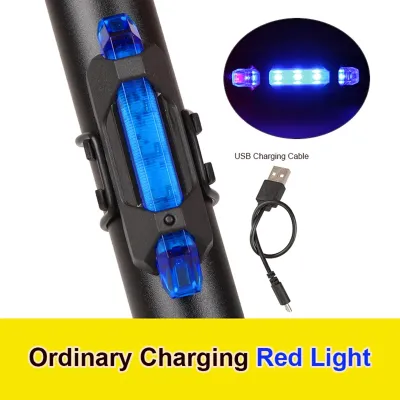
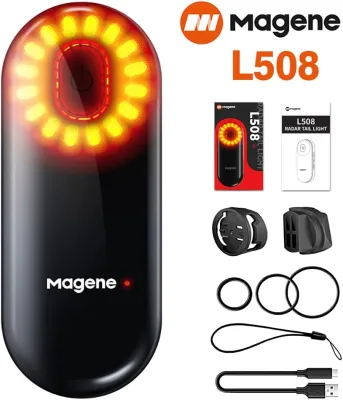
![[LOCAL SELLER] Bicycle Rear Tail Light/Road Bike/Mountain Bike/Fixed Gear/Fixie/Time Trail Bike/Bmx/Led Light](https://img.lazcdn.com/g/ff/kf/S571d8e66252f48908033ae6a5733d6cbg.jpg_400x400q80.jpg_.webp)
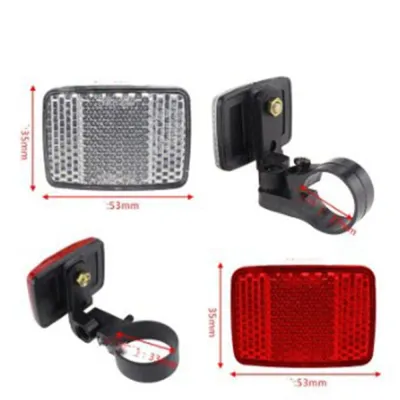
Prices are valid at publication and may change. Please refer to the product page for the latest price.
The lighting conditions along the PCN are highly inconsistent. Stretches running through mature HDB estates are often illuminated by powerful streetlights and ambient building glow, requiring only a modest light to signal your presence. Conversely, sections of the Round Island Route, the Rail Corridor, or paths bordering nature reserves can be exceptionally dark, with minimal ambient light to guide you or alert others to your position. Your rear light must feature multiple, easily adjustable brightness levels so you can dim the output in crowded, well-lit zones and boost it when entering dark, isolated stretches.
Furthermore, PCN cycling involves frequent stopping, starting, and turning. You will regularly encounter pedestrian crossings, traffic lights where the path intersects with public roads, and congested choke points near park hubs or food centers. During these frequent pauses, a static, low-intensity light can easily blend into the background clutter of streetlights and shop signs. Features such as automatic brake sensing, motion-activated standby, or highly irregular flash patterns help your bicycle stand out during these critical transitions, reducing the risk of collisions from behind.
Recommended Rear Light Types for PCN Riding
To help you navigate these diverse conditions, rear lights can be categorized into four distinct functional types. Understanding the strengths, limitations, and ideal use cases of each type allows you to select the best configuration for your specific commuting or recreational habits.

Radar-Equipped Tail Lights for Shared Path Awareness
Radar-equipped tail lights represent a significant technological advancement in cycling safety, combining a rear-facing radar sensor with an integrated LED light. The radar continuously scans the path behind you, detecting approaching objects—such as faster cyclists, PMDs, or vehicles when transitioning to roads—and transmits real-time visual and audible alerts to a paired handlebar-mounted device. This technology acts as a digital rear-view mirror, giving you ample warning before someone attempts to overtake you on a narrow PCN lane.
This category is highly recommended for fast commuters, long-distance endurance riders, and those who frequently ride during peak evening hours when the paths are congested. Knowing exactly when a faster user is approaching from behind allows you to adjust your lane position safely, avoiding sudden swerves that could lead to a collision.
However, radar lights come with notable trade-offs. They are generally much more expensive than standard lights, often priced upwards of S$150 to S$300, and their larger housing can add bulk to your seatpost. Additionally, they rely heavily on compatible cycling computers, sports watches, or smartphone applications to display alerts; without a paired screen, the radar functionality is largely lost, leaving you with just a standard light.
Before purchasing a radar-equipped unit, perform these essential checks:
- Verify Standalone Capability: Check if the light offers standalone audible alerts or vibration patterns if you do not own a compatible GPS cycling computer.
- Confirm Detection Specs: Check the manufacturer's specifications regarding the detection range and the maximum number of targets the radar can track simultaneously.
- Ensure Device Compatibility: Confirm that the mounting bracket is robust enough to hold the heavier unit securely on your seatpost without slipping.
Brake-Sensing Smart Lights for Crowd Communication
Brake-sensing smart lights utilize built-in accelerometers to monitor your speed and detect deceleration. When you apply your brakes or slow down rapidly, the internal sensor triggers a temporary increase in lumen output, transforming the light into a solid, high-intensity brake light similar to those found on cars and motorcycles. This immediate visual cue instantly alerts trailing cyclists and pedestrians that you are slowing down.
These lights are exceptionally useful for riders who frequent busy park entrances, school zones, and highly populated HDB estate connectors. In these high-traffic environments, sudden stops are common as children, pets, or pedestrians cross the path unexpectedly. A responsive brake light provides an extra layer of safety by giving those behind you a fraction of a second more to react.
Despite their benefits, smart lights have limitations. The internal accelerometers can sometimes be triggered by rough pavement, speed bumps, or even deep drainage grates, causing the light to brighten unnecessarily and drain the battery faster than expected. Additionally, these lights require precise, level mounting; if the light is tilted too far upward or downward, the sensor may fail to register deceleration accurately.
When evaluating a brake-sensing light, keep these guidelines in mind:
- Check Calibration Requirements: Check if the light features an auto-calibration function that adjusts to the angle of your seatpost automatically.
- Verify Sensitivity Options: Check whether you can adjust the sensitivity of the brake sensor through an app or physical buttons to suit your typical riding terrain.
- Confirm Mounting Stability: Ensure the mounting system allows for a perfectly stable, horizontal orientation that prevents the light from shifting during vibration.
High-Visibility Strobe Lights for Unlit Connectors
High-visibility strobe lights are designed with one primary goal: to capture attention in environments filled with visual distractions. These lights feature non-rhythmic, disruptive flash patterns—such as alternating pulses, random strobes, or rapid bursts—that break through the visual noise of streetlights, neon signs, and car headlights.
Recreational cyclists and weekend riders who enjoy late-night rides along unlit coastal paths or nature reserve connectors will benefit most from this type of light. The irregular flash pattern makes your bicycle immediately recognizable as a moving hazard from a significant distance, even in pitch-black conditions where a steady light might blend into the background.
The primary limitation of high-visibility strobes is the potential to cause discomfort or temporary glare for other path users. A high-lumen strobe flashing directly into the eyes of a pedestrian walking close behind you can be highly disorienting and discourteous on shared paths.
To ensure you use a strobe light responsibly, verify the following before buying:
- Look for Urban Flash Modes: Look for models that offer dedicated 'urban' or 'group ride' flash modes, which utilize lower lumen outputs or softer pulsing patterns designed not to blind others.
- Check Mode Switching: Check if the light has an easily accessible physical button that allows you to quickly switch from a high-intensity strobe to a low-power steady mode when entering crowded areas.
- Verify Lateral Visibility: Confirm that the light's lens design offers excellent lateral visibility, ensuring you are seen by users approaching from side paths and intersections.
Compact, Anti-Theft Clip-Ons for Multi-Modal Commuters
Compact clip-on lights are small, lightweight units designed for maximum portability and convenience. They typically feature simple silicone strap mounts or integrated spring clips that allow them to be attached to seatposts, saddlebags, clothing, or backpacks in a matter of seconds without the need for tools.
This category is perfect for multi-modal commuters who regularly transition between the PCN and public transport systems like the MRT or buses. Because these lights are so easy to detach, you can quickly remove them and slip them into a pocket or bag when parking your bike at a public rack, minimizing the risk of opportunistic theft. Their low-profile design also ensures they do not snag on clothing or bags when carrying your folding bike onto a train.
The trade-off for this extreme convenience is performance. Due to their small physical size, compact clip-ons have limited space for internal batteries. Consequently, they generally offer lower maximum brightness levels and shorter runtimes on high-intensity modes compared to larger, dedicated seatpost lights.
Before choosing a compact clip-on, perform these practical checks:
- Inspect Strap Durability: Inspect the quality of the silicone strap or mounting clip to ensure it is durable enough to withstand daily stretching and removal.
- Verify Attachment Security: Verify that the clip mechanism holds the light securely to your bag or clothing without sagging, which could point the beam downward toward the ground rather than backward.
- Check Charging Speed: Check the charging speed, as many compact lights can be fully recharged in under an hour, making them easy to top up at your office desk.
Essential Specs to Verify Before Purchasing
To ensure your chosen rear light can withstand Singapore’s demanding environmental conditions and fit your bicycle frame perfectly, you must look past marketing claims and verify specific technical details.
Weather Resistance and IP Ratings
Singapore’s tropical climate is notorious for sudden, torrential downpours that can saturate trail equipment in seconds. Standard electronics can easily short-circuit if water penetrates the casing, making water resistance a non-negotiable feature for any PCN rider. To assess a light’s true water resistance, you must check its Ingress Protection (IP) rating.
The IP rating consists of two digits; the second digit measures liquid protection on a scale from 0 to 8. For reliable performance in Singapore’s rain, look for a minimum rating of IPX4, which protects against splashing water from any direction. For complete peace of mind during heavy monsoon downpours, look for IPX6 (protection against powerful water jets) or IPX7 (protection against temporary submersion in water up to 1 meter deep).
Always verify the exact IP rating on the manufacturer’s official technical specification sheet, as generic terms like ‘water-resistant’ are not standardized. Additionally, inspect the design of the charging port cover. It should be made of thick, flexible rubber or silicone that fits tightly into the port opening with a noticeable seal. After every charge, always double-check that this cover is pressed completely flush with the housing to prevent moisture from seeping in during your ride.
Mounting Compatibility and Seatpost Shapes
Modern bicycles feature a wide variety of seatpost designs, ranging from standard round tubes to aerodynamic teardrop shapes, D-shaped profiles, and dropper seatposts on mountain bikes. A mount designed for a round post will often slip, twist, or fail to mount entirely on an aerodynamic or D-shaped post.
Before purchasing a light, inspect your bicycle’s seatpost and verify that the included mounting hardware is compatible. Many manufacturers include adaptable rubber shims, angled brackets, or multiple lengths of silicone straps in the box to accommodate different shapes. If you ride a folding bike with an exceptionally thick seatpost, you may need to purchase an aftermarket mount or look for a light that can clip directly onto your saddle rails.
When installing your light, always consult your bicycle manufacturer’s instructions, especially if you have a carbon fiber seatpost. Carbon fiber is sensitive to clamping pressure, and over-tightening a rigid plastic mount can cause structural damage to the post. Additionally, ensure the mounted light is positioned high enough to remain visible over any rear racks, mudguards, or saddle bags you plan to carry.
Battery Runtime and Charging Standards
A rear light is only useful if it remains powered throughout your entire journey. When reviewing battery specifications, be aware that the headline runtime advertised on the packaging almost always refers to the lowest-power eco-flash mode. A light advertised as lasting ’50 hours’ might only run for 2 or 3 hours if set to a high-intensity steady mode.
To avoid getting caught in the dark, check the manufacturer’s detailed runtime chart for the specific modes you plan to use most frequently on the PCN. If you regularly go on long weekend rides, choose a light that offers at least double your average ride duration on your preferred setting to account for battery degradation over time.
Charging standards are also an important convenience factor. Look for lights that utilize USB-C charging, which has become the modern standard in Singapore. USB-C ports offer faster charging speeds and allow you to use the same cable as your smartphone or laptop, reducing cable clutter. Older micro-USB models are still common but charge more slowly and require a specific, older cable style. Finally, prioritize lights with clear battery level indicators, such as a multi-stage LED indicator that changes color (e.g., green, orange, red) to warn you when the battery drops below critical levels.
Maintenance and Care for Tropical Weather
Singapore’s high humidity, intense heat, and salt-laden air create a harsh environment for electronic accessories. Proper maintenance is essential to prevent premature failure of your rear light and ensure its safety features remain reliable.
After riding in wet or dusty conditions, always wipe down the light housing and mounting straps with a soft, damp cloth. This removes sweat, sunscreen residue, road grime, and salt spray, all of which can slowly degrade silicone straps and plastic lenses over time. Avoid using harsh chemical cleaners or solvents, as these can damage the protective coatings on the lens and housing.
Periodically inspect the rubber seals and charging port covers for signs of wear. Under intense tropical UV exposure, rubber can become brittle, stiff, or cracked, compromising the light’s water resistance. If you notice the charging port cover no longer seals tightly, contact the manufacturer to see if replacement parts are available.
If you store your bicycle in an outdoor rack, a damp corridor, or an unventilated storage room, do not leave the light attached to the bike. The combination of heat and trapped humidity can accelerate battery degradation and lead to internal corrosion. Instead, remove the light after every ride and store it in a cool, dry, well-ventilated indoor environment.
In the event that moisture or condensation becomes visible inside the light lens after a heavy downpour, take immediate action to protect the device. Stop using the light immediately and do not attempt to turn it on or plug it into a charger, as this can cause a short circuit. If the battery is removable, take it out. Place the unit in a dry environment and consult the manufacturer’s customer service or a qualified professional for advice. Never attempt to dry the light using extreme heat sources like hair dryers, ovens, or direct, prolonged sunlight, as this can permanently warp the plastic housing and damage the internal lithium-ion battery.
Frequently Asked Questions (FAQ)
Are flashing rear lights allowed on the PCN?
Yes, flashing rear lights are generally permitted on Singapore’s Park Connector Network (PCN). While public road regulations typically mandate steady lights for motorized vehicles to help other drivers judge distance, shared paths like the PCN allow flashing modes because they are highly effective at catching the attention of pedestrians and other slow-moving path users. However, you should always ride responsibly and check the latest Active Mobility Act guidelines and local Land Transport Authority (LTA) advisories to ensure your lighting setup complies with current brightness limits and path etiquette.
How bright should a rear bike light be for shared paths?
Unlike front headlights, which require high lumen outputs to illuminate the path ahead, the primary purpose of a rear bike light is to make you visible to others. For night riding on well-lit sections of the PCN, an output of 10 to 30 lumens is generally sufficient to signal your presence without causing glare. On darker, unlit connectors, you can increase this to 50 lumens. Reserve high-intensity modes of 100 lumens or more for daytime riding or extremely foggy conditions, and always dim your light when riding closely behind other path users to avoid causing visual discomfort.
Community discussion
Share your experience or ask a question. Comments are reviewed before publication.