
A sudden mechanical rattle or a slipping saddle can quickly disrupt a ride along Singapore’s Park Connector Network (PCN) or a daily commute. For cyclists seeking a lightweight, pocket-sized companion, the Nextool Mini offers a portable solution for quick adjustments and minor trailside emergencies. This compact multi-tool is designed to handle basic tightening, minor alignment tweaks, and securing rattling accessories, allowing you to keep riding without carrying a heavy saddlebag. However, its utility is strictly defined by its compact size, meaning it is built for temporary, on-the-go fixes rather than comprehensive home workshop overhauls.
Understanding exactly what the Nextool Mini can and cannot do is essential for your safety and the longevity of your bicycle. While it excels at tightening a loose bottle cage or adjusting a slipping seatpost clamp, it lacks the leverage and specialized components required for complex mechanical repairs. Before setting off, knowing the precise capabilities of your tool ensures you can make informed decisions when a mechanical issue arises, helping you determine whether to perform a quick trailside adjustment or seek professional assistance.
Understanding the Nextool Mini's Capabilities and Limits
The primary use case of the Nextool Mini is to provide an emergency-focused tool for minor adjustments and tightening loose bolts during a ride. Whether you are navigating the paved paths of East Coast Park or commuting through the city, this compact tool fits easily into a jersey pocket or a small top-tube bag. It is designed for convenience, allowing you to address unexpected vibrations or slight component slippage before they escalate into major mechanical failures.
Products mentioned in this guide
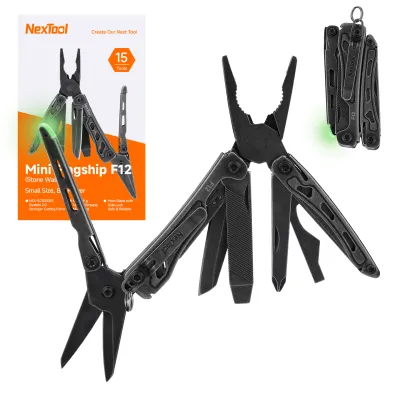
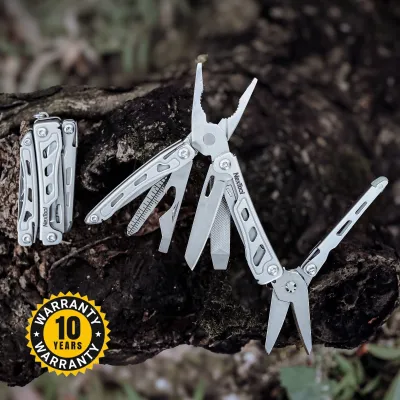
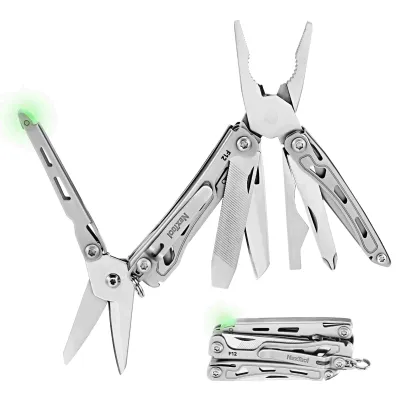
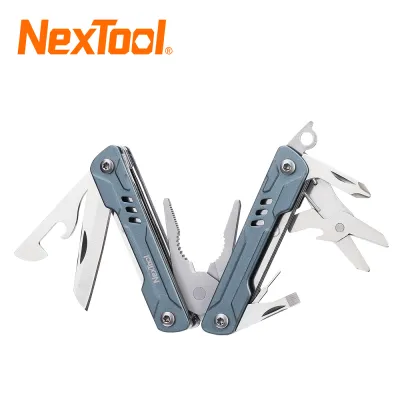
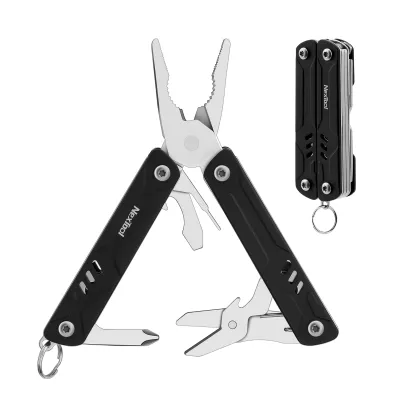
Prices are valid at publication and may change. Please refer to the product page for the latest price.
Before relying on the Nextool Mini as your sole roadside companion, verify the exact bits and tools included in your specific model. Nextool manufactures several compact variations, and the available tools can range from basic flathead and Phillips screwdrivers to small hex keys, scissors, or pliers. Some variations may feature small Allen keys, while general-purpose pocket multi-tools might require you to carry a separate bit adapter or a small set of hex wrenches. Always check your tool’s exact configuration to ensure it matches the bolt sizes on your bicycle, which typically require 4mm, 5mm, or 6mm hex keys.
The physical limitations of mini tools are primarily governed by physics. Because the Nextool Mini features a very short body, its lever arms are significantly shorter than those of standard workshop T-handle wrenches or dedicated folding bike multi-tools. This short leverage makes it difficult to apply high torque, which can be a double-edged sword. While it reduces the risk of crushing delicate components, it also makes it challenging to loosen seized bolts. Trying to force a tight bolt with a small, awkward grip increases the risk of the tool slipping, which can easily round or strip the bolt heads.
Ultimately, you must view this compact multi-tool as a temporary bridge to get you home safely or keep you comfortable during your journey. It is not designed to perform deep mechanical overhauls such as adjusting bottom brackets, installing pedals, or servicing hubs. Relying on it for major repairs can damage both the tool and your bicycle’s high-value components.
Essential Pre-Ride Checks and Quick Adjustments
Performing a quick pre-ride inspection is the most effective way to prevent mechanical failures before you leave. The Nextool Mini is highly useful during these brief checks, allowing you to quickly secure any components that may have vibrated loose during previous rides.

- Seatpost and Saddle Adjustments: A slipping saddle can ruin your pedaling efficiency and cause knee discomfort. If you notice your saddle tilting or sliding down, use the appropriate hex bit on the Nextool Mini to loosen the seat clamp bolt slightly. Adjust the saddle to your preferred height and tilt, ensuring it aligns perfectly with the frame's centerline. Carefully re-tighten the bolt. Because you lack a torque wrench on the trail, tighten the bolt until it is snug and firm, but avoid forcing it past its natural resistance, especially on lightweight frames.
- Handlebar and Stem Alignment: Steering security is a critical safety factor. Inspect the stem faceplate bolts and the steerer tube pinch bolts to ensure your handlebars are perpendicular to the front wheel. If the handlebars have twisted slightly, loosen the pinch bolts, realign the stem with the front tire, and tighten the bolts gradually. Ensure the handlebar faceplate is secure so the bars do not rotate forward or backward when you apply pressure.
- Quick-Release and Thru-Axle Checks: Before mounting your bike, verify that both wheels are fully seated in the dropouts and that the quick-release skewers or thru-axles are securely tightened. Additionally, use the multi-tool's screwdriver or hex bits to check accessory mounts. Items like bottle cages, fenders, and rear racks are highly susceptible to loosening from road vibrations; tightening these small bolts prevents them from rattling or, worse, detaching and jamming into your spokes.
- The Shake Test: Once you have completed these adjustments, perform a quick physical verification. Lift the bicycle a few centimeters off the ground and drop it gently onto its tires. Listen closely for any unusual rattles or loose sounds. Physically grab the saddle and the handlebars, applying moderate force to confirm that neither component twists, slips, or moves under pressure. If everything remains rigid, your bicycle is ready for the ride.
Handling Common Trailside Emergencies
When a mechanical issue occurs mid-ride, finding a safe spot to address the problem is your first priority. Before pulling out your multi-tool, always move your bicycle completely off the shared path, PCN, or roadside to a flat, stable area. This ensures you do not obstruct other cyclists, runners, or traffic, and keeps you safe from accidental collisions while your attention is focused on the repair.
Flat tires are the most common disruption on any ride. While the Nextool Mini may feature small pliers or screwdrivers, these are not suitable for removing a tire from the rim. To fix a flat, you will need to use dedicated tire levers (either carried separately or integrated into your specific multi-tool model) to carefully pry the tire bead over the rim wall. Once the tire is open, the multi-tool’s small pliers can be incredibly helpful for extracting embedded debris, such as wire, glass, or thorns, from the tire casing before you install a fresh inner tube. Remember that a mini tool cannot assist with inflation; you must always carry a mini pump or CO2 inflator alongside your patch kit or spare tube.
Loose or rubbing brakes can quickly drain your energy and damage your braking surfaces. If you hear a persistent rubbing sound from your disc brakes, you can use the multi-tool to adjust the caliper. Loosen the caliper mounting bolts slightly so the caliper can move freely. Squeeze the brake lever firmly to self-center the caliper over the rotor, and while holding the lever down, gently tighten the mounting bolts back into place. For rim brakes, ensure the brake pads are aligned with the wheel’s braking track and are not rubbing against the tire sidewall, which can cause a sudden blowout.
Derailleur limit screws occasionally require micro-adjustments if your chain begins slipping past the largest or smallest cogs. If the chain is dropping off the cassette into the spokes or frame, use the small cross-head screwdriver bit on your Nextool Mini to adjust the high (H) or low (L) limit screws. Turn the screw in small, quarter-turn increments to restrict the derailleur’s travel. This is a delicate adjustment; over-turning these screws can restrict your gear range or cause severe shifting issues, so only perform minor tweaks to ensure you can pedal home safely.
Step-by-Step Repair Guides for Key Components
Before performing any adjustments, always consult your bicycle manufacturer’s instructions and the specific component labels for compatibility and torque specifications. If instructions conflict, or if you are unsure of the component material, stop and consult a qualified bicycle mechanic to prevent voiding your warranty or damaging your gear.
Adjusting the Saddle and Handlebars
When adjusting your cockpit, precision is vital to prevent component damage and maintain control.
- Identify the Bit: Match the multi-tool's hex or Torx bit to the seatpost clamp or stem bolts. Most modern bicycles use 4mm or 5mm hex bolts for these areas.
- Use the Cross-Tightening Pattern: When tightening a four-bolt stem faceplate, never tighten one bolt completely before moving to the next. Instead, tighten them in an "X" pattern—top-left, bottom-right, top-right, bottom-left. Turn each bolt a quarter-turn at a time to distribute the clamping pressure evenly across the faceplate. This prevents uneven stress that can crack the faceplate or strip the threads.
- Respect Torque Limits: Be extremely cautious not to over-tighten, particularly on older, weathered, or lightweight aluminum components. Because the Nextool Mini does not have a torque gauge, rely on a firm, finger-tight feel. Stop turning as soon as you feel solid resistance; forcing the tool further can easily round the bolt head or crack the clamp.
Managing Chain Issues and Drivetrain Tweaks
A dropped or broken chain can instantly halt your progress, but it can often be managed with the right technique.
- Re-seat a Dropped Chain: If your chain slips off the chainrings, shift your front derailleur to the smallest ring. Use a clean rag, a leaf, or protective gloves to grab the lower run of the chain. Guide it onto the teeth of the bottom chainring, then slowly rotate the pedals forward by hand to let the chain wrap back onto the drivetrain. This keeps your fingers safe from getting pinched between the chain and the sharp chainring teeth.
- Address a Damaged Link: If your specific Nextool Mini model includes a dedicated chain breaker tool, you can repair a broken chain by removing a damaged link. Position the damaged link in the chain tool cradle, aligning the tool's driving pin perfectly with the chain rivet. Slowly turn the tool handle to push the rivet out, taking care not to push it entirely out of the outer plate if you plan to reassemble it, or completely remove the broken link to install a quick-link (master link). Note: Always check your chain manufacturer's instructions, as some chains require single-use replacement pins or specific quick-links and cannot be safely rejoined using a standard chain tool pin.
- Fine-Tune Shifting: For minor shifting hesitation, do not adjust the limit screws. Instead, use your fingers to turn the barrel adjuster located where the cable enters the rear derailleur or shifter. Turn it counter-clockwise to increase cable tension if the bike is struggling to shift to larger gears, or clockwise to decrease tension if it struggles to shift to smaller gears. Use the multi-tool's screwdriver only if the chain is physically falling off the gears.
Tightening Brakes and Accessories
Keeping your stopping power reliable and your gear quiet requires regular, careful tightening.
- Align Disc Calipers: If your disc brake is rubbing, loosen the two caliper mounting bolts slightly using your multi-tool's hex key. Squeeze and hold the brake lever on your handlebars to clamp the brake pads onto the rotor, which naturally centers the caliper. While keeping the lever squeezed tightly, gradually tighten the caliper mounting bolts, alternating between the two to ensure even torque.
- Secure Rattling Accessories: Inspect your bottle cages, fenders, and racks. Use the multi-tool to snug down any loose mounting bolts. Accessories often experience high vibration, so ensuring these bolts are snug prevents them from backing out entirely during your ride.
- Verify the Repair: Before mounting the bike, lift the wheel and spin it freely. Listen closely to ensure there is no brake rub. Physically shake the cargo racks or bottle cages to confirm they are completely rigid and do not wiggle.
When to Stop and Seek Professional Help
While the Nextool Mini is an excellent tool for minor adjustments, knowing when to put the tool away is critical for your safety and to prevent costly damage to your bicycle.
Recognizing the limits of your tools and your mechanical skills is a vital part of cycling. If you encounter a bolt that is completely stripped, seized, or heavily corroded, do not attempt to force it with a compact multi-tool. The short leverage and small grip of a mini tool will almost certainly slip, rounding the bolt head further and making extraction significantly harder. These situations require workshop-grade tools, penetrating oils, and professional extraction techniques that only a fully equipped bicycle shop can safely provide.
Complex mechanical systems should never be serviced with a basic multi-tool. If you experience a loss of braking power due to a hydraulic brake fluid leak, or if your suspension forks are bottoming out or leaking oil, do not attempt to disassemble these components on the trail. These systems require highly specialized tools, precise torque specifications, and a clean, debris-free environment to function safely. Attempting to service them without proper training can lead to sudden component failure.
Structural damage to your bicycle is an absolute stop-ride condition. If you inspect your bike and find cracked carbon fiber on the frame or handlebars, a severely bent wheel rim, or broken wheel spokes, do not attempt to ride or fix it yourself. Riding on compromised structural components can lead to catastrophic failure, resulting in severe accidents. In these scenarios, stop riding immediately.
Always have a reliable backup plan. When riding in Singapore, ensure you carry a fully charged mobile phone, have ride-sharing applications installed, and keep a mental note of local bike shops along your planned route. If a mechanical issue cannot be safely resolved with your Nextool Mini, it is always wiser to call for transport or walk to the nearest professional bike shop rather than risking your safety on a compromised bicycle.
Frequently Asked Questions (FAQ)
Can the Nextool Mini replace a full bicycle toolkit?
No, the Nextool Mini cannot replace a dedicated bicycle toolkit. It is designed strictly as a highly portable, emergency-focused tool for quick trailside adjustments. It lacks the long leverage handles, precise torque wrenches, and specialized tools—such as bottom bracket tools, cassette lockring removers, and pedal wrenches—required for safe, thorough bicycle maintenance and overhauls at home.
What should I do if the multi-tool bit slips and strips a bolt?
If the multi-tool bit slips and begins to strip a bolt, stop attempting to turn it immediately. Continuing to force a slipping tool will completely round the bolt head, making it nearly impossible to remove. To prevent further damage to your bicycle components, take the bike to a professional workshop where mechanics can use specialized extraction tools to safely remove and replace the damaged hardware.
Is it safe to use the Nextool Mini on carbon fiber bike parts?
You must exercise extreme caution when using the Nextool Mini on carbon fiber components. Carbon fiber is highly sensitive to clamping force and requires precise torque measurements, typically printed on the component labels. Because compact multi-tools do not have built-in torque-limiting features, it is very easy to over-tighten and crack the carbon structure. For trailside adjustments, tighten only until snug enough to prevent movement, and verify the torque with a calibrated torque wrench as soon as possible.
Community discussion
Share your experience or ask a question. Comments are reviewed before publication.