
Carrying a child on a Brompton folding bike is an appealing prospect for urban commuters and recreational riders who want to explore park connector networks together. However, because the Brompton is engineered with a highly specialized folding mechanism, a compact wheelbase, and unique frame geometry, finding a compatible child seat requires navigating several technical challenges. Standard bicycle child seats designed for full-sized frames are almost never compatible with a Brompton without custom adapters or specific front-mounting systems. To ensure a safe and stable ride, you must understand how a child carrier interacts with the bike’s folding hinges, cable routing, steering dynamics, and structural weight limits. This guide provides a comprehensive breakdown of the mechanical constraints of the Brompton frame, evaluates the safety and practicality of different child carrier options, and outlines a step-by-step verification process to help you make an informed decision.
Why Standard Child Seats Rarely Fit Brompton Bikes
Standard bicycle child seats are typically designed to mount either to a traditional rear luggage rack, clamp onto a thick seat tube, or attach to a spacious front handlebar stem. On a Brompton, none of these mounting areas behave like those of a standard rigid-frame bicycle. The most significant obstacle is the Brompton’s signature folding design, which requires the rear triangle to swing completely under the main frame tube. Any child seat mounted directly to the rear frame or a standard rear rack will physically block this swinging motion, rendering the folding feature useless. Furthermore, even if you do not mind losing the fold temporarily, standard rear mounts often interfere with the small transit wheels located on the rear mudguard or frame, preventing the bike from standing or rolling smoothly when partially folded.
Up front, the engineering constraints are equally demanding. The Brompton’s steering column and handlebar stem fold down alongside the front wheel. Clamping a standard front-mounted child seat to the handlebar stem can severely restrict this fold. More importantly, the Brompton relies on a precise, free-floating cable routing system for its brakes and gears. When you turn the handlebars or fold the bike, these cables must slide smoothly through their guides. Clamping a heavy bracket over the main frame tube or steering column can easily pinch these cable housings, leading to stiff braking, poor gear shifting, or even sudden cable binding while riding.
Products mentioned in this guide
Prices are valid at publication and may change. Please refer to the product page for the latest price.
The compact cockpit of the Brompton also limits the physical space available for both the rider and the child. Because the distance between the saddle and the handlebars is much shorter than on a standard hybrid or mountain bike, a front-mounted seat occupies a significant portion of the rider’s active space. This tight clearance can force you to ride in an awkward, knees-out position, which reduces your control over the bike and increases fatigue. Additionally, the front carrier block, which is mounted directly to the head tube, is designed specifically for proprietary luggage bags and cannot support the dynamic weight or mounting brackets of a child seat.
Finally, the structural weight limits of the Brompton frame must be respected. The main frame hinges, handlebar hinge, and seatpost clamp are engineered to handle specific load distributions. Adding a child seat introduces concentrated forces at points on the frame that were not originally designed to bear load. Overloading these areas can accelerate wear on the hinge pins, stretch the clamp surfaces, or even lead to hairline fractures in the frame tubing over time. This is particularly true for lightweight titanium rear triangles or custom carbon components, which have much lower tolerances for non-standard clamping forces than classic steel frames.
Child Carrier Options and Their Suitability
Front-Mounted Seats and Steering Impact
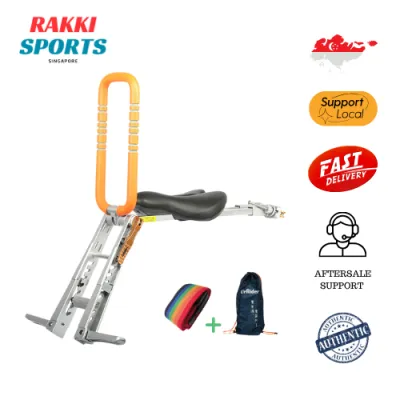
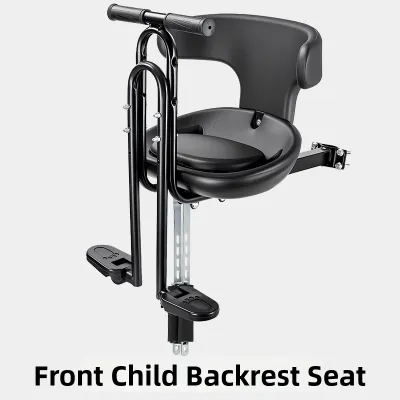
Front-mounted child seats are generally considered the most practical option for Brompton riders who wish to keep their child close and maintain the bike’s rear folding capability. These seats typically mount to the main steel frame tube just behind the head tube, or clamp onto the lower portion of the handlebar stem. By mounting the seat to the main frame rather than the handlebars, the child’s weight remains centered along the bike’s longitudinal axis. This configuration is crucial because it prevents the child’s weight from turning with the handlebars, which helps maintain predictable steering and prevents the front wheel from flopping to one side when parked.

However, even a frame-mounted front seat has a noticeable impact on steering responsiveness and overall balance. Because the Brompton has relatively small 16-inch wheels, its steering is naturally quick and agile compared to a full-sized bicycle. Adding a passenger to the front of the bike dampens this agility, making the steering feel heavier and slower to respond. This change requires the rider to use more deliberate steering inputs, particularly when navigating tight corners or riding at low speeds on busy pathways. The rider’s line of sight is also slightly altered, as you must look over and around the child’s head and helmet to monitor the road surface directly in front of your tire.
From a developmental standpoint, front-mounted carriers are highly suitable for younger toddlers who have achieved sufficient head and neck control. Most front seats have a maximum weight capacity of approximately 15 kilograms, though the practical limit on a Brompton is often lower due to physical space constraints. As the child grows taller, their knees and helmet will begin to interfere with your chest and handlebars, indicating that they have outgrown this mounting style. It is essential to monitor this clearance continuously to ensure you always have unobstructed access to your brake levers and gear shifters.
Rear-Mounted Seats and Folding Interference
Mounting a child seat to the rear of a Brompton is a highly complex undertaking that requires specialized aftermarket adapters. Because a standard rear-mounted seat completely blocks the folding mechanism, manufacturers of folding-bike accessories have developed elevated brackets that raise the child seat high above the rear wheel’s folding path. These adapters typically clamp securely to the seatpost and the rear frame hinges, providing a stable platform for the seat. However, the primary trade-off is that you must completely remove the child seat and its mounting arms before you can fold the bike, which adds extra steps to your daily commute.
The safety implications of a rear-mounted seat on a Brompton are significant due to the bike’s short wheelbase and small wheels. Placing a child’s weight high and far back on the frame shifts the center of gravity dramatically toward the rear axle. This shift makes the front wheel incredibly light, increasing the risk of the bike tipping backward when you accelerate from a stop, climb a steep ramp, or ride over a sudden bump. To mitigate this risk, riders must consciously lean forward and apply power smoothly to the pedals to keep the front wheel firmly planted on the ground.
Additionally, a rear-mounted seat completely alters the folded utility of the Brompton. One of the key benefits of a Brompton is the ability to fold the rear wheel under to park the bike upright. With a rear seat adapter installed, this quick-parking feature is often compromised, as the mounting brackets can strike the ground or prevent the bike from sitting level. The added bulk also makes it difficult to roll the bike on its transit wheels through train stations or shopping malls, forcing you to carry the full weight of the bike and the mounting hardware.
Bike Trailers and Detachable Alternatives
For riders who find that frame-mounted seats compromise the safety, handling, or folding utility of their Brompton, a bicycle trailer offers a practical alternative. Trailers attach to the rear axle of the bike using a dedicated hitch cup that is secured by the rear wheel nut. Because the trailer supports its own weight on its own wheels, it places virtually no vertical load on the Brompton’s frame or hinges. This setup preserves the bike’s natural steering feel and ensures that the frame’s structural integrity is not compromised by heavy clamps or concentrated passenger weight.
Using a trailer also allows you to maintain almost all of the Brompton’s folding functionality. The small hitch connector on the rear axle is compact enough that it does not interfere with the rear triangle swinging under the frame. When you reach your destination, you simply unclip the trailer’s tow arm using a quick-release pin, fold your Brompton normally, and wheel it inside while leaving the trailer parked or folded separately. This modular approach is highly convenient for multi-modal commutes where you need to transition quickly from riding to public transport.
However, towing a trailer in a dense urban environment presents its own set of challenges. The overall length of your setup is more than doubled, which requires a much wider turning radius and careful planning when navigating narrow park paths, tight street corners, or shared pavements. Maneuvering a trailer through crowded areas requires constant awareness of the trailer’s width to prevent the wheels from clipping curbs, signposts, or pedestrians. Additionally, storing a trailer at home or in an office requires significant space, which may not be practical for apartment dwellers who chose a folding bike specifically for its compact storage footprint.
Pre-Purchase Checklist for Compatibility and Safety
To ensure a safe and successful setup, you should follow a structured verification process before purchasing any child carrier for your Brompton. This checklist will help you identify potential compatibility issues and safety hazards before you ride.
First, verify the manufacturer compatibility lists. Many child seat brands maintain updated databases of compatible bicycle models. Look specifically for mentions of folding bikes, small-wheel bikes, or Brompton-specific adapters. If a manufacturer explicitly warns against mounting their seat to a folding frame, do not attempt to bypass this warning with DIY modifications.
Second, calculate the total system weight. You must ensure that the combined weight of the rider, the child, the child seat, and any mounted luggage does not exceed the maximum weight limit specified by Brompton. For most standard steel models, this limit is typically around 110 kilograms (including rider and luggage). Exceeding this limit places excessive stress on the frame hinges, seatpost, and wheels, which can lead to structural failure. Use the following formula to verify your setup: Total Weight = Rider Weight + Child Weight + Seat/Trailer Weight + Luggage Weight
Third, perform a physical clearance and cable inspection during a dry fit of the seat:
- Install the mounting bracket loosely on the frame or steering column.
- Turn the handlebars fully from lock to lock and verify that the brake and gear cables are not pinched, stretched, or kinked.
- Squeeze the brake levers completely to ensure they do not strike the child seat or the child's footrests.
- Check that your knees have sufficient clearance to pedal comfortably without striking the back of the child seat.
- Slowly fold the rear triangle under the frame to identify exactly where the mounting hardware interferes with the fold, and confirm how quickly the seat can be detached.
Fourth, consult an authorized Brompton dealer or a professional bicycle mechanic. If you are unsure about the structural safety of a specific mounting bracket or adapter, take your bike and the child seat to a professional. A mechanic can inspect the torque of the mounting bolts, verify that the bracket does not deform the frame tubing, and ensure that your brakes and drivetrain are fully functional with the added hardware installed.
Adjusting Your Ride and Maintenance After Installation
Once you have successfully installed a compatible child carrier, you must adjust both your bike setup and your riding habits to accommodate the new weight distribution. The added passenger weight changes how the bike responds to steering inputs, braking, and acceleration, requiring a conscious shift in your riding style.
Start by adjusting your bike’s physical setup. Increase the air pressure in both tires to the upper limit recommended on the tire sidewall. The extra weight of a child increases the risk of pinch flats (where the inner tube is pinched between the rim and a bump on the road) and causes the tires to deform more, which increases rolling resistance. You should also consider lowering your saddle slightly. While a lower saddle reduces pedaling efficiency, it allows you to easily place both feet flat on the ground when stopping, providing crucial stability when balancing a heavy bike at a standstill.
Your braking technique must also change significantly. Because a loaded Brompton has much more momentum, your stopping distance will be substantially longer. Begin braking much earlier than you would when riding solo, and apply gradual, even pressure to both the front and rear brake levers. Avoid sudden, hard braking, which can cause the small wheels to skid or slide, especially on wet or sandy surfaces. When cornering, reduce your speed well before you enter the turn, and keep the bike as upright as possible to prevent the high center of gravity from pulling you off balance.
Finally, establish a strict routine maintenance schedule. The added weight and dynamic forces of a child passenger place extra stress on every component of your Brompton. Before every ride, perform a quick safety check:
- Inspect all mounting bolts on the child seat bracket to ensure they are torqued to the manufacturer's specifications.
- Check that the quick-release mechanisms on the child seat or trailer hitch are fully engaged and locked.
- Examine the Brompton's main frame hinge clamps and handlebar hinge to ensure they are tight and free of play.
- Inspect the wheel spokes for even tension, as the extra load can cause loose spokes to break prematurely.
- Clean and lubricate your drivetrain regularly, as the added weight increases chain and sprocket wear.
Frequently Asked Questions (FAQ)
Can I still fold my Brompton with a child seat attached?
No, you cannot fully fold a Brompton with a child seat attached directly to the frame or steering column. The physical bulk of the seat prevents the handlebar stem from folding down and blocks the rear wheel from swinging under the frame. However, most compatible front-mounted seats are designed with quick-release brackets. This allows you to slide the seat off the mounting block in a matter of seconds, leaving only a small, lightweight bracket on the frame. Once the seat is removed, you can fold the Brompton completely normally. If you use a bicycle trailer, you only need to uncouple the tow arm from the rear axle hitch, which does not affect the bike’s ability to fold.
What is the minimum age for a child to ride on a Brompton?
The general safety guideline is that a child must be at least 12 months old before riding in any bicycle child seat or trailer. At this age, most children have developed the necessary neck strength and muscle control to support their head and a properly fitted safety helmet while experiencing the bumps, vibrations, and sudden movements of cycling. Always ensure your child wears a certified, well-fitting helmet that sits low on their forehead. You should also consult your pediatrician and check local traffic regulations, as some regions have specific legal age limits or equipment requirements for carrying young passengers.
Do I need a specific Brompton model to carry a child?
While standard steel Brompton models (such as the C Line) are well-suited for carrying child seats due to their robust frame construction, other models require careful consideration. Superlight models (like the P Line) or ultra-lightweight titanium models (like the T Line) have different structural properties and lower weight limits, and clamping heavy brackets to their specialized tubing may void the manufacturer’s warranty or damage the frame. Additionally, your handlebar type plays a role: Mid (M) and High (H) handlebars provide more vertical clearance and a more upright riding position, making them much better suited for front-mounted child seats than the sporty, low-profile Low (S) handlebars.
Community discussion
Share your experience or ask a question. Comments are reviewed before publication.