
Selecting the right bicycle bag depends entirely on what you carry, how far you ride, and the specific geometry of your bicycle. There is no single, universal bag that excels in every setting. An urban commuter carrying a laptop and professional attire needs a completely different setup than a recreational rider exploring paved paths or an endurance cyclist embarking on a multi-day tour. Matching your choice to your specific activity, bicycle type, and the local climate ensures a safer, more comfortable ride.
For daily commuters, keeping heavy loads off your back is essential to prevent fatigue and stay cool in tropical climates. Leisure riders navigating paved park connectors require only minimalist, easily accessible storage for personal essentials. Meanwhile, long-distance touring and bikepacking demand a carefully balanced distribution of gear across multiple points on the frame to preserve stable handling and aerodynamics. Understanding the structural differences and mounting requirements of each bag type is the first step toward optimizing your ride.
Quick Guide to the Four Main Bicycle Bag Styles
Before selecting a bag, it is helpful to understand the basic characteristics, mounting locations, and typical capacities of the four primary styles.
Products mentioned in this guide
Prices are valid at publication and may change. Please refer to the product page for the latest price.
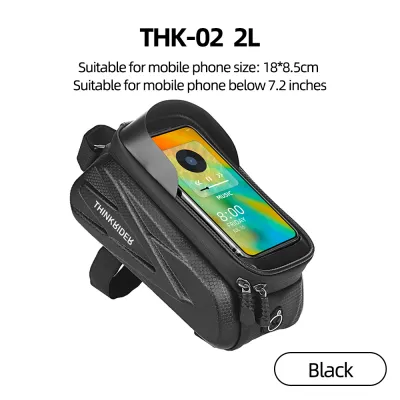
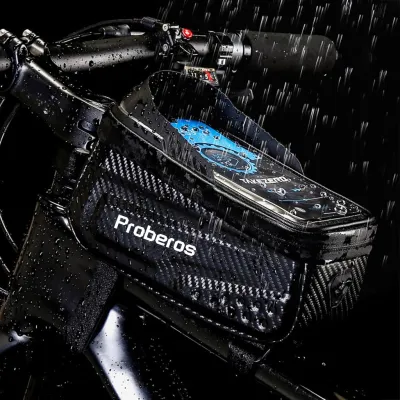
- Frame Bags: These bags mount directly inside the bicycle's main triangle using straps or integrated bolts. They keep cargo weight centered and low, offering a narrow profile with capacities ranging from 1 to 14 liters.
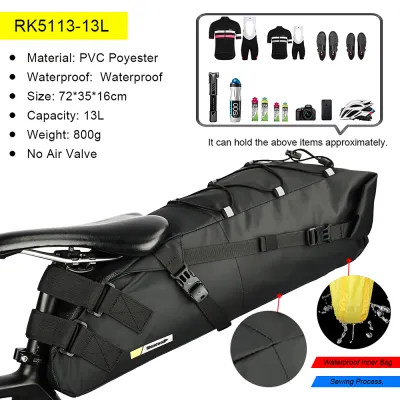
- Saddle Bags (Seat Packs): Attaching beneath the saddle rails and securing around the seatpost, these range from tiny 0.5-liter tool pods to large 15-liter roll-top bikepacking seat packs.
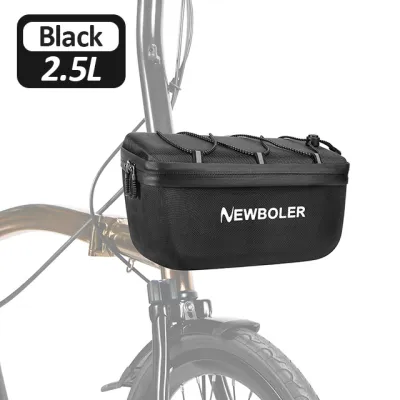
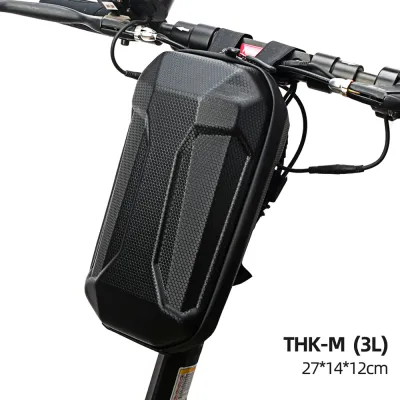
- Handlebar Bags: Mounted directly to the handlebars, these bags place items right in front of you. They range from small 1-liter accessory pouches to large 20-liter horizontal dry rolls.
- Panniers: These high-capacity bags (typically 15 to 30 liters each) hang on either side of a front or rear cargo rack, providing excellent stability for heavy loads.
Commuting: Carrying Laptops, Work Gear, and Daily Essentials
Urban commuting requires a bicycle bag that protects sensitive electronics, handles sudden weather changes, and transitions smoothly to off-bike carrying. In a tropical environment like Singapore, where high humidity and sudden afternoon downpours are common, your choice of bag directly affects both your comfort and the safety of your gear. The right setup keeps you dry and prevents physical strain during stop-and-go city riding.

Panniers (Rear and Front)
Panniers are the traditional gold standard for heavy utility riding because they transfer cargo weight completely from your body to the bicycle frame. Carrying a heavy laptop, charger, and a change of clothes in a backpack traps heat against your back, leading to excessive sweating and physical fatigue during your commute. By mounting your gear in rear panniers, you lower your center of gravity, keep your back completely free, and enjoy a much cooler, more comfortable ride.
Before choosing a pannier, you must check your bicycle’s heel clearance to ensure safe pedaling. If your bike has short chainstays—common on road bikes and compact folding bikes—your heels may strike the front of the pannier with every pedal stroke. To prevent this, look for panniers featuring adjustable mounting tracks that allow you to slide the bags further backward on the rack, or opt for smaller, tapered models.
Weather resistance and ease of use are critical for daily office travel. Look for panniers made of waterproof materials with welded seams, or verify that they include an integrated, high-visibility rain cover to protect your electronics during sudden tropical downpours. Additionally, select a system with a quick-release mounting mechanism so you can easily unhook the bag and carry it into the office using a detachable shoulder strap.
Handlebar Bags and Large Frame Bags
If your bicycle lacks eyelets for a rear rack, or if you prefer not to install permanent hardware, handlebar and frame bags offer excellent rackless alternatives. A compact handlebar bag keeps your daily essentials—such as your transit card, office access pass, keys, and phone—immediately accessible without needing to dismount. This is highly convenient when navigating urban environments with frequent stops.
Large frame bags fit inside the front triangle and can accommodate flat items like tablets, documents, or a folded change of clothes. However, you must carefully measure your bicycle’s frame clearance before purchasing. Ensure the bag’s width does not cause it to bulge outward, which can lead to your knees rubbing against the fabric while pedaling. You must also verify that the mounting straps do not pinch or interfere with external brake and derailleur cables running along the frame.
Leisure PCN Rides: Keeping It Light and Accessible
Riding along Singapore’s Park Connector Network (PCN) is typically a relaxed, recreational activity. Because these rides are shorter and often involve social stops at cafes or food centres, you do not need heavy cargo capacity. Instead, the focus is on a minimalist setup that carries only essential tools and personal items without altering your bicycle’s nimble handling.
Saddle Bags (Seat Packs)
A compact saddle bag is the ideal solution for carrying emergency roadside repair kits. Tucked neatly beneath your seat, these small bags remain completely out of the wind and away from your legs. They are designed to hold just the essentials: a spare inner tube, tire levers, a compact multi-tool, and a CO2 inflator or small hand pump.
When selecting a saddle bag, pay close attention to the strapping system. A high-quality saddle bag must strap firmly to both the saddle rails and the seatpost to prevent side-to-side swaying. Loose or poorly designed straps can allow the bag to rub against the inner thighs of your cycling shorts, which can damage the fabric over time and cause distraction while riding.
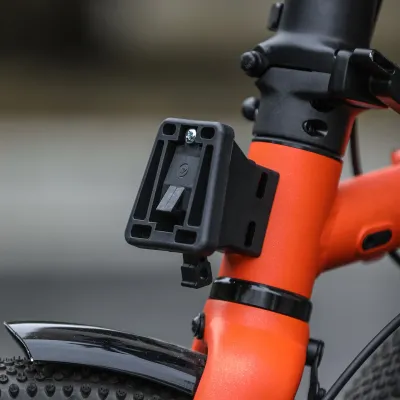
For casual PCN riders, quick-release mounting clips are often more convenient than traditional hook-and-loop straps. This allows you to easily click the bag off your bike when stopping for a break, keeping your valuables secure without having to unthread complex straps.
Small Frame Bags and Top Tube Bags
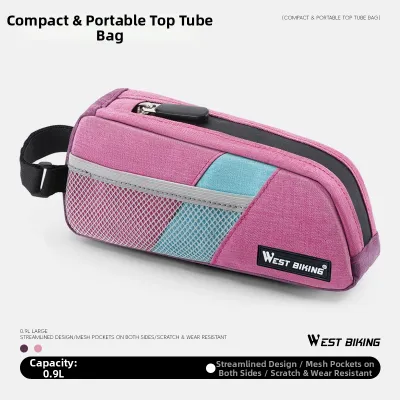
Top tube bags, often called stem bags or fuel pods, mount on the top tube directly behind your handlebar stem. This position is perfect for items you want to access quickly while riding or waiting at a traffic junction. The top-facing zipper allows you to grab a snack, apply sunscreen, or check your phone’s GPS navigation without needing to dismount.
Small frame bags fit snugly into the front or rear corner of your bike’s main triangle. When selecting a small frame bag, choose a size that does not block access to your water bottle cages. Many manufacturers design wedge-shaped bags specifically to sit above or below standard bottle mounts, ensuring you can still carry essential hydration for hot afternoon rides.
Long-Distance Cycling: Maximizing Capacity and Aerodynamics
Multi-day touring or long-distance bikepacking requires carrying significantly more gear, including spare clothing, tools, food, and potentially shelter. Traditional touring relies on heavy panniers, but modern long-distance riders often prefer bikepacking bags. These setups distribute weight along the bike’s natural centerline, which improves aerodynamics and preserves nimble handling on narrow paths or rough terrain. Achieving the correct weight distribution is critical to prevent steering instability and premature wear on your bicycle’s components.
Bikepacking Frame Bags
A full-frame bag occupies the entire central triangle of your bicycle, providing a large-capacity storage zone. Because this space is located directly between your wheels and low to the ground, it is the absolute best place to pack your heaviest and densest gear. Storing items like heavy tools, spare parts, dense food supplies, or a hydration water bladder here keeps the bike’s center of gravity low and centered.
Before buying a full-frame bag, you must confirm how you will carry water. Since a full-frame bag completely covers your standard bottle cage mounts, you will need to use a hydration bladder inside the bag with a routing tube, or relocate your bottle cages to the fork legs or the underside of the down tube. Additionally, check that the bag does not interfere with front derailleur cables if your bike uses external routing along the tubes.
Saddle Rolls and Harness Systems
Large saddle rolls (or seat packs) extend outward from the seatpost, offering a streamlined alternative to bulky rear racks and panniers. These bags are ideal for carrying lightweight, compressible, and bulky gear, such as a lightweight sleeping bag, a compact tent body, or spare clothing. By keeping the profile narrow and tucked behind the rider, they offer clear aerodynamic advantages and prevent snagging on narrow trails or roadside barriers.
A major challenge with large saddle rolls is “tail wag”—the side-to-side swaying of the bag during out-of-the-saddle pedaling or climbing. To prevent this, look for saddle rolls that feature a rigid internal plastic frame or a dedicated mounting harness that clamps securely to the saddle rails. Always verify that your seatpost has enough exposed extension; most large seat rolls require at least 10 to 15 centimeters of exposed seatpost and a similar amount of clearance above the rear tire to prevent the bag from rubbing against the tire tread over bumps.
Handlebar Rolls
Handlebar rolls consist of a cylindrical dry bag that mounts horizontally across your handlebars, often secured by a dedicated harness system. This setup is perfect for carrying lightweight, highly compressible gear like sleeping pads, bivy sacks, or down jackets. Placing lightweight items here helps balance the weight of a heavy saddle roll at the rear.
You must avoid overloading the front handlebar roll, as excessive weight on the steering axis severely degrades handling and steering responsiveness. A heavy front end can make the bike slow to turn at low speeds and unpredictable during fast descents. Additionally, verify that the packed roll does not compress your brake and shifter outer housings, which can cause poor shifting performance or, worse, bind your brake cables.
Cross-Scenario Compatibility and Bike Fit Checks
While specialized bags excel in their target environments, many riders want a versatile setup that can transition from a weekday commute to a weekend PCN cruise or an occasional long-distance ride. Using a single versatile bag, such as a medium-sized frame bag or a compact handlebar bag, is a cost-effective compromise. However, a single bag cannot perfectly serve every scenario; for example, a large commuting pannier is unnecessarily bulky for a casual PCN ride, while a tiny PCN saddle bag cannot hold a laptop.
Before purchasing any bicycle bag, you must perform several physical compatibility and bike fit checks to ensure safe operation. Use this practical checklist to verify compatibility:
- Measure the front triangle: For any frame bag, measure the internal length, height, and width of your frame's main triangle. Compare these dimensions directly with the manufacturer's spec sheet, allowing a small margin for cable ports.
- Check heel clearance: Mount your chosen pannier or rack and pedal slowly while wearing your riding shoes. Ensure there is at least a 2 to 3-centimeter gap between your heel and the bag at the furthest point of your pedal stroke.
- Verify saddle bag clearance: Ensure your seatpost has enough exposed length to accommodate the bag's straps. Measure the distance between the bottom of the bag and the top of the rear tire to ensure they will not make contact when the suspension compresses or when riding over bumps.
- Inspect cable routing: Mount the handlebar bag and check that it does not pinch, kink, or pull your brake and shifter cables. Ensure you can still fully actuate your brake levers and shifters without restriction.
- Check weight limits: Consult your bicycle and rack manufacturer's manuals to find the maximum weight limits. Never exceed these ratings, as overloading can lead to structural failure of the rack, frame eyelets, or bolts.
Frequently Asked Questions (FAQ)
Do I need a special rack to use panniers?
Yes, traditional panniers require a compatible front or rear rack to hang securely. Your bicycle frame must have dedicated threaded eyelets near the rear dropouts and seatstays to bolt the rack in place. If your bicycle lacks these eyelets—which is common on carbon fiber road bikes or full-suspension mountain bikes—you can use adapter-based racks that clamp onto the seatstays or seatpost-mounted beam racks. Keep in mind that seatpost-mounted racks generally have significantly lower weight capacities than frame-mounted racks and are not suitable for heavy touring loads. Always check the manufacturer’s weight limit before loading them.
How do I clean and maintain my bicycle bags after riding in the rain?
Riding in wet conditions exposes your bags to road grime, grit, and moisture, which can degrade the materials over time. To clean your bags, first empty all contents and wipe down both the interior and exterior with a soft, damp cloth and mild soapy water. Never use harsh chemical solvents or machine wash the bags, as this can destroy waterproof coatings and tape-sealed seams. Allow the bags to air dry completely in a well-ventilated indoor space away from direct heat sources or intense sunlight before storing them. Finally, inspect all zippers, plastic buckles, and mounting hardware for trapped sand or debris, and clear them out to prevent premature wear.
Community discussion
Share your experience or ask a question. Comments are reviewed before publication.