
Riding Singapore’s Park Connector Network (PCN) at night offers a cooler, quieter alternative to daytime cycling, but navigating these shared paths safely requires a strategic lighting setup. The most effective configuration for PCN night riding is a dual-light system: a dedicated handlebar-mounted light to illuminate the ground directly ahead, paired with a lightweight, adjustable helmet light for directional scanning. While the handlebar light provides a stable base of illumination, the helmet light follows your line of sight, allowing you to spot hazards around tight bends, read path markers, and remain visible to other path users at intersections.
Selecting the right helmet light involves balancing your need for personal visibility with courtesy toward pedestrians, runners, and oncoming cyclists. Because PCN paths transition rapidly between brightly lit urban corridors and pitch-black nature reserves, a single fixed light setting is rarely sufficient. A successful setup relies on a highly adjustable light that can be dimmed instantly, securely mounted without causing neck strain, and integrated seamlessly with your bicycle’s primary lighting system.
Assessing Park Connector Lighting and Traffic Conditions
Singapore’s PCN spans hundreds of kilometers, presenting a highly diverse mix of environmental lighting conditions that change from one kilometer to the next. Some sections, particularly those running through residential estates or commercial hubs, are brightly illuminated by overhead streetlights and ambient urban glow. In these well-lit zones, your primary safety objective is not necessarily to light up the path, but rather to ensure that pedestrians and other active mobility users can see you from a distance.
Products mentioned in this guide
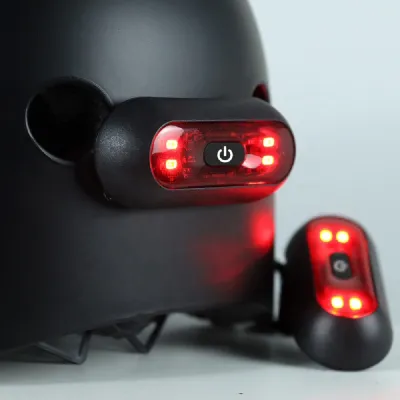
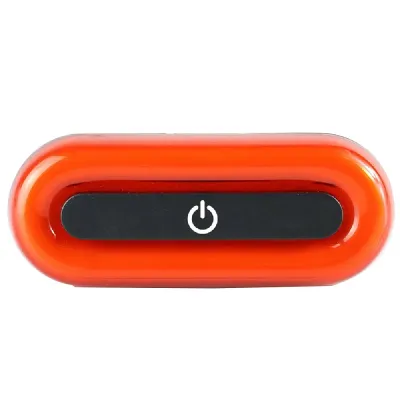
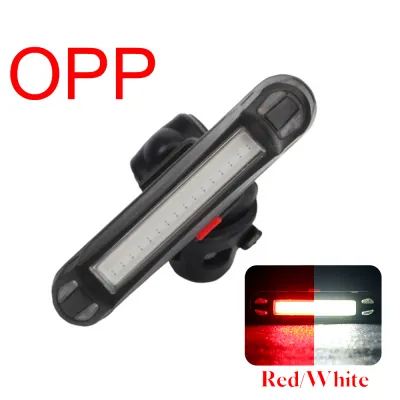
Prices are valid at publication and may change. Please refer to the product page for the latest price.
Conversely, sections of the PCN that skirt nature parks, canals, or coastal areas can be exceptionally dark once the sun sets. Underpasses, forested stretches, and coastal loops often have minimal or no overhead lighting, leaving cyclists to rely entirely on their own equipment to spot obstacles. On these unlit paths, hazards such as fallen branches, uneven pavement joints, and sudden curves require a focused beam that can project far enough ahead to allow safe braking times.
The shared-path dynamics of the PCN also demand careful consideration of other users. Unlike dedicated road cycling lanes, the PCN is shared with runners, families walking dogs, and personal mobility device users. High-intensity, poorly aimed lights can easily blind oncoming path users, creating dangerous situations where pedestrians cannot see where they are walking or oncoming cyclists lose their line of sight. Your lighting setup must be versatile enough to handle these social dynamics without compromising safety.
Intersections, driveway crossings, and transitions to public roads represent another critical challenge. At these points, path lighting can become inconsistent, and motorists turning into driveways may not easily spot a cyclist approaching from a side path. A helmet light is particularly valuable here because it allows you to project light directly toward turning vehicles or crossing pedestrians, signaling your presence in ways that a fixed handlebar light cannot.
Evaluating Helmet Light Beam Patterns and Brightness
When choosing a helmet light, understanding the difference between beam patterns is essential for navigating winding paths safely. A spot beam projects a narrow, concentrated column of light over a long distance, which is useful for high-speed riding but can create a “tunnel vision” effect on tight PCN curves. A flood beam, on the other hand, distributes light widely across your immediate field of view, making it much easier to perceive peripheral hazards, path borders, and low-hanging branches. For most PCN riders, a hybrid beam or a wide flood pattern is preferred, as it provides a natural field of vision at moderate speeds.

Brightness levels, measured in lumens, must be highly adjustable to suit the changing environments of the PCN. A light that is too dim will fail to illuminate dark underpasses, while an excessively bright light will cause glare and discomfort for others. Look for a helmet light that offers multiple brightness modes, ideally ranging from a low setting of around 100 to 200 lumens for well-lit urban areas, up to 400 to 800 lumens for pitch-black coastal or forested stretches. The ability to toggle quickly between these modes is a critical safety feature.
The physical mounting system of the helmet light directly impacts both comfort and safety during your ride. Because the light sits on your head, weight distribution is paramount; a heavy light can cause neck fatigue or cause your helmet to tilt forward, obstructing your vision. Opt for a compact, lightweight unit where the battery is either integrated into a small chassis or connected via a cable to a pack stored in your jersey pocket or backpack. When budgeting for a quality setup, riders typically find reliable options ranging from S$30 to S$100 on local online marketplaces.
Before purchasing, verify that the mounting bracket is fully compatible with your specific helmet’s ventilation slots. Strap-based mounts are highly versatile and can be threaded through most standard helmet vents, while adhesive or magnetic mounts offer a cleaner look but require flat, smooth surfaces on the helmet shell. Ensure the mount allows you to adjust the vertical tilt angle easily, so you can direct the beam downward rather than straight into the eyes of oncoming path users.
Configuring a Complete Night Riding Light Setup
A helmet light should never be used as your sole source of illumination; instead, it should function as part of a coordinated dual-light strategy. Your handlebar-mounted light serves as the primary anchor, casting a steady, wide beam directly onto the ground in front of your front wheel to highlight immediate road surface hazards like potholes or debris. Because the handlebar light is fixed to the frame, its beam remains stable even when you turn your head, providing a consistent reference point for your spatial orientation.
The helmet light complements this setup by acting as your dynamic, directional spotlight. When you approach a sharp bend on the PCN, your handlebar light continues to point straight ahead, momentarily leaving the turn in darkness. By turning your head toward the direction of the curve, your helmet light illuminates the path ahead of your turn, allowing you to anticipate obstacles before your bicycle actually changes direction. This combination of fixed and dynamic lighting dramatically improves reaction times.
Rear visibility is equally critical when configuring your night riding setup, especially when crossing driveways or navigating shared road sections. Pair your front lights with a high-quality rear red light mounted to your seatpost, helmet, or saddlebag. The rear light should be set to a steady or low-frequency pulsing mode to help trailing cyclists and motorists judge your distance and speed accurately.
Battery life and runtime planning are vital to prevent being stranded in the dark on longer PCN loops. Calculate your typical ride duration—which often ranges from one to three hours for a standard evening ride—and select a light with a battery capacity that exceeds this window by at least fifty percent on your preferred brightness setting. Regularly check the battery level indicators before setting off, and establish a consistent recharging routine using USB connections to ensure your lights are fully powered for every journey.
Practicing Shared-Path Lighting Etiquette
Owning a powerful helmet light comes with the responsibility of using it courteously to maintain a safe environment for everyone on the PCN. The most important rule of etiquette is to angle your helmet light slightly downward. The beam should strike the ground several meters in front of you rather than projecting horizontally at eye level. This simple physical adjustment ensures that your path is well-lit while preventing the intense center of the beam from shining directly into the eyes of oncoming pedestrians or cyclists.
As you ride, remain highly conscious of your surroundings and actively manage your light’s brightness settings. When entering well-lit residential zones or approaching crowded areas near PCN food centers and parks, dim your helmet light to its lowest setting or switch it off temporarily if your handlebar light provides sufficient visibility. This practice reduces visual clutter and prevents discomfort for families and recreational walkers sharing the space.
Use the mobility of your helmet light to your advantage without causing annoyance. When approaching intersections or driveways, a quick, deliberate sweep of your head can alert drivers to your presence, but avoid lingering your gaze directly on a driver’s face or windshield. Similarly, when overtaking pedestrians from behind, keep your head turned slightly away or look down at the path to avoid casting a harsh, moving shadow directly in front of them, which can startle them and cause unpredictable movements.
Frequently Asked Questions (FAQ)
Are helmet lights legally required for cycling on the PCN?
No, helmet lights are not legally required for cycling on Singapore’s Park Connector Network, but they are highly recommended as a supplementary safety measure. Under local active mobility regulations, cyclists are legally required to equip their bicycles with a front white light and a rear red light when riding during hours of darkness. These mandatory lights must be physically attached to the bicycle itself, not the rider. A helmet light serves as an optional, additional tool to enhance your directional visibility and scanning capabilities, but it cannot legally replace the required frame-mounted front and rear lights. Always ensure your primary bicycle lights are functioning and compliant before adding a helmet light to your setup.
How do I prevent my helmet light from blinding others?
Preventing your helmet light from blinding others requires a combination of proper mounting, active adjustment, and mindful riding habits. Start by physically tilting the light mount downward on your helmet so that the beam naturally points toward the ground a few meters ahead of your front wheel when you are in your normal riding posture. You can also look for helmet lights that feature built-in diffusers or anti-glare beam cut-offs, which shape the light to prevent it from scattering upward into the eyes of oncoming path users. Finally, make it a habit to use the manual dimming switch when approaching others, or simply turn your head slightly toward the left shoulder (away from oncoming traffic) when passing pedestrians or cyclists on narrow stretches of the PCN.
Community discussion
Share your experience or ask a question. Comments are reviewed before publication.