
Selecting the right rubber mat thickness is the foundation of a safe, functional, and durable home gym. The ideal thickness depends on your specific workout style, the weight of your equipment, and the vulnerability of your subfloor. For light bodyweight exercises, yoga, or stretching, a thin utility mat of 4mm to 6mm provides sufficient surface protection. However, if your routine involves heavy lifting, high-impact plyometrics, or heavy machinery like treadmills, you will need a thicker, high-density rubber mat ranging from 10mm to 20mm to absorb impact and protect your home.
In high-density living environments, such as apartments or condominiums in Singapore, noise dampening is another critical factor. Dropping weights or jumping on thin flooring can transmit disruptive vibrations directly to your neighbors downstairs. By understanding how different thicknesses and densities interact with your movements and subfloor, you can design a workout space that protects your joints, preserves your home’s flooring, and keeps your training environment quiet and stable.
Evaluating Your Subfloor and Space Constraints
Before purchasing any rubber mat, you must evaluate the existing subfloor material in your designated workout space. Common residential flooring types like concrete, ceramic tiles, engineered wood, and luxury vinyl tiles (LVT) react differently to heavy loads and impact. Concrete is highly rigid and durable, but it offers zero shock absorption, meaning all impact energy is transferred back into your joints or equipment unless cushioned. Brittle materials like ceramic tiles are highly vulnerable to cracking under sudden impacts, while engineered wood and vinyl can easily scratch, dent, or discolor under heavy static loads, potentially costing you thousands of S$ in repairs when moving out.
Products mentioned in this guide
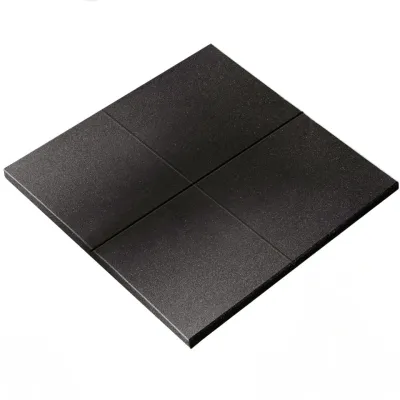
![[BEST SELLER]Rubber gym mats High Density EPDM Rubber Tile Mat With Connector 20mm Thickness Crossfit Gym Flooring](https://img.lazcdn.com/g/p/283522ee973e4963458b83ca9fd96231.jpg_400x400q80.jpg_.webp)
Prices are valid at publication and may change. Please refer to the product page for the latest price.
Accurately measuring your workout area is the next step to ensure an efficient layout. Calculate the total square footage and sketch a floor plan that accounts for door clearances and equipment placement. Thick rubber mats can easily obstruct low-clearing doors, so you must measure the gap beneath your doors before deciding on a mat thickness. Additionally, check the subfloor for any uneven surfaces, cracks, or moisture issues. In humid climates, trapping moisture beneath an impermeable rubber mat can lead to mold growth and adhesive failure, making it essential to ensure the subfloor is completely dry and level before installation.
Matching Thickness to Your Workout Movements
Your daily workout routine dictates the level of cushioning and stability your floor requires. High-impact and plyometric exercises, such as jump squats, burpees, and skipping, subject your joints to repetitive stress. For these movements, prioritizing a thicker rubber mat profile—typically between 10mm and 15mm—helps maximize joint cushioning and reduce the transmission of airborne and structural noise to adjacent rooms. This thickness provides a supportive rebound that minimizes fatigue during intense cardio sessions.

Conversely, heavy lifting and balance-focused movements require a different structural response. When performing deadlifts, squats, or overhead presses, you need a firm, uncompressed base to maintain proper alignment and stability. A mat that is too thick or soft can cause your ankles and knees to wobble, compromising your lifting form and increasing the risk of injury. For dedicated lifting areas, a thinner but denser profile of 8mm to 10mm is often preferred, as it offers excellent subfloor protection without sacrificing the solid ground contact needed for heavy strength training.
For floor-based routines, stretching, and flexibility work, a moderate thickness of 6mm to 8mm strikes the right balance. This range provides adequate comfort for kneeling, sitting, or lying down, preventing your knees and elbows from pressing painfully against a hard subfloor. Rather than relying solely on general thickness assumptions, always verify the manufacturer’s intended use cases and structural specifications to ensure the mat can withstand the specific physical demands of your training style.
Choosing Density for Equipment Weight and Drop Protection
While thickness determines the height of your floor protection, density determines how well the mat resists compression under heavy loads. To select the right density, evaluate the maximum weight of your equipment, including loaded squat racks, weight benches, treadmills, and stationary bikes. Consult the manufacturer’s technical specifications for load-bearing limits and compression set data to ensure the rubber will not permanently indent or bottom out under static weight over time.
You must also assess the risk and typical height of dropped weights in your routine. If you practice Olympic lifting or powerlifting where heavy barbells are frequently dropped from hip or shoulder height, high-density rubber mats are essential. These dense materials are engineered to dissipate kinetic energy rapidly, preventing the force of the drop from cracking the underlying concrete or shattering subfloor tiles. In contrast, low-density foam or soft rubber mats will simply compress completely, leaving your subfloor fully exposed to the impact.
Choosing a high-density mat involves a practical trade-off regarding weight and handling. Denser rubber mats are significantly heavier, making them more challenging to transport, cut, and install. For example, a single high-density rubber tile measuring one meter square and 20mm in thickness can weigh upwards of 15 kilograms. If you live in a multi-story building, consider the physical effort required to move these heavy materials up lifts and into your apartment, as well as the tools needed to cut the dense rubber for a custom wall-to-wall fit. Review product labels and technical data sheets for impact resistance ratings to confirm compatibility with your heaviest gear.
Designing a Multi-Purpose Layout and Zoning Strategy
If your home gym serves multiple purposes, a single mat thickness may not be ideal for the entire space. Designing a zoned layout allows you to accommodate different workout styles safely and efficiently. You can designate a high-density, thick zone (such as 15mm to 20mm) specifically for your heavy lifting platform or squat rack, while keeping a separate, moderately cushioned zone (around 8mm) for cardio machines, stretching, and bodyweight exercises. This approach optimizes both performance and budget, as thicker mats are generally more expensive, sometimes costing upwards of S$80 per square meter.
When planning your layout, evaluate the pros and cons of interlocking tiles versus rolled rubber mats. Interlocking tiles are highly modular, easy to transport in small vehicles or lifts, and simple to reconfigure if you decide to expand your gym space. Rolled mats, on the other hand, provide a seamless, professional appearance with fewer joints. This seamless finish is highly beneficial for dynamic, lateral movements, as there are no seams to catch your feet or allow sweat to seep through to the subfloor.
If you choose to combine different mat thicknesses within the same room, you must ensure seamless, flush transitions between the zones. A sudden change in floor height creates a significant tripping hazard, especially during fast-paced, dynamic workouts. Use transition strips, bevelled reducer edges, or ramp profiles to bridge the height differences safely. This keeps your workout environment secure and prevents accidental stumbles during lateral movements or high-intensity intervals.
Final Verification and Safe Installation Steps
Before finalizing your purchase, verify the material composition and manufacturing details of the rubber mats. Many budget-friendly mats are made from recycled tire rubber, which can release a strong, distinct odor when first installed indoors. If you are sensitive to smells or planning to set up your gym in a poorly ventilated bedroom, look for low-odor virgin rubber or polyurethane-bonded mats. Always check the manufacturer’s guidelines for specific cleaning requirements, as some rubber materials can be damaged by harsh household chemicals or oil-based cleaners.
Review the warranty terms carefully to ensure your intended setup is fully covered. Some warranties are voided if the mats are installed over certain subfloor types, used outdoors, or subjected to heavy commercial-grade equipment. Additionally, plan for a proper acclimatization period before laying the mats permanently. Unroll or unpack the rubber mats and let them rest flat at room temperature for at least 24 to 48 hours. This allows the material to relax, expand, or contract to its natural state, preventing curling edges and ensuring a flush, stable fit during installation.
Finally, select the appropriate installation method based on your subfloor type and whether you need a temporary or permanent setup. For rental properties, a loose-lay installation using interlocking tiles or securing the perimeter with heavy-duty, double-sided carpet tape is ideal, as it allows for easy removal without damaging the landlord’s flooring. For permanent, high-traffic home gyms on concrete subfloors, a full-spread adhesive or perimeter glue-down method provides the ultimate stability, preventing any shifting or buckling during intense workouts.
Frequently Asked Questions (FAQ)
How do I manage the initial rubber odor when bringing new mats indoors?
The distinct smell associated with new rubber mats is caused by the vulcanization process and the binding agents used during manufacturing. This off-gassing is entirely normal and typically dissipates over a period of a few days to several weeks, depending on the quality of the rubber and the ventilation in the room. To accelerate this process, air the mats outdoors in a shaded, dry area for a few days before bringing them inside, ensuring they are protected from direct sunlight which can degrade the material. Indoors, maximize cross-ventilation by opening windows and using fans to keep air moving. You can also wash the mats with a mild solution of warm water and dish soap to help remove surface residues and reduce the odor more quickly.
Can I install rubber gym mats directly over carpeted floors?
Installing rubber gym mats directly over carpeted floors is generally not recommended for heavy strength training due to stability and hygiene risks. Carpet is a compressible, soft subfloor that shifts and gives way under load, which can compromise your balance and increase the risk of joint strain during heavy lifts like squats or deadlifts. Furthermore, placing an impermeable rubber mat over carpet traps moisture and restricts airflow, creating an ideal environment for mold, mildew, and unpleasant odors to develop within the carpet fibers, especially in humid climates. If you cannot remove the carpet, a highly effective solution is to lay a rigid subfloor layer, such as 12mm to 15mm thick plywood sheets, directly over the carpet before placing your rubber mats on top to distribute the weight evenly and provide a stable lifting surface.
Community discussion
Share your experience or ask a question. Comments are reviewed before publication.