
Selecting the right recovery tool after a run is not a one-size-fits-all decision. Your choice depends on matching your immediate physical feedback—whether it is a dull, widespread ache in your thighs, a sharp knot in your calf, or stiffness in your joints—to the specific mechanical action of the tool. Theraband provides a suite of recovery options, including foam rollers, massage balls, and resistance bands, each engineered for distinct physiological purposes. By understanding how to evaluate your body’s post-run signals, you can choose the precise tool or combination of tools to restore mobility, alleviate muscle tension, and support long-term injury prevention.
Assessing Your Post-Run Muscle and Joint Needs
To build an effective recovery routine, you must first learn to interpret the physical feedback your body provides after a run. Not all post-run discomfort is the same, and treating every sensation with the same tool can lead to ineffective recovery or even injury. General muscle fatigue typically presents as a bilateral, dull ache across large muscle groups like your quadriceps or hamstrings. This widespread sensation indicates a need for broad tissue stimulation to promote blood flow and ease overall tension.
In contrast, localized tightness manifests as a specific, asymmetrical point of tension—often referred to as a muscle knot or trigger point. You might feel this as a hard, tender spot in your calf or glute that does not resolve with simple rest. This localized feedback requires targeted, deep-pressure therapy to release the contracted muscle fibers. Joint stiffness, characterized by a restricted range of motion in areas like your ankles or hips without acute pain, points to a need for active mobilization and stretching rather than direct tissue compression.
Products mentioned in this guide
Prices are valid at publication and may change. Please refer to the product page for the latest price.
Recognizing the boundaries of self-recovery is critical for your safety. While mild discomfort and muscle tightness are normal responses to training, certain red flags require you to stop using recovery tools immediately. Sharp, stabbing pain, localized swelling, visible bruising, heat radiating from a joint, or acute joint instability are signs of potential injury, such as a sprain, strain, or stress fracture. Applying heavy pressure or stretching compromised tissues can worsen these conditions. If you observe any of these symptoms, bypass your recovery tools and consult a healthcare professional for a proper diagnosis.
Using Theraband Foam Rollers for Large Muscle Groups
Foam rolling, or self-myofascial release, is highly effective for addressing broad muscle fatigue across large surface areas. When selecting a foam roller, the surface texture is your primary decision point. Smooth foam rollers distribute your body weight evenly across the muscle, providing a gentler, more uniform pressure. This is ideal if you have highly sensitive tissues, are new to foam rolling, or are recovering from an exceptionally grueling long run where your muscles are highly tender.

Textured rollers, featuring ridges or molded grids, provide alternating zones of high and low pressure. This design mimics the targeted pressure of a massage therapist’s fingers, allowing for deeper tissue penetration and more intense stimulation of stubborn muscle layers.
To roll your calves safely and effectively, sit on the floor with your legs extended and place the roller under your lower leg, just above the ankle. Support your body weight with your hands on the floor behind you, and slowly lift your hips. Roll forward and backward, keeping the movement slow and controlled, from just above the ankle to just below the knee. To target different parts of the calf, rotate your leg slightly inward or outward as you roll. Avoid rolling directly over the back of the knee joint, as this area contains sensitive nerves and blood vessels that should not be subjected to heavy compression.
For the quadriceps, lie face down in a forearm plank position with the roller positioned under the front of your thighs. Slowly roll from the bottom of your hips down to just above your kneecaps. If you encounter a tender spot, pause for several seconds to let the pressure work, rather than rolling rapidly over it.
When addressing the lateral side of your leg, often associated with IT band tightness, exercise caution. The IT band itself is a thick, fibrous band of connective tissue that does not stretch easily; instead of rolling directly over the bony hip joint or the lateral knee joint, focus your rolling on the surrounding muscles, such as the tensor fasciae latae at the hip and the vastus lateralis on the side of the thigh, to relieve tension indirectly.
Throughout your foam rolling session, you must carefully monitor your pain boundaries. A therapeutic sensation is often described as a deep, dull ache that gradually releases as you hold pressure—sometimes referred to as “good pain.” However, if you experience sharp, shooting, or nerve-related sensations, such as numbness or tingling, stop immediately. These sensations indicate that you are compressing a nerve, a bone, or a damaged tendon rather than muscle tissue.
Applying Theraband Massage Balls for Targeted Trigger Points
While foam rollers excel at treating large muscle groups, massage balls are designed for highly localized, deep-tissue relief in smaller or hard-to-reach areas. The small surface area of a massage ball concentrates your body weight onto a single point, making it the ideal tool for addressing stubborn trigger points that a flat roller cannot reach. Common application zones for runners include the plantar fascia on the sole of the foot, the gluteal muscles (particularly the piriformis), and the upper back muscles between the shoulder blades.
When choosing a massage ball, you must evaluate the material density and the ball’s diameter against your personal pain tolerance and the target muscle group. A smaller, firmer ball with high density delivers intense, highly focused pressure. This is particularly effective for the dense fascia on the bottom of your foot. To use it, stand near a wall or chair for balance, place the ball under the arch of your foot, and slowly apply pressure while rolling the ball from the heel to the base of your toes. If you have sensitive feet or are new to this technique, a larger or slightly softer ball distributes the pressure over a wider area, making the sensation more manageable.
For the gluteal muscles, sit on the floor with your knees bent and place the massage ball under one side of your hip. Gently shift your weight onto the ball, moving slowly until you locate a tender spot. Once found, hold your position and take deep, relaxing breaths, allowing the muscle to sink into the ball. You can also perform small, circular movements to help release the tissue. This targeted approach is highly effective for relieving the deep hip tightness that often accumulates during long, repetitive running strides.
Safety is paramount when applying concentrated pressure. You must perform a visual and tactile check of your anatomy to ensure you avoid pressing directly on bones, joints, or major nerve pathways. For example, when targeting the upper back, keep the ball positioned in the muscular channel between your spine and your shoulder blade; never roll directly over the spinal vertebrae or the bony edge of the scapula. Similarly, avoid placing heavy pressure directly on the sciatic nerve pathway in the center of the glutes if it triggers shooting pain down your leg.
Incorporating Theraband Resistance Bands for Active Stretching
Active stretching with resistance bands is a powerful method to restore range of motion, improve flexibility, and prevent injuries after a run. Unlike static stretching, which can sometimes cause muscles to tighten defensively, band-assisted stretching allows you to use gentle traction to guide your joints through a full, controlled range of motion.
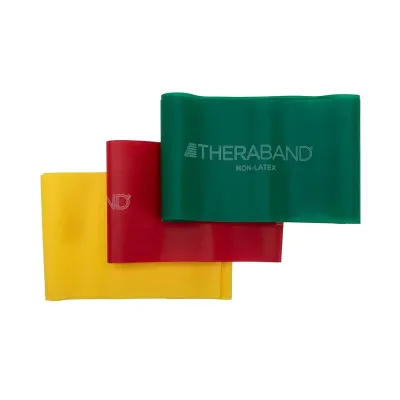
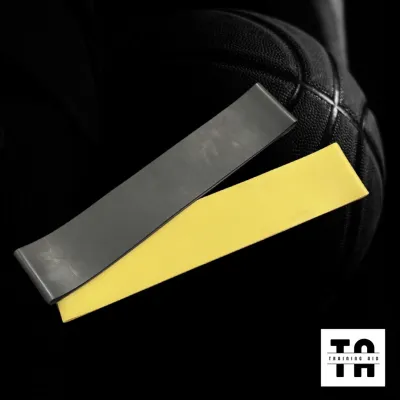
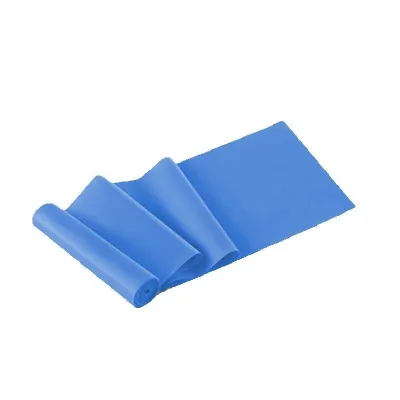
The primary rule when selecting a resistance band for post-run recovery is to prioritize light to medium resistance. Theraband uses a standardized, color-coded progression to indicate resistance levels. For post-run stretching, opt for lighter bands (such as yellow, red, or green) rather than the heavy bands used for strength training. The goal is to assist your movement and provide light support, not to create high-tension resistance that forces your muscles to contract.
To perform a band-assisted hamstring stretch, lie flat on your back and loop the center of the band around the arch of one foot. Hold the ends of the band in each hand, keeping your elbows resting on the floor to stabilize your upper body. Slowly raise your leg toward the ceiling, keeping your knee straight but not locked. Use the band to gently pull your leg closer to your torso until you feel a comfortable stretch along the back of your thigh. Hold this position for 20 to 30 seconds while breathing deeply, then slowly lower your leg.
You can also use the band to improve hip flexor and ankle mobility. For ankle mobility, loop the band around the front of your ankle joint and anchor the other end to a heavy, stable object behind you. Step forward into a half-kneeling position to create tension on the band, then slowly drive your knee forward over your toes. This mobilization technique helps glide the ankle joint, which can become compressed and stiff from the repetitive impact of running.
Before every session, you must perform a thorough pre-use inspection of your resistance bands. Latex and synthetic rubber bands are subject to wear and environmental degradation over time. Inspect the entire length of the band for micro-tears, small nicks, discoloration, dry rot, or a powdery residue. Gently stretch the band to check for any hidden weak spots. If you detect any signs of material compromise, discard the band immediately. A band that snaps under tension can cause sudden, painful impact injuries to your skin or eyes.
Designing a Safe and Effective Post-Run Recovery Sequence
To maximize the benefits of your Theraband tools, you should organize them into a logical, sequential routine. A structured sequence ensures that you prepare your tissues gradually, moving from broad relaxation to targeted release, and finally to length restoration. Begin your routine with broad foam rolling. This initial step increases local blood circulation, warms up the muscle tissue, and helps you identify specific areas of tightness. Spend approximately 5 to 10 minutes rolling your major running muscles, focusing on your calves, quadriceps, and glutes.
Once your muscles are warmed up and you have identified specific “hot spots,” transition to targeted work using the massage ball. Spend 1 to 2 minutes on each localized knot, such as the arch of your foot or a tight spot in your glutes. This targeted pressure helps release stubborn trigger points that the foam roller could not fully resolve.
Finally, conclude your recovery session with band-assisted active stretching. Because your muscles are now warm and the localized tension has been released, they are highly receptive to stretching. Use your resistance band to gently stretch your hamstrings, hips, and calves, holding each stretch for 20 to 30 seconds to restore optimal resting muscle length.
You must adjust the duration and intensity of this routine based on the physical demands of your preceding run. After an easy recovery jog, your muscles are not highly stressed, so a quick 5-to-10-minute session focusing on light foam rolling and basic stretching is sufficient. However, after a high-intensity speed workout or a long-distance run, your muscle fibers have sustained micro-tears and are highly sensitive. In these cases, extend your routine to 15 or 20 minutes, but significantly reduce the pressure you apply. Avoid aggressive, deep-tissue rolling or intense trigger point work on highly fatigued muscles, as this can exacerbate inflammation and delay healing.
Always listen to your body and establish clear conditions for modifying or skipping your recovery routine. If you experience systemic exhaustion, severe muscle soreness that makes light touch painful, or signs of overtraining, skip the deep tissue compression entirely. Instead, focus on passive rest, hydration, and very gentle, unassisted mobility movements. Recovery tools are meant to assist your body’s natural healing process, not to add further physical stress to an already overwhelmed system.
Frequently Asked Questions (FAQ)
Can I use a foam roller and a massage ball on the same day?
Yes, combining a foam roller and a massage ball in a single session is highly effective and safe, provided you follow a logical order. You should always start with the foam roller to address large muscle groups and increase overall blood flow. This initial step helps relax the surrounding tissues and allows you to locate specific, stubborn knots. Once identified, you can use the massage ball to apply targeted pressure directly to those trigger points.
However, you must monitor your total tissue stress carefully. Avoid spending too much time on a single spot, as overworking the same muscle group with multiple high-pressure tools can lead to bruising, localized inflammation, and delayed recovery.
How do I clean and maintain my Theraband recovery tools?
Proper maintenance of your Theraband recovery tools ensures hygiene and extends their usable lifespan. To clean foam rollers and massage balls, wipe them down after each use with a damp cloth and a mild, non-abrasive soap. Avoid using harsh chemical solvents, bleach, or alcohol-based cleaners, as these substances can degrade the foam or rubber materials over time. Allow the tools to air dry completely in a well-ventilated area before storing them.
For resistance bands, store them in a cool, dry place away from direct sunlight, moisture, and extreme heat, which can accelerate dry rot and cause the material to become brittle. To prevent latex bands from sticking together, you can occasionally apply a light dusting of talcum powder or cornstarch.
Regularly perform visual and tactile checks on all your tools. If a foam roller loses its shape, feels permanently compressed, or develops deep cracks, or if a resistance band shows any signs of nicks, tears, or loss of elasticity, it is time to replace the tool to ensure your safety during recovery.
Community discussion
Share your experience or ask a question. Comments are reviewed before publication.