
Quick Answer: Which Bicycle Pump Fits Your Routine?
Selecting the right bicycle pump depends on where you ride, how often you maintain your tire pressure, and your storage space. For routine home maintenance, a floor pump is the standard choice, offering high-volume inflation, stable footplates, and large, easy-to-read pressure gauges. If you prioritize emergency roadside repairs, a compact hand pump is an essential, lightweight tool that mounts directly to your bicycle frame or fits inside a jersey pocket.
For riders seeking a low-effort, automated solution that can handle multiple tire types and inflatable items, a portable electric pump offers digital precision and hands-free operation, though it requires regular battery management. Matching your pump selection to your specific cycling habits ensures you remain prepared for both daily pre-ride checks and unexpected punctures on the road.
Floor Pumps: High Volume and Garage Convenience
Floor pumps are the cornerstone of home bicycle maintenance. Their primary advantage lies in their large cylinder volume, which allows you to inflate tires to the correct pressure with minimal strokes and physical exertion. This high-volume delivery is particularly beneficial when seating tubeless tires, which require a rapid burst of air to snap the tire bead into the rim channel, or when inflating wide mountain bike tires.
Products mentioned in this guide
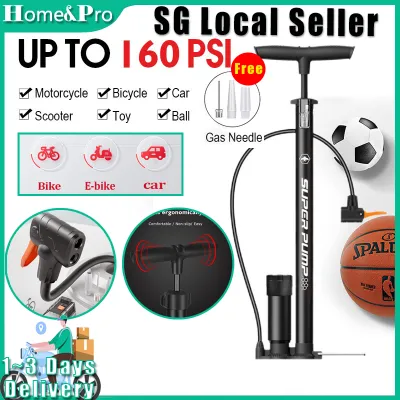
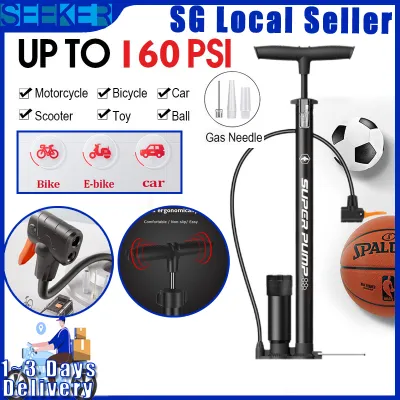

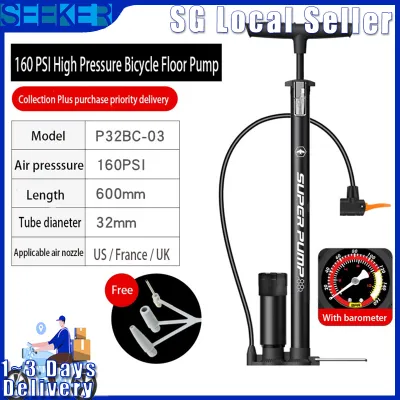

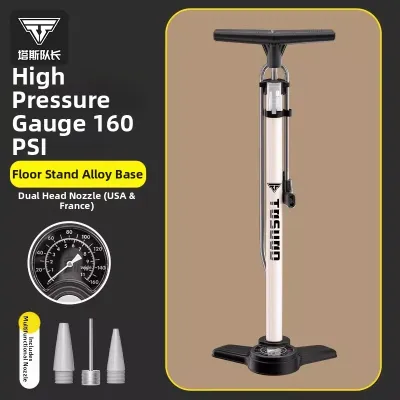
Prices are valid at publication and may change. Please refer to the product page for the latest price.

When evaluating a floor pump, consider the physical footprint and storage requirements. In space-constrained living environments, a pump with a folding base or a slim profile is easier to tuck away. Additionally, hose length is a critical usability factor; a longer, flexible hose allows you to inflate tires while the bicycle is secured in a repair stand or parked several feet away, eliminating the need to maneuver the pump into awkward positions.
The pressure gauge is another vital component. Base-mounted gauges are less prone to damage if the pump tips over, but they require a larger dial face to be easily readable from a standing position. Top-mounted gauges bring the dial closer to your eyes, making precise pressure adjustments easier, though they can make the pump slightly top-heavy.
Finally, verify the versatility of the pump head. Most quality floor pumps feature a head that accommodates both Presta and Schrader valves without requiring internal disassembly. Many models also come with dedicated storage clips for ball needles and plastic inflation cones, allowing you to use the pump for sports equipment and household inflatables.
Hand Pumps: Portability and On-the-Go Emergencies
Hand pumps are designed specifically for portability and emergency roadside recovery. Unlike floor pumps, they are not intended for daily tire pressure top-offs, as their small chamber volume requires hundreds of strokes to reach riding pressure. For high-pressure road tires, inflating with a hand pump demands significant physical effort, and reaching pressures above 80 PSI can become physically challenging due to the resistance of the small piston.
To ensure your hand pump is always available, evaluate its mounting options. Most portable pumps include a mounting bracket that bolts directly beneath a standard water bottle cage. Ensure the bracket features a robust rubber strap or hook-and-loop fastener to prevent the pump from rattling loose during rough trail rides. Alternatively, ultra-compact mini pumps can be carried in a hydration pack or a cycling jersey pocket.
When choosing an emergency inflation tool, riders often compare manual hand pumps with CO2 inflators. CO2 systems use pressurized gas cartridges to inflate a tire in seconds with zero physical effort. However, CO2 cartridges are single-use items that carry recurring costs and environmental waste. Furthermore, if you misalign the inflator head or experience a second puncture, you may run out of cartridges, whereas a manual hand pump provides an unlimited supply of air.
The durability of a hand pump depends heavily on its build materials. CNC-machined aluminum bodies offer excellent structural integrity without adding excessive weight, while composite plastic models are lighter but may flex under heavy pumping pressure. Look for designs with extendable flexible hoses rather than direct-connect heads; a flexible hose reduces the leverage placed on the valve stem during rapid pumping, minimizing the risk of bending or breaking the valve.
Portable Electric Pumps: Automated Inflation and Versatility
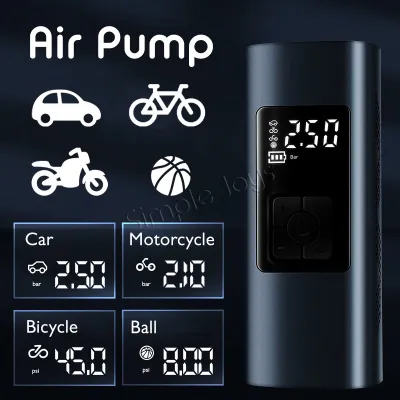
Portable electric pumps represent a modern, automated alternative to manual inflation tools. Powered by rechargeable lithium-ion batteries, these compact devices use an internal motor to compress air, delivering precise pressure without requiring physical effort. This makes them highly suitable for riders with limited hand strength or those who manage multiple bicycles and want to streamline their pre-ride preparation.
Battery management is the most critical consideration when relying on an electric pump. Most models utilize standard USB-C charging interfaces, making them easy to charge at home or via a portable power bank. However, because batteries naturally discharge over time, you must establish a routine charging schedule. Relying solely on an electric pump during a long, remote ride carries the risk of power depletion, leaving you without a means of inflation if the battery dies.
Operational noise and heat generation are inherent characteristics of portable electric compressors. The small internal motors must work hard to generate high pressures, resulting in a noticeable buzzing sound. Additionally, the pump body and hose connector can become warm to the touch during continuous operation, requiring built-in thermal protection or heat-resistant sleeves to ensure safe handling.
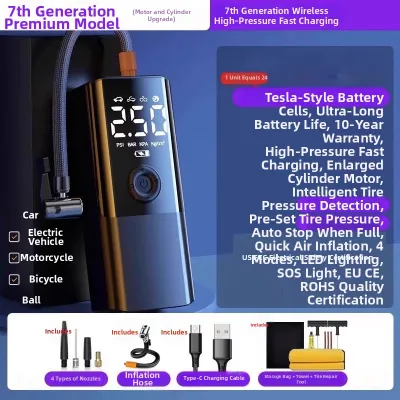
Despite these constraints, electric pumps offer advanced features like digital pressure displays and automatic shutoff mechanisms. You can preset your desired target pressure, connect the pump, and allow it to run hands-free until it reaches the exact limit, preventing over-inflation. While they are heavier and bulkier than manual hand pumps, they fit easily into frame bags, panniers, or commuter backpacks.
Key Decision Factors: Matching the Pump to Your Cycling Needs
To select the ideal pump, you must first verify valve compatibility. Bicycle inner tubes primarily use either Presta valves (slender, with a threaded locknut, common on road and gravel bikes) or Schrader valves (wider, spring-loaded, common on mountain and utility bikes). Some pumps feature a “smart” head that automatically adjusts to either valve type, while others use a dual-sided head or require you to unscrew the internal rubber grommet and flip it around. Ensure the connection mechanism is secure and does not leak air during high-pressure inflation.
Maximum pressure limits must align with your tire specifications. Road tires typically require higher pressures (often between 70 and 110 PSI), which demands a pump designed specifically for high-pressure output. Conversely, mountain bike and gravel tires run at much lower pressures (often between 20 and 50 PSI) but require a larger volume of air. Using a high-pressure, low-volume pump on a wide mountain bike tire will result in a tedious inflation process, while using a high-volume, low-pressure pump on a road tire may make it impossible to reach the required PSI.
Build quality directly impacts the lifespan and reliability of your pump. Heavy-duty steel or aluminum barrels and bases provide the stability needed for frequent use, while composite materials are lighter but may degrade faster under heavy load. In humid environments, look for pumps with corrosion-resistant coatings and dust caps that protect the valve connection ports from moisture and road grit.
Finally, consider the long-term serviceability of the pump. Over years of use, the internal rubber O-rings and gaskets will inevitably wear down, leading to air leaks. High-quality pump manufacturers often sell replacement rebuild kits, including new O-rings and replacement hoses. Choosing a brand that supports self-service and parts replacement prevents you from having to discard the entire pump when a simple rubber seal fails.
Comparison Matrix: Floor vs. Hand vs. Electric Pumps
| Feature | Floor Pump | Hand Pump | Portable Electric Pump |
|---|---|---|---|
| Primary Use Case | Daily home maintenance & pre-ride prep | Emergency roadside puncture repairs | Multi-purpose home & travel inflation |
| Inflation Speed | Very fast (high volume per stroke) | Slow (requires manual effort) | Moderate (automated, hands-free) |
| Portability | Low (bulky, heavy, home use only) | High (lightweight, frame-mounted) | Moderate (compact but heavy battery) |
| Power Source | Manual physical effort | Manual physical effort | Rechargeable lithium-ion battery |
| Key Maintenance | Lubricate plunger, check hose seals | Clean barrel, inspect internal O-ring | Monitor battery charge, clear vents |
Maintenance and Care for Long-Lasting Performance
Proper maintenance ensures your bicycle pump remains reliable and performs consistently over years of use. For manual pumps, the primary maintenance task is keeping the internal cylinder clean. Dust, sand, and road grit can enter through the pump head or the plunger shaft, scratching the inner walls of the barrel and compromising the airtight seal. Periodically wipe down the exterior plunger shaft with a clean cloth to remove accumulated debris.
Lubrication is essential for maintaining the smooth movement of the internal piston and preserving the rubber O-rings. If you notice increased resistance or a squeaking sound during pumping, unscrew the top cap of the barrel, carefully pull out the plunger assembly, and apply a thin layer of silicone-based grease to the rubber seals. Avoid using petroleum-based lubricants, as they can cause the rubber components to degrade prematurely.
Regularly inspect the flexible hose and the pump head for signs of wear. Over time, exposure to sunlight and temperature fluctuations can cause rubber hoses to dry out, crack, or develop slow leaks near the connection points. Check the hose by bending it gently along its length; if you observe deep cracks or hear air escaping during use, replace the hose or trim the damaged section and re-secure the fitting according to the manufacturer’s instructions.
For electric pumps, storage conditions are critical to preserving battery health and electronic circuitry. Store the device in a cool, dry location away from direct sunlight and moisture, especially in humid climates. Avoid leaving an electric pump in a hot vehicle trunk, as extreme heat can accelerate battery degradation. Additionally, perform a battery check every few months during periods of inactivity, recharging the unit to around 50% to 80% capacity to maintain optimal cell health.
Frequently Asked Questions (FAQ)
Can I use a car tire pump on my bicycle?
You can use a car tire pump on a bicycle tire, provided the valves are compatible and you exercise extreme caution. Car tires use Schrader valves, so if your bicycle has Presta valves, you will need a brass Presta-to-Schrader adapter to connect the pump head. However, automotive air compressors at service stations are designed to deliver high volumes of air rapidly. Because bicycle tires have a much smaller air volume, using a high-volume commercial compressor can inflate the tire too quickly, leading to sudden over-inflation and a dangerous tire blowout. If you must use a service station pump, apply the air in very short, controlled bursts and monitor the tire pressure constantly.
How often should I check my tire pressure?
You should check your bicycle tire pressure before every ride, or at least once a week, because all bicycle tires naturally lose air over time. Inner tubes are made of slightly permeable rubber materials, with lightweight latex tubes losing air much faster than standard butyl rubber tubes. Tubeless tire setups also experience gradual pressure loss through the tire casing and around the valve stem or rim tape. Riding on under-inflated tires increases rolling resistance, accelerates tread wear, and raises the risk of pinch flats or rim damage. Developing a habit of performing a quick pressure check before you set off ensures a safer, more comfortable, and more efficient ride.
Community discussion
Share your experience or ask a question. Comments are reviewed before publication.