
Finding the right bicycle parking stand for your home depends on balancing your available floor area, wall strength, and how much physical effort you want to exert after a long ride along the Park Connector Network (PCN). While a floor stand offers immediate, drill-free setup, it consumes valuable floor space. Wall mounts and vertical racks reclaim that floor space but require secure installation and regular lifting. By evaluating your home’s layout, your bicycle’s physical specifications, and your household’s daily routine, you can select a storage system that keeps your living space organized and your bicycle secure.
Core Decision Factors for Home Bicycle Storage
Before purchasing any bicycle parking stand, you must assess the physical dimensions of your storage area. In compact residential layouts, such as HDB apartments or condominiums, every square meter counts. Measure both the horizontal floor footprint and the vertical clearance up to the ceiling. A bicycle stored horizontally on the floor requires approximately 1.8 meters of length and 60 centimeters of width. If you plan to lift the bicycle, ensure there is enough overhead clearance so the wheels or handlebars do not obstruct ceiling fans, light fixtures, or doorways.
Next, examine the physical characteristics of your bicycle. Heavy commuter bicycles, utility models, and electric bicycles place significant demands on storage hardware. Note the tire width, as some stands only accommodate standard road tires (typically 23mm to 32mm) while others are designed for wide mountain bike or fat-bike tires. Frame materials also dictate your choice; carbon fiber frames should not be subjected to heavy clamping forces along the tubes, making wheel-contact stands a safer option than frame-clamping hangers.
Products mentioned in this guide
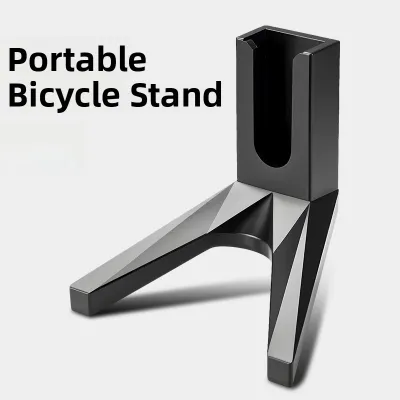
![[LOCAL SELLER] Adjustable Aluminum Bicycle Parking Bicycle Stand Rack Mountain Road Bike Support Side Stand Kickstand Bicycle Accessories](https://img.lazcdn.com/g/p/c0d1091f80744946e817c13e47ee3186.png_400x400q80.png_.webp)
Prices are valid at publication and may change. Please refer to the product page for the latest price.
Finally, verify your home’s structural limitations and tenancy agreements. If you are renting your home, drilling holes into concrete or brick walls to mount heavy brackets is often prohibited or requires landlord approval. Even if you own the property, you must identify the wall type. Solid concrete walls provide excellent load-bearing capacity for heavy mounts, whereas partition walls or drywall require locating internal studs and using specialized anchors to prevent structural failure.
Floor Stands: Flexible and Drill-Free Parking
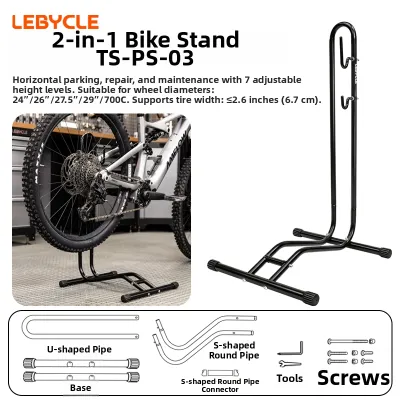
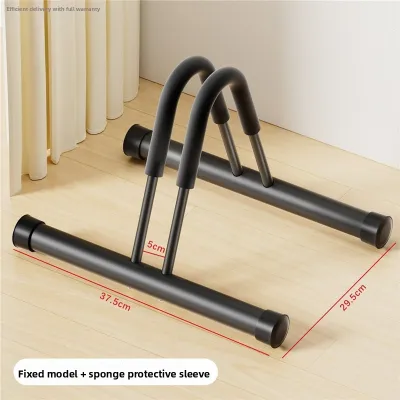
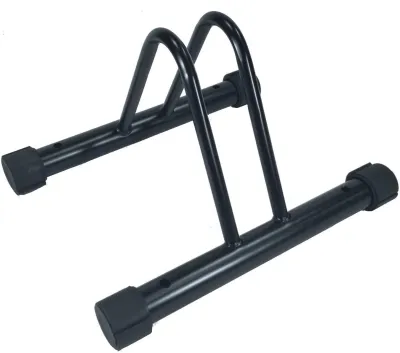
Floor stands are the most straightforward and non-destructive bicycle parking stand options available. Because they rest directly on the ground, they require absolutely no drilling, making them highly suitable for renters or those who frequently rearrange their living spaces. These stands typically support the bicycle by holding either the front or rear wheel, or by cradling the rear axle. This design allows you to park your bicycle instantly upon returning from a ride without lifting its entire weight.

However, the primary trade-off of a floor stand is its footprint. A single floor stand occupies the same amount of floor space as the bicycle itself, which can restrict movement in narrow hallways or small balconies. To maximize stability, look for floor stands with a wide, weighted base or those that allow you to link multiple units together. Some modular floor stands can be adjusted to fit different tire widths, ensuring a snug fit that prevents the bicycle from tipping over if accidentally bumped.
When selecting a floor stand, check the compatibility of the holding mechanism with your bicycle’s components. Stands that slide between the spokes and support the tire are generally safer for disc brake rotors and delicate rear derailleurs. If your bicycle has deep-section carbon rims or mudguards, verify that the stand’s cradle does not press against these fragile parts. The portability of these stands also makes them useful for temporary outdoor parking during cleaning or basic maintenance sessions.
Wall Mounts: Clearing the Floor for Daily Riders
Horizontal wall mounts are designed to lift your bicycle completely off the ground, freeing up valuable floor space for other household items or foot traffic. By suspending the bicycle parallel to the wall, these mounts turn your bike into a functional display while keeping the floor clear. This setup is highly practical for daily riders who want quick access to their bicycles without navigating cluttered floor areas.
Installing a horizontal wall mount requires careful planning regarding wall construction and hardware. In many modern apartments, internal walls may consist of hollow drywall rather than solid concrete. Mounting a bicycle directly onto drywall without securing the bracket to structural timber or metal studs can lead to the wall crumbling under the weight. Always use a stud finder to locate solid mounting points and use high-quality wall plugs rated for the total weight of your bicycle and the mount itself.
Spatial clearance is another critical consideration for horizontal wall mounts. The handlebars of a standard flat-bar road bike or mountain bike can protrude 60 to 70 centimeters from the wall, which may block narrow corridors. You must also position the mount at a height where the pedals do not scuff the wall surface or catch on clothing as people walk past. Additionally, consider the physical effort required to lift the bicycle to chest or shoulder height every day, which can be challenging after a tiring ride.
Vertical Racks: Utilizing Ceiling Height for Multiple Bikes
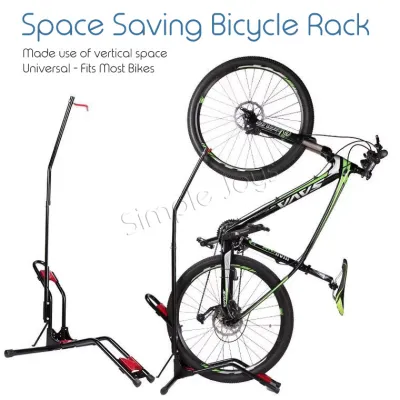
Vertical racks store the bicycle perpendicular to the wall, hanging it by either the front or rear wheel. This configuration is exceptionally efficient for households with multiple bicycles, as it allows you to line up several bikes side-by-side along a single wall. By utilizing the full vertical height of the room, vertical racks can reduce the horizontal footprint of your bicycle storage by more than half.
Before committing to a vertical rack, measure your ceiling height and the total length of your bicycle. When hung vertically, a standard adult bicycle extends approximately 1.8 meters downward from the hook. If your ceilings are low, the rear wheel may rest on the floor, which actually helps distribute the weight but still requires sufficient vertical clearance to hang the bike easily. Ensure the hanging location does not interfere with doors, cabinets, or walkways, as a vertically hanging bicycle protrudes significantly into the room.
Lifting a bicycle into a vertical position requires a specific technique and physical strength. You must lift the front wheel and guide it onto the hook while stabilizing the rear wheel against the wall. To prevent wall damage, many vertical racks include a rear-wheel tray or sticker that keeps the dirty tire from marking the paint. Furthermore, hanging a bicycle by its rim puts localized stress on the wheel components. While most quality aluminum and carbon rims can easily support the weight of the bicycle, you should check with the wheel manufacturer if you use ultra-lightweight spokes or specialized tubeless setups.
Feature Comparison Matrix
To help you evaluate these options side-by-side, the following table summarizes the key operational and spatial differences between the three primary bicycle parking stand designs.
| Feature | Floor Stand | Wall Mount (Horizontal) | Vertical Rack |
|---|---|---|---|
| Floor Space Required | High (Full bicycle footprint) | Zero (Completely clear) | Low (Only wheel contact area) |
| Wall Space Required | Zero | High (Full bicycle length) | Medium (Bicycle width and depth) |
| Installation Effort | None (Out of the box) | High (Drilling and stud finding) | High (Drilling into wall or ceiling) |
| Lifting Effort | None (Roll-in design) | Medium to High (Lifting to chest height) | Medium (Lifting front wheel to hook) |
| Ideal User Profile | Renters, heavy bikes, quick parking | Single bike owners, solid walls | Multi-bike households, high ceilings |
Final Selection Framework for Your Space
Choosing the right bicycle parking stand involves matching your home’s physical constraints with your personal physical capabilities. If you live in a rented apartment where drilling is strictly prohibited, or if your walls are made of lightweight partition materials, a floor stand is the safest and most practical choice. It provides immediate stability without risking structural damage or lease violations, though you must allocate sufficient floor space for it.
If floor space is at a premium and you have solid concrete walls, a horizontal wall mount offers an elegant solution. This option is best suited for lightweight road bikes or city bikes that are easy to lift. Ensure you have enough clearance in the room so the protruding handlebars do not disrupt the flow of traffic. Whether you are protecting a high-end road bike or a commuter model, choosing the right stand prevents costly damage to frames that can run into thousands of S$.
For households with multiple bicycles or very limited horizontal wall space, a vertical rack is the most efficient way to maximize your storage capacity. This setup works best in rooms with high ceilings and for riders who are comfortable lifting the front wheel of their bicycle to hook height.
Regardless of the design you choose, always verify the manufacturer’s specified weight limits and tire width compatibility before making a purchase. Investing in a stand that matches your bicycle’s exact specifications ensures long-term safety, protects your home’s walls, and keeps your cycling gear ready for your next journey.
Frequently Asked Questions (FAQ)
Can I use a wall mount or vertical rack for a heavy e-bike?
Storing a heavy electric bicycle (e-bike) on a wall mount or vertical rack requires extreme caution due to the substantial weight of these vehicles, which often exceeds 20 kilograms. First, you must verify that both the mounting bracket and the wall structure are rated for the specific weight of your e-bike with the battery installed. Standard drywall anchors are highly likely to fail under this load; the mount must be anchored directly into solid concrete or heavy-duty wall studs using commercial-grade fasteners.
Additionally, consider the physical strain of lifting a heavy e-bike. Hoisting a 20-to-25-kilogram bicycle onto a high wall mount or vertical hook daily can lead to back strain or accidental drops, which could damage the e-bike’s sensitive electronic components. If you cannot easily lift the e-bike, a heavy-duty floor stand that supports the bike at ground level is a much safer and more practical alternative. If you must use a vertical rack, look for designs that allow the rear wheel to remain on the floor, reducing the lifting height required to secure the front wheel.
Community discussion
Share your experience or ask a question. Comments are reviewed before publication.