
Maintaining the correct tire pressure is the simplest way to ensure a smooth, fast, and puncture-resistant ride. However, finding the right tool to inflate your tires depends heavily on where you ride, how often you ride, and how you plan to carry your gear. Choosing the right air pump bicycle riders rely on requires balancing portability, speed, physical effort, and cost.
To make an immediate decision, you can use this conditional framework to identify the best tool for your cycling routine:
- Choose a floor pump if you need high-volume, precise inflation at home before you head out. It is the most efficient, durable, and ergonomic option for routine maintenance.
- Choose a hand pump (mini pump) if you want a reliable, reusable, and lightweight backup to carry on every ride. It requires no recurring costs and will never run out of air on long solo journeys.
- Choose a CO2 inflator if you prioritize the fastest possible roadside fix during a race or group ride and do not mind the recurring cost of single-use gas cartridges.
For most cyclists, the ideal setup is not a single tool, but a combination. Keeping a robust floor pump at home for weekly pressure checks paired with a portable hand pump or CO2 inflator in your saddlebag for emergency punctures ensures you are prepared for any situation. Below, we analyze each pump type in detail to help you build the perfect setup for your riding style.
Products mentioned in this guide
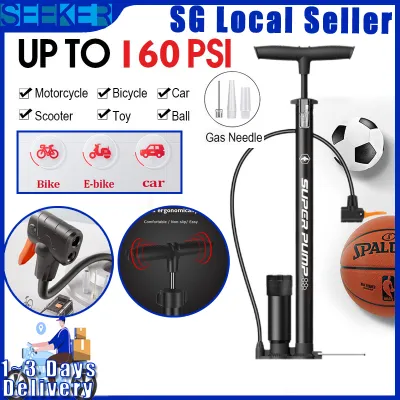
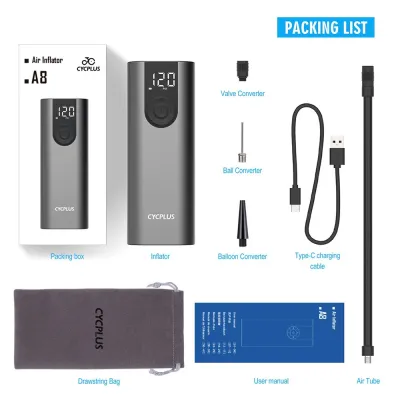
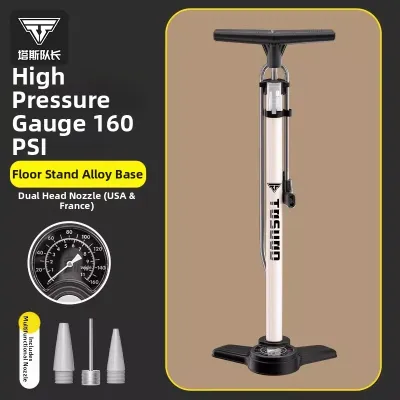
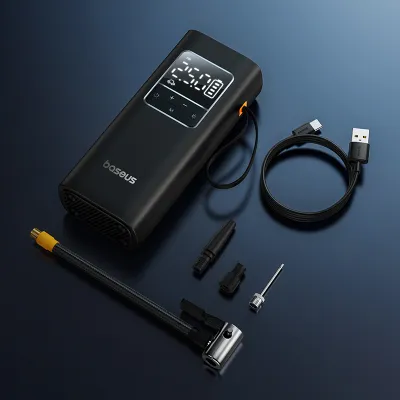
![[SG Stock] Air Pump Car Inflator Compressor Portable Ball Bike Bicycle Rechargeable Basketball Soccer Volleyball Tyre Wheel Tire 12V LED Fast Auto Shut-off Emergency](https://img.lazcdn.com/g/p/cc7d92c566c3860fbbfa1d535cc6f3bb.jpg_400x400q80.jpg_.webp)
![[SG Seller]Portable Car Electric Inflator air pump car electric pump Bicycle inflator pump/air pump/Electric pump/汽车充气泵](https://img.lazcdn.com/g/p/11d7062f8a657612c19945cd3cdafcdb.jpg_400x400q80.jpg_.webp)
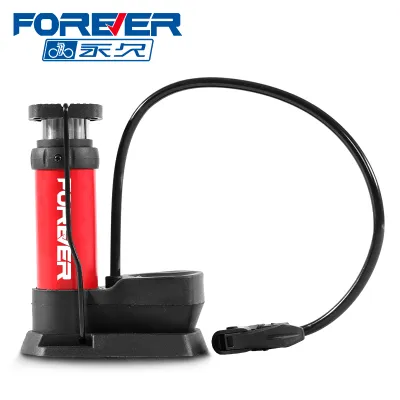
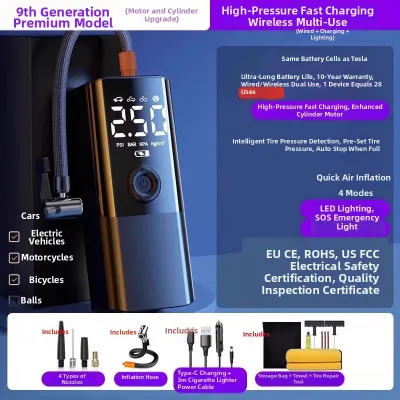
Prices are valid at publication and may change. Please refer to the product page for the latest price.
Floor Pumps: The High-Volume Air Pump Bicycle Owners Need at Home
Floor pumps, often called track pumps, are the undisputed workhorses of bicycle maintenance. Designed to stand firmly on the ground, these pumps feature a large-diameter metal or composite cylinder, a wide base for foot stability, a long flexible hose, and an integrated pressure gauge. Because you use your body weight and both hands to push a large piston down, floor pumps transfer a massive volume of air with each stroke, making tire inflation rapid and physically effortless.
The primary strength of a floor pump lies in its efficiency and precision. Whether you are seating a stubborn tubeless tire on a mountain bike or inflating a road tire to a precise 90 PSI, a floor pump handles the task in a dozen strokes. The built-in gauge, positioned near the base or top of the barrel, provides a clear, real-time reading of the internal tire pressure. This accuracy is crucial for optimizing rolling resistance and grip, as even a 5 PSI variance can noticeably alter how your bike handles on wet pavement or loose gravel.
The obvious limitation of a floor pump is its bulk. These tools are heavy, tall, and designed strictly for stationary use in your home, garage, or vehicle trunk. Attempting to carry one on a ride is impractical. For cyclists living in compact urban spaces, such as apartments or HDB flats in Singapore, storing a floor pump requires a small dedicated corner, though its utility far outweighs the minor space it occupies.
When shopping for a floor pump, use this buying checklist to ensure maximum compatibility and ease of use:
- Valve Head Compatibility: Ensure the pump head features a dual-chuck design or an intelligent auto-switching valve that fits both Presta (slender, threaded valves common on road and gravel bikes) and Schrader (wider valves identical to car tires) without needing internal disassembly.
- Gauge Range and Readability: If you ride a road bike, look for a gauge that reads up to 120 PSI with clear, high-contrast markings. If you ride a mountain or gravel bike, a low-pressure gauge (maxing out at 60 PSI) is preferable, as it offers finer increments for precise single-digit pressure adjustments.
- Base and Handle Ergonomics: Look for a wide, heavy steel or cast-iron base with textured grip pads to prevent slipping. A wide, padded wooden or composite handle reduces hand fatigue during high-pressure pumping.
- Hose Length: A longer hose (over 1 meter) allows you to inflate tires while the bicycle is mounted on a workstand or parked in a tight storage rack.
Hand Pumps (Mini Pumps): The Reliable On-the-Go Backup
Hand pumps are compact, lightweight mechanical cylinders designed to be carried on the bicycle frame or inside a jersey pocket. Operating on manual piston strokes, these pumps rely entirely on your physical arm strength to force air into the tire. Because they do not rely on pressurized canisters or electricity, they represent the ultimate insurance policy for self-supported, long-distance riding.

The greatest advantage of a hand pump is its absolute reliability. It is a reusable tool that will never run out of power or consumables. If you experience multiple punctures on a grueling solo ride, a hand pump will inflate your tire as many times as necessary. Modern mini pumps are constructed from CNC-machined aluminum, making them highly resistant to tropical humidity, rain, and road grit.
However, hand pumps demand significant physical effort. Because the air chamber is highly compact, each stroke delivers a very low volume of air. Reaching a rideable pressure of 80 PSI on a road tire can require 200 to 300 continuous manual strokes, which can be exhausting in hot, humid climates. Furthermore, basic hand pumps that press directly onto the valve stem can easily bend or snap the delicate brass cores of Presta valves if you pump too vigorously.
To find a high-performing hand pump that minimizes these drawbacks, look for the following features before purchasing:
- Flexible Internal Hose: Choose a hand pump with an integrated, pull-out flexible hose. This hose threads securely onto the valve, isolating the valve stem from the mechanical motion of your pumping arm and preventing costly valve damage.
- High-Volume vs. High-Pressure Design: Match the pump's internal design to your tire type. High-volume (HV) mini pumps have wider barrels to push more air per stroke, ideal for low-pressure mountain bike tires. High-pressure (HP) mini pumps have narrower barrels, making it physically easier to push air into high-pressure road tires.
- Telescopic or Dual-Action Chambers: Some advanced hand pumps feature dual-action pistons that compress air on both the push and pull strokes, effectively doubling inflation speed.
- Secure Frame Mounting: Ensure the pump comes with a dedicated mounting bracket that bolts underneath your bottle cage, complete with a heavy-duty silicone strap to prevent the pump from rattling loose on rough roads.
CO2 Inflators: The Fastest Fix for Roadside Emergencies
CO2 inflators consist of a small, pocket-sized nozzle head that threads onto a steel cartridge filled with highly pressurized carbon dioxide gas. When the nozzle is pressed or threaded onto the tire valve, it pierces the cartridge seal, releasing the compressed gas into the tire instantly. This system bypasses physical labor entirely, making it the preferred choice for competitive racers and group riders who need to keep stop times to an absolute minimum.
The primary appeal of a CO2 setup is speed and compactness. A complete kit—consisting of an inflator head and two cartridges—can easily fit into a tiny saddlebag or a zippered pocket, weighing less than most hand pumps. When a flat occurs, a CO2 inflator can fully seat and inflate a tire to riding pressure in less than three seconds, allowing you to rejoin your riding group without breaking a sweat.
Despite the convenience, CO2 inflators have distinct limitations and operating risks. The cartridges are strictly single-use; once pierced, they cannot be resealed and must be recycled, creating ongoing material costs (typically S$3 to S$6 per cartridge) and environmental waste. Additionally, carbon dioxide gas behaves differently than standard atmospheric air. CO2 molecules are smaller than nitrogen and oxygen molecules, meaning they permeate through butyl and latex inner tubes at a much faster rate. A tire inflated with CO2 will lose significant pressure within 12 to 24 hours, requiring you to deflate and pump it up with standard air once you return home.
Furthermore, the rapid expansion of compressed gas causes the inflator head and cartridge to drop to sub-zero temperatures almost instantly. If you operate the device with bare hands, your skin can freeze to the metal, causing severe frostbite.
If you decide to adopt a CO2 system, use this checklist to ensure safe and successful operation:
- Flow Control Valve: Choose an inflator head with a spring-loaded trigger or a dial valve. This allows you to regulate the gas flow slowly, ensuring the inner tube is not pinched before releasing the full blast of pressure.
- Insulating Sleeve: Always use a thick neoprene or silicone sleeve over the cartridge, or wear thick cycling gloves during operation to protect your skin from extreme freeze burns.
- Cartridge Thread Compatibility: Verify whether your inflator head requires threaded or non-threaded cartridges. Threaded cartridges are more secure and widely used, but they must match the specific thread pitch of your inflator nozzle.
- Cartridge Size Selection: Match the cartridge volume to your tire size. A standard 16g cartridge is ideal for inflating a 700x25c road tire to roughly 90 PSI. For high-volume gravel or mountain bike tires, you will need a larger 25g cartridge to achieve adequate riding pressure.
Comparing Pump Types Across Key Riding Dimensions
To help you weigh the practical trade-offs of each system, this comparison matrix outlines how each pump type performs across the six most critical riding dimensions:
| Feature | Floor Pump | Hand Pump | CO2 Inflator |
|---|---|---|---|
| Portability | Extremely Low (Home use only) | Extremely High (Fits in pocket/frame) | Maximum (Fits in small saddlebag) |
| Inflation Speed | Fast (30–45 seconds) | Slow (2–5 minutes of pumping) | Instantaneous (1–3 seconds) |
| Physical Effort | Low (Ergonomic body weight) | High (Repetitive arm motion) | None (Pressurized gas release) |
| Gauge Accuracy | High (Large, dedicated dial) | None to Low (Rare, small inline gauges) | None (Requires separate pressure check) |
| Ongoing Cost | None (One-time purchase) | None (One-time purchase) | High (S$3–S$6 per single-use cartridge) |
| Best Use Case | Pre-ride prep & garage maintenance | Long solo rides & multi-day touring | Races, fast group rides & quick commutes |
Building Your Ideal Pump Setup for Different Riding Styles
No single pump is perfect for every scenario. To get the most out of your cycling routine, tailor your pump combination to match your specific riding discipline, terrain, and safety requirements.
The Commuter and Casual Rider
For those navigating park connectors, paved bike paths, and daily commutes, reliability and simplicity are paramount.
- At Home: Keep a mid-range floor pump in your storage area. Checking your tire pressure once a week will prevent pinch flats and make your ride much more efficient.
- On the Bike: Carry a basic, durable hand pump mounted to your frame. Since commuters rarely face strict time constraints, the extra minutes spent manually pumping a tire are a minor inconvenience compared to the absolute reliability of a mechanical pump.
The Dedicated Road Cyclist
Road cyclists prioritize low weight, aerodynamic efficiency, and minimal downtime during high-speed group rides.
- At Home: Use a high-pressure floor pump equipped with a highly accurate gauge capable of reaching 100 PSI with ease.
- On the Bike: Carry a compact CO2 inflator with two 16g cartridges for rapid roadside fixes. For long-distance solo endurance rides where a double-puncture could leave you stranded, tuck a minimalist, high-pressure mini pump into your jersey pocket as a secondary backup.
The Mountain Biker and Gravel Rider
Off-road riding involves high-volume tires, tubeless setups, and lower operating pressures where precision traction is critical.
- At Home: Invest in a high-volume floor pump. Some specialized tubeless floor pumps feature an integrated pressurized chamber that can be pre-charged to release a sudden blast of air, which is essential for seating the bead of a tubeless tire without an air compressor.
- On the Bike: Carry a high-volume hand pump. Mountain bike tires hold a massive volume of air; attempting to fill them with a standard road mini pump is extremely tedious, and a standard 16g CO2 cartridge will barely fill a wide trail tire to riding pressure. A high-volume hand pump ensures you can easily adjust pressure on the trail to adapt to changing mud or rock conditions.
Critical Safety and Verification Checks
Regardless of the pump system you choose, equipment cannot replace proper technique and safety checks. Before inflating any tire, locate the manufacturer’s recommended pressure range printed on the tire’s sidewall. Never exceed the maximum pressure rating, as this can cause the tire to violently blow off the rim, potentially damaging the wheel or causing injury.
When seating a new tire or inner tube, inflate the tire slowly to about 10 to 20 PSI first. Stop pumping and inspect the entire circumference of the wheel on both sides to ensure the tire bead is seating evenly in the rim channel and that the inner tube is not pinched underneath the bead. If you notice any bulging or uneven seating, deflate the tire immediately, reposition the tube, and start again. Always carry a patch kit and a spare inner tube alongside your pump, as no air pump can fix a tire that has not been properly patched or replaced.
Frequently Asked Questions (FAQ)
Can I use a car air compressor or gas station pump on my bicycle?
Using a high-pressure automotive air compressor on a bicycle tire is highly discouraged and carries a significant risk of injury. Car compressors and gas station pumps are engineered to deliver a massive volume of air rapidly to fill large automotive tires. Because bicycle tires have a much smaller volume, an automotive compressor can over-inflate them in a fraction of a second. This rapid pressure spike often causes the bicycle tire to violently explode, which can permanently damage your wheel rim and cause severe physical injury. Always use a dedicated bicycle pump equipped with an appropriate pressure gauge for controlled, safe inflation.
Do I need a different pump for Presta and Schrader valves?
No, you do not need to buy separate pumps, but you must ensure your chosen pump is compatible with both valve designs. Presta valves are narrow, threaded, and typically found on high-performance road, gravel, and mountain bikes. Schrader valves are wider, feature a spring-loaded internal pin, and are identical to automotive tire valves, commonly found on casual, utility, and kids’ bikes. Most modern bicycle pumps feature a dual-head design with separate ports, a smart-head that automatically adjusts to either valve, or reversible internal rubber seals. Always check the product packaging to verify valve compatibility before purchasing, or carry a cheap brass Presta-to-Schrader adapter in your saddlebag.
Why does my tire lose pressure a few days after using a CO2 inflator?
This rapid pressure loss is caused by basic physics and chemistry, not a puncture. Carbon dioxide ($CO_2$) gas molecules are significantly smaller than the nitrogen ($N_2$) and oxygen ($O_2$) molecules that make up standard atmospheric air. Because butyl rubber and latex bicycle inner tubes are slightly porous at a microscopic level, the smaller CO2 molecules diffuse through the tube walls up to ten times faster than standard air. Consequently, a tire inflated with CO2 will become noticeably soft within 12 to 24 hours. You should always treat CO2 as a temporary emergency tool to get you home; once back, fully deflate the tire and purge the remaining CO2, then re-inflate it with standard air using your floor pump.
Community discussion
Share your experience or ask a question. Comments are reviewed before publication.