
Choosing the right bicycle front rack requires matching your bike’s fork design, frame geometry, and mounting points to the correct rack attachment style. Because a front rack directly affects your steering dynamics and overall stability, selecting an incompatible model can compromise your safety on the road. By systematically evaluating your fork’s physical features, your bike category, and your cargo requirements, you can find a secure setup that preserves your bicycle’s handling.
Identify Your Bike's Frame and Fork Mounting Points
To begin, inspect the front fork of your bicycle to identify the available attachment points. Look closely at the lower dropouts, just above where the wheel axle secures to the frame. Many commuter, touring, and hybrid bikes feature small, threaded holes called eyelets in this area, which are designed to accept rack mounting bolts.
Next, look halfway up the fork legs. Some specialized touring forks feature threaded inserts on the outer or inner faces, known as mid-fork bosses or low-rider braze-ons. These are highly desirable for carrying heavy panniers because they allow you to mount the rack lower, keeping the center of gravity closer to the ground.
Products mentioned in this guide
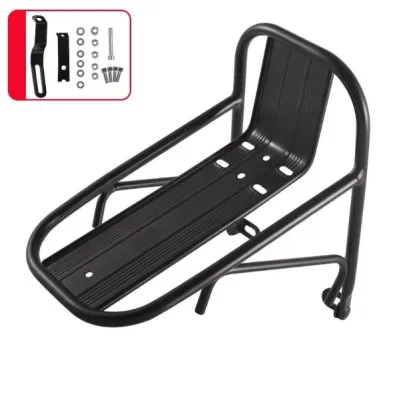
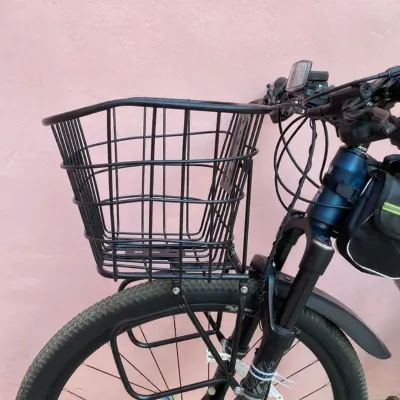
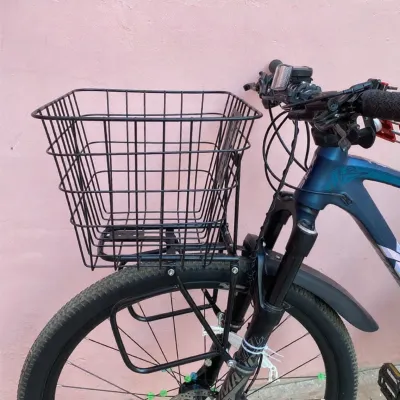
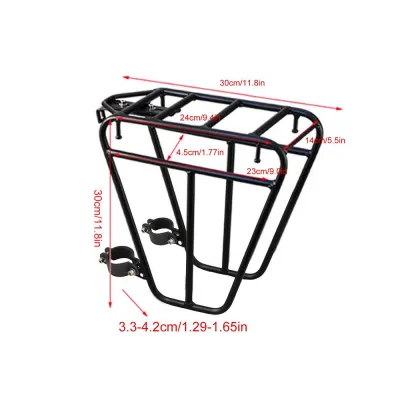
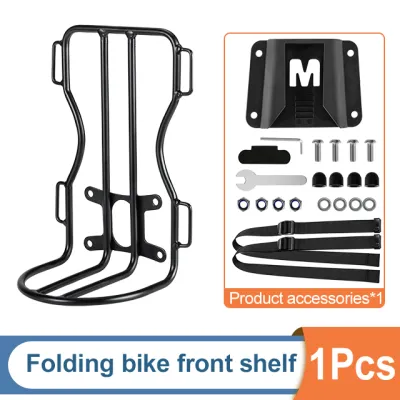
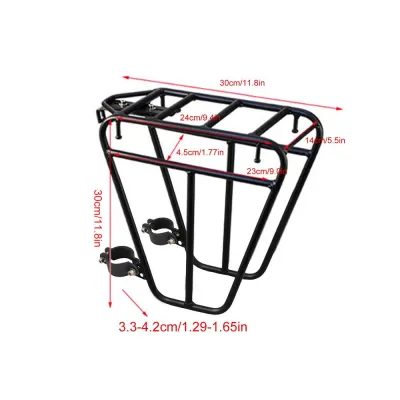
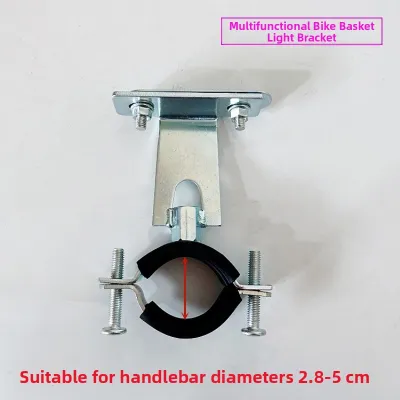
Prices are valid at publication and may change. Please refer to the product page for the latest price.
If your fork legs are completely smooth, look at the fork crown—the area where the two fork legs meet below the headset. Many rigid forks have a central hole drilled through the crown, which is traditionally used for mounting rim brakes or fenders but can also serve as an upper anchor point for certain front racks.
Finally, identify your front wheel’s axle configuration and brake setup. Note whether your wheel uses a traditional quick-release skewer or a modern, thicker thru-axle. You must also locate your brake calipers; disc brake calipers mounted on the lower left fork leg often block access to standard eyelets, requiring a rack designed with offset struts to clear the brake hardware.
Compare Front Rack Mounting Styles
Front racks use several distinct mechanical designs to secure cargo to your bicycle, each offering different trade-offs in terms of weight capacity, steering feel, and installation complexity. Understanding how these systems interact with your steering axis is essential for maintaining control, especially when navigating busy urban paths or uneven gravel trails.

When you load weight onto the front of a bicycle, it alters the steering inertia. Racks that mount directly to the fork rotate with your handlebars, meaning any cargo weight will directly resist your steering inputs and can cause the wheel to “flop” when parked. Choosing a mounting style that positions the load as low and close to the steering axis as possible minimizes this handling penalty.
If your bike lacks standard threaded eyelets, you do not necessarily have to buy a new fork. Various aftermarket adapters, such as rubber-coated p-clamps, specialized axle-mounting brackets, or stem-clamping systems, can adapt non-standard frames. However, these adapters often have lower weight limits and require more frequent safety checks than direct-threaded connections.
Fork Eyelet and Mid-Fork Bosses
Racks that bolt directly into lower dropout eyelets and mid-fork bosses provide the most stable and structurally secure connection possible. By utilizing threaded steel or aluminum inserts built directly into the fork’s structure, these racks distribute the cargo’s weight evenly across the strongest parts of the front triangle.
This direct integration allows for low-rider rack configurations, which position the bulk of your pannier bags on either side of the front wheel hub. Keeping the weight low minimizes the leverage the cargo has over your handlebars, resulting in predictable steering and reduced front-wheel wobble at high speeds.
The primary limitation of this style is compatibility; if your bicycle has a lightweight carbon fork or a suspension fork without these specific threaded inserts, you cannot use a traditional eyelet-mounted rack without risking severe structural damage to your frame.
Quick-Release and Thru-Axle Adapters
For bicycles lacking lower eyelets, axle-mounted racks offer a robust alternative by utilizing the wheel’s axle to support the weight of the cargo. These systems use specialized brackets that slide directly onto a longer quick-release skewer or mount via custom thru-axle adapters designed to replace your bike’s original axle.
When selecting an axle-mounted system, you must verify the exact specifications of your existing axle, including the total length, diameter, and thread pitch. A mismatch of even half a millimeter in thread pitch can strip the internal threads of your fork, leading to an expensive and dangerous failure.
While axle mounts provide excellent vertical load support, they can reduce the clearance around your brake calipers and wheel dropouts. Additionally, you must re-verify your wheel’s security after installing or removing the rack, as the mounting brackets add extra thickness to the axle assembly that can affect how tightly the quick-release or thru-axle clamps down.
Handlebar Clamp and Brake Mount Options
Handlebar-clamped racks and small porteur-style racks that attach to the front brake mount or fork crown are popular for carrying light, accessible items. These systems clamp directly around the handlebars near the stem and often use a secondary support strut running down to the fork crown or axle.
Because these racks position the cargo high above the front wheel, they have strict weight limitations, typically restricted to five kilograms or less. Overloading a handlebar-mounted rack raises your bicycle’s center of gravity, making the steering highly sensitive to wind gusts and causing the front wheel to swing rapidly when you try to balance or park.
Additionally, mounting a rack to your front brake caliper bolt introduces extra stress to a critical safety component. You must ensure that the rack’s mounting bracket does not interfere with the free movement of your brake arms, pinch your brake cables, or compress hydraulic hoses during tight turns.
Match the Rack to Your Specific Bike Type
Different bicycle categories feature distinct frame geometries, wheel sizes, and intended uses, all of which dictate the type of front rack you should choose. A rack that works perfectly on a dedicated touring bike may be completely unusable on a folding commuter bike or a front-suspension mountain bike.
To preserve your bike’s original handling characteristics, you must match the rack’s physical dimensions and weight capacity to the bike’s design. For example, putting a heavy, wide steel porteur rack on a lightweight road bike will ruin its agile steering, while a minimalist rack may not offer enough support for a rugged gravel adventure.
Furthermore, you must account for dynamic clearances. As your bike moves, tires can flex, mud can accumulate, and suspension forks will compress. Your chosen rack must maintain a safe distance from all moving parts under all riding conditions to prevent sudden wheel lockups.
Folding and Compact Bikes
Folding and compact commuter bikes, common in dense urban environments, present unique challenges due to their small wheels and folding mechanisms. When choosing a front rack for a folding bike, your primary concern is ensuring the rack does not interfere with the folding hinge or the compact nesting of the frame.
Look for racks specifically designed for compact wheel sizes, as standard-sized racks will sit far too high, creating an unstable center of gravity and blocking your view of the road. Many folding bike manufacturers offer proprietary front carrier blocks that bolt directly to the frame’s headtube rather than the fork, allowing the rack and cargo to remain stationary when you steer.
If you opt for a fork-mounted rack, prioritize quick-release or easily detachable models so you can remove the rack in seconds before folding the bike for transit on buses or trains. Always verify that the rack’s struts do not obstruct the path of the folding handlebars or pinch the control cables when the bike is fully collapsed.
Road, Gravel, and Hybrid Bikes
Rigid-fork road, gravel, and hybrid bikes are highly versatile platforms for front racks, but your choice should align with your riding style. For traditional road bikes with narrow tires, look for lightweight, low-profile racks that mount to the brake caliper bolt and quick-release axle to minimize aerodynamic drag and unnecessary weight.
Gravel and hybrid bikes, which are built for mixed-terrain riding and bikepacking, benefit from wider, high-capacity front platforms or low-rider racks. These bikes often feature multiple fork eyelets, allowing you to mount heavy water bottle cages or cargo cages directly to the fork legs, distributing your gear evenly for long-distance self-sufficiency.
When fitting a rack to a gravel or hybrid bike, pay close attention to tire and fender clearance. Ensure there is at least 10 to 15 millimeters of space between the underside of the rack and the top of your tire or fender to prevent trapped debris, such as mud or small stones, from stopping your front wheel abruptly.
Mountain Bikes with Suspension Forks
Mounting a front rack to a mountain bike with a suspension fork requires specialized equipment and careful consideration of suspension dynamics. You must never clamp a rigid rack directly to the moving inner stanchions of a suspension fork, as this will scratch the smooth surface, damage the dust seals, and cause oil leaks that ruin the fork’s performance.
Instead, look for specialized suspension-compatible front racks that secure to the lower, non-moving legs of the fork using heavy-duty, rubberized straps or specialized axle mounts. These designs allow the suspension fork to compress and rebound freely without transferring the impact forces directly into your cargo or binding the fork’s movement.
Keep in mind that adding weight to the lower legs of a suspension fork increases the “unsprung weight” of your bicycle. This extra mass makes the suspension less responsive to small bumps and alters your steering feel, meaning you should limit your cargo weight on suspension forks and reserve them for smoother, well-maintained paths.
Verify Load Capacity, Clearance, and Brake Compatibility
Before finalizing your purchase, you must verify that the rack’s physical specifications align with your cargo needs and your bike’s mechanical layout. Start by checking the manufacturer’s stated maximum load limit, which is typically rated in kilograms. Never exceed this limit, and remember that carrying cargo on rough, unpaved surfaces subjects the rack to higher dynamic forces, effectively reducing its safe carrying capacity.
Measure the physical clearance between the rack’s platform and your front tire. If you plan to install fenders for wet-weather riding, ensure the rack leaves enough vertical space to accommodate the fender profile without compressing it against the tire. A compressed fender can rub against the tread, causing rapid wear and potentially catching on the tire knobs, which can lead to a sudden crash.
Brake compatibility is another critical checkpoint. If your bicycle uses disc brakes, the caliper body mounted on the lower left fork leg will often physically block straight rack struts from reaching the eyelet. You must choose a disc-compatible rack, which features bowed or offset lower struts designed to curve around the caliper, or use spacer hardware to push the rack strut outward, ensuring it does not rub against the brake rotor or pinch the hydraulic brake hose.
Finally, ensure the installed rack does not block your front safety equipment. The rack platform and any cargo loaded onto it must not obstruct your front headlight or safety reflectors. If your handlebar-mounted light is blocked by your cargo, you will need to relocate the light to a dedicated mounting eyelet on the front of the rack itself to maintain visibility during night rides.
Pre-Installation Checks and Safety Boundaries
A proper pre-installation routine is essential to prevent mechanical failures while riding. Begin by inspecting all mounting hardware supplied with the rack. Ensure the bolts are of the correct thread pitch and length; bolts that are too short will not engage enough threads and may strip under load, while bolts that are too long can protrude through the inside of the fork leg and damage your tire or wheel spokes.
When assembling the rack, apply a small drop of medium-strength threadlocking compound to the bolt threads to prevent them from vibrating loose over time. As you tighten the bolts, check that the rack sits perfectly level and symmetrical. Avoid forcing a rack into place if the struts do not align naturally with your mounting points, as forcing them can bend your fork blades out of alignment or cross-thread the eyelets.
Establish clear stop-work conditions during installation. If you encounter stripped threads in your fork eyelets, notice any hairline cracks in your fork material (especially around welded joints or carbon layups), or find that the rack hardware is missing critical structural washers, stop immediately. Do not attempt to ride the bicycle with a partially secured or compromised rack.
If your bicycle features a carbon fiber frame or fork, or if you are dealing with a highly complex suspension setup, do not rely on guesswork. Carbon fiber is highly sensitive to clamping forces and point loads, which can cause sudden, catastrophic structural failure if exceeded. Always consult the bicycle manufacturer’s manual to verify if your specific fork is rated for front rack installation, or take your bike to a professional mechanic to ensure a safe, certified setup.
Frequently Asked Questions (FAQ)
Can I install a front rack on a carbon fork?
You should only install a front rack on a carbon fork if the manufacturer has explicitly rated the fork for cargo carrying and provided integrated, reinforced threaded eyelets. Carbon fiber is designed to handle specific directional forces and is highly vulnerable to crushing damage from aftermarket clamps or p-clamps. If your carbon fork lacks factory-installed eyelets, do not attempt to clamp a rack to it; instead, look for alternative cargo solutions such as a handlebar bag, frame bag, or a rear rack if your frame allows.
Do I need a specific rack for disc brakes?
Yes, if your bicycle is equipped with disc brakes, you will likely need a disc-compatible front rack. The disc brake caliper mounted on the lower fork leg typically protrudes outward, blocking the straight path of standard rack struts to the mounting eyelets. Disc-compatible racks are designed with offset, curved lower struts or include specialized spacer kits that allow the rack to clear the caliper body safely without interfering with the brake rotor or pinching the hydraulic lines.
Community discussion
Share your experience or ask a question. Comments are reviewed before publication.