
To make your balance ball trainer workouts safer and more effective, you should pair it with targeted support accessories: grip gloves to manage sweat-induced slipping, wrist wraps to stabilize joints during load-bearing exercises, heavy-duty resistance bands with secure external anchors, and a high-density non-slip mat to lock the base in place.
Using a balance ball trainer introduces an element of instability that forces your core and stabilizing muscles to work harder. However, this same instability can place unexpected stress on your joints and increase the risk of slipping, especially during dynamic exercises. Incorporating the right accessories ensures you can push your physical limits without compromising your safety or form.
Identifying When You Need Support Accessories
Recognizing the subtle signs of physical strain is the first step in determining when to add support gear to your fitness routine. It is common to experience muscle fatigue during an intense workout, but you must learn to distinguish this from joint strain. A deep, warm burn in your forearm muscles during a plank is a sign of healthy muscle engagement, whereas a sharp, pinching sensation in your wrist joints indicates harmful mechanical stress. Ignoring these sharp signals can lead to chronic repetitive strain injuries.
Products mentioned in this guide
![3H Fitness [46CM/58CM] Upgrade Bosu Yoga Balance Ball Fitness Gym Workout Half Yoga Ball Exercises Balance Trainer Ball](https://img.lazcdn.com/g/p/aeaa9601b120e1f9f9cd61096fe6c306.jpg_400x400q80.jpg_.webp)
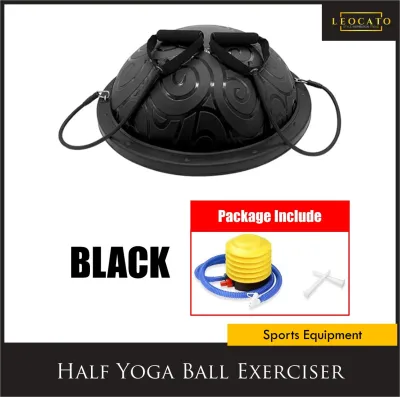

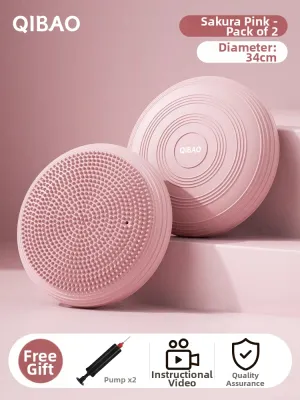
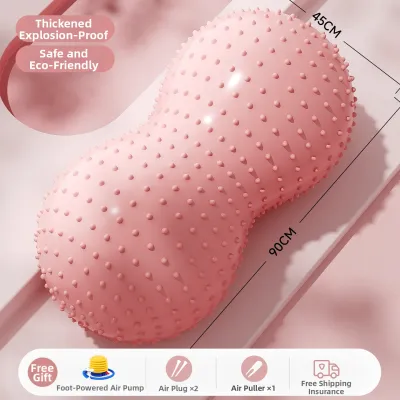
Prices are valid at publication and may change. Please refer to the product page for the latest price.
Environmental factors also play a critical role in your workout safety, particularly in tropical climates like Singapore’s. High humidity levels cause rapid sweat accumulation on your hands and the surface of the balance ball trainer. This moisture dramatically reduces friction, turning a controlled movement into a sudden slip hazard. If you find your hands sliding during push-ups or your feet losing traction during mountain climbers, external grip support is no longer optional—it is a safety necessity.
However, support accessories should never be used to mask poor form or push through an existing injury. There is a clear boundary between using gear for safe skill progression and relying on it as a physical crutch. If you lack the base strength to hold a proper plank on a flat surface, wrapping your wrists to force your way through a balance ball progression will only lead to injury elsewhere. Use accessories to stabilize and protect your body as you gradually increase the difficulty of exercises you can already perform with clean form.
Hand and Wrist Support: Gloves and Wraps
When you perform exercises on the unstable surface of a balance ball trainer, your hands and wrists must constantly micro-adjust to maintain balance. This continuous shifting increases the shear forces and extension angles acting on your wrist joints compared to performing the same movements on flat, solid ground. The wrist is often forced into extreme hyperextension, placing intense pressure on the delicate carpal bones and surrounding ligaments.

To protect these vulnerable areas, you can utilize two primary categories of hand and wrist gear: friction management accessories and joint stabilization accessories. Friction management, achieved through specialized grip gloves, focuses on maintaining a secure connection with the dome. Joint stabilization, achieved through structural wrist wraps, focuses on restricting excessive joint movement and absorbing load. Understanding how and when to apply each type of support will keep your upper body training safe and productive.
Grip Gloves for Sweat and Friction Management
Selecting the right grip gloves requires balancing moisture control with tactile feedback. In warm, humid environments, look for gloves made from highly breathable, moisture-wicking synthetic blends, such as lightweight nylon or polyester mesh. These materials allow air to circulate freely, preventing sweat from pooling inside the gloves and causing your hands to slide internally.
The palm design is the most critical safety feature of a workout glove used with a balance ball trainer. Opt for gloves featuring thin, textured silicone or rubber patterns across the palms and fingers. Avoid gloves with thick gel or foam padding; while padded gloves are excellent for heavy barbell lifts, they create an unstable barrier between your hand and the balance ball, reducing your ability to feel the surface and make rapid micro-adjustments. A thin, high-friction palm ensures you maintain direct sensory feedback while eliminating the risk of slipping.
Maintaining your gloves is also essential for preserving their grip performance and hygiene. Sweat, body oils, and chalk can quickly clog the textured silicone patterns, causing them to lose their non-slip properties. Always check the manufacturer’s care label before washing your gloves. Most grip gloves should be hand-washed in cool water with a mild detergent and hung to dry in a well-ventilated indoor area, away from direct sunlight, to prevent the rubber elements from cracking or peeling.
Wrist Wraps for Joint Stability During Load-Bearing Moves
Wrist wraps are highly beneficial during exercises where your full body weight is supported by your hands on the balance ball trainer. Movements like dome push-ups, plank variations, pike-ups, and handstand preparations place the wrist in extreme extension under a heavy load. A quality pair of supportive wraps helps distribute this load across the forearm, reducing the risk of hyperextension and joint fatigue.
To apply wrist wraps correctly, use the “thumb loop and spiral” method. Slip the elastic loop over your thumb, then pull the wrap snugly around your wrist joint, ensuring it covers the area where the hand meets the forearm. Wrap in a spiral pattern, keeping the tension firm but comfortable, and secure the hook-and-loop fastener. The wrap should feel supportive and stiff, limiting excessive backward bending of the wrist while still allowing your fingers to move freely to grip the sides of the trainer.
You must always monitor your physical sensations while wearing wrist wraps to prevent circulation issues. If your fingers begin to tingle, turn pale, feel cold, or lose sensation, stop your workout immediately and remove the wraps. These symptoms are clear signs that the wrap is too tight and is restricting blood flow or pinching a nerve. Reapply the wraps with slightly less tension, ensuring they provide structural support without cutting off circulation.
Adding Resistance Safely with Bands
Integrating resistance bands with a balance ball trainer is an excellent way to increase workout intensity, but it requires strict safety protocols to prevent accidents. The most important rule is to select bands that attach to secure external anchoring points, such as heavy, solid furniture, dedicated wall anchors, or a closed door with a heavy-duty door anchor. Never loop resistance bands directly under or around the balance ball trainer itself. Doing so can cause the ball to slip, roll, or flip unexpectedly when tension is applied, leading to a sudden fall.
You must also match the band’s resistance level to your current stability limits. Using a band with excessively high tension on an unstable surface creates strong lateral pulling forces that can easily pull you off balance. Start with light-to-medium resistance bands that allow you to maintain perfect control over your posture and core stability throughout the entire range of motion. As your balance improves, you can gradually transition to heavier bands.
Before starting any exercise session, perform a detailed physical inspection of your resistance bands. Look closely for micro-tears, small punctures, discoloration, or stretched anchor loops. The friction of bands rubbing against the textured plastic base or the rubber dome of a balance ball trainer can accelerate material wear and lead to sudden snapping. If you detect any signs of degradation, discard the band immediately and replace it.
Finally, never release a tensioned band abruptly while you are standing on or leaning against the balance ball trainer. A sudden release of tension will cause a rapid shift in your center of gravity, making a fall almost inevitable. Always return the band to its starting position under complete control before releasing your grip or stepping off the trainer.
Securing Your Base: Mats and Non-Slip Pads
The foundation of any safe balance ball trainer workout is a stable, non-slip base. In many modern homes, particularly HDB flats and condominiums in Singapore, flooring materials like polished ceramic tiles, marble, or smooth laminate are incredibly common. While these floors are beautiful and easy to clean, they offer very little traction. When you place a hard plastic-bottomed fitness tool on these slick surfaces, even minor lateral movements can cause the entire unit to slide out from under you.
To eliminate this hazard, always place your balance ball trainer on a high-density, non-slip yoga mat or a dedicated rubber equipment mat. The mat should be large enough to extend well beyond the perimeter of the trainer in all directions, providing a stable platform for both the equipment and your feet. Look for mats made from natural rubber or polyurethane, which offer superior grip on smooth floors and do not slide around during dynamic movements.
Before you step onto the trainer, perform a quick manual traction test. Place the balance ball trainer on the mat and apply firm downward and lateral pressure with your hands. If the trainer or the mat shifts even slightly, adjust the positioning or clean the underside of both surfaces to remove any dust or debris that might be reducing friction.
Never use thin, worn-out, or folded mats to secure your trainer. Thin mats can easily bunch up under the weight of the ball, creating uneven surfaces and tripping hazards during dynamic exercises like step-ups or lateral hops. A thick, stable, flat mat ensures your equipment stays exactly where you place it, allowing you to focus entirely on your form and balance.
Step-by-Step Setup and Pre-Workout Safety Checks
Establishing a consistent pre-workout routine is the best way to prevent equipment failure and ensure a safe training session. Follow this step-by-step checklist before every workout with your balance ball trainer and accessories:
Step 1: Inspect the balance ball trainer. Verify that the dome is properly inflated according to the manufacturer’s specifications. It should feel firm but retain a slight give when you press down on it; a completely rock-hard ball or a soft, saggy dome that bottoms out under your weight will compromise your stability and joint safety. Check the outer surface for any scratches, scuffs, or embedded debris that could lead to a puncture.
Step 2: Check all accessories. Examine your grip gloves, wrist wraps, and resistance bands for any signs of wear. Look for frayed stitching on the wraps, peeling silicone on the glove palms, and micro-tears or cracks in the resistance bands. Ensure all hook-and-loop fasteners secure tightly and do not slip under tension.
Step 3: Secure the environment. Clear a safety zone of at least 1.5 to 2 meters around your workout area. Remove any sharp objects, furniture with hard corners, or loose items from the floor. Lay down your high-density non-slip mat flat on the floor, ensuring there are no folds or ripples, and place the trainer in the center. If you are using resistance bands, double-check that they are anchored to a stable, load-bearing structure.
Step 4: Perform a low-intensity test run. Before starting your main workout, spend 10 to 15 seconds performing a low-intensity movement, such as a static plank with your hands on the dome or a basic squat standing on the flat platform. Use this time to assess the grip of your gloves, the stability of the base mat, and the comfort of your wrist wraps.
Abort conditions: You must stop your workout immediately if you observe any of the following warning signs: the plastic base of the trainer shifts on the mat, a resistance band slips from its anchor point, your mat begins to bunch up, your fingers feel numb or tingly from your wrist wraps, or you experience sharp, sudden joint pain.
Frequently Asked Questions (FAQ)
Can I use lifting straps instead of wrist wraps on a balance ball?
No, lifting straps and wrist wraps serve completely different functions and cannot be used interchangeably. Lifting straps are designed to loop around a barbell or dumbbell to assist your grip during pulling exercises, such as deadlifts or rows. They do not provide any compression or structural support to the wrist joint itself. Wrist wraps, on the other hand, are designed to wrap tightly around the wrist to stabilize the joint and prevent hyperextension during pressing or load-bearing movements on the balance ball trainer.
How do I clean my grip gloves and mats after sweaty workouts?
To clean your non-slip mat, wipe it down after every workout with a damp cloth and a mild, non-abrasive soap solution, then allow it to air-dry completely before rolling it up. This prevents sweat oils from breaking down the non-slip surface. For your grip gloves, hand-wash them in cool water with a gentle detergent, paying close attention to the palm area to remove any accumulated sweat and dirt. Air-dry the gloves in a well-ventilated indoor space away from direct heat or sunlight to protect the integrity of the silicone grip patterns, always following the manufacturer’s specific care instructions.
Community discussion
Share your experience or ask a question. Comments are reviewed before publication.