
Selecting the right resistance bands and tension levels for thigh workouts requires matching the equipment to your specific anatomy, movement patterns, and current strength baseline. Because the inner thighs (adductors) and outer thighs (abductors) differ significantly in muscle size, leverage, and functional capacity, a single band or tension level rarely suffices for a complete lower-body routine. Instead of relying on arbitrary brand rankings or fixed weight ratings, the most effective approach involves selecting a versatile multi-band set, understanding how different materials behave under tension, and verifying manufacturer specifications for safety and durability. By focusing on observable physical feedback, such as maintaining proper joint alignment and achieving muscle fatigue within targeted repetition ranges, you can safely optimize your thigh training while avoiding joint strain or premature equipment failure.
Understanding Resistance Tension for Inner and Outer Thighs
To target the thigh muscles effectively, you must first understand the distinct physiological differences between the inner and outer hip and thigh regions. The outer thighs and glutes are naturally geared toward abduction (moving the leg away from the midline). These muscles are relatively powerful and work in tandem with the larger gluteal complex, meaning they can typically handle moderate to heavy resistance levels during lateral movements. Conversely, the inner thighs consist of the adductor group, which brings the legs together. The adductors are often less accustomed to isolated heavy resistance in daily life, making them highly sensitive to overstrain. Consequently, inner thigh exercises generally require lighter, more controlled resistance to prevent compensatory movements and protect the delicate groin tendons.
Rather than relying on non-standardized weight ratings printed on bands, gauge your starting resistance levels using perceived exertion and target repetition ranges. A light band should allow you to complete 15 to 20 controlled repetitions with moderate effort, making it ideal for warm-ups, muscle activation, and sensitive inner thigh movements. A medium band should challenge you within the 12 to 15 repetition range, serving as the baseline for primary working sets. A heavy band is best reserved for shorter, high-intensity sets of 8 to 12 repetitions, typically during compound movements like squats or glute bridges where larger muscle groups assist the thighs.
Products mentioned in this guide
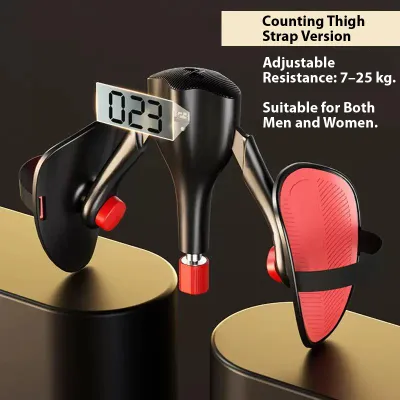
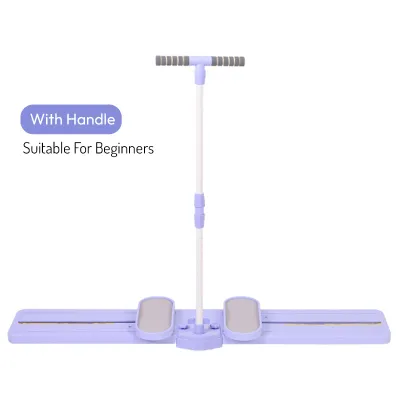


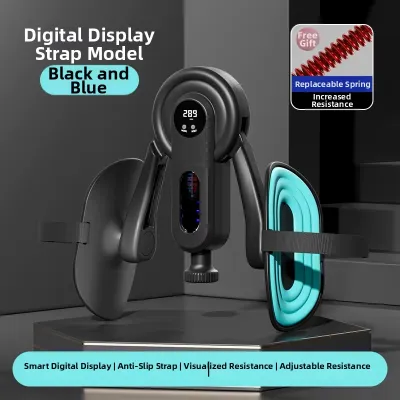
Prices are valid at publication and may change. Please refer to the product page for the latest price.
Recognizing the physical signs of incorrect resistance is crucial for preventing injury and ensuring muscle engagement. If a resistance level is too high, you will immediately notice compromised form: your knees may cave inward (valgus collapse) during squats, your lower back may arch excessively, or you may need to swing your torso to complete a movement. These compensatory patterns shift the load away from the target thigh muscles and place dangerous stress on the knee and hip joints. On the other hand, if the resistance is too low, you will finish your planned set without feeling any deep muscle fatigue or warmth in the target area, rendering the exercise inefficient for building strength or endurance.
Selecting the Right Band Style and Material for Leg Workouts
The physical design and material composition of a resistance band directly dictate its suitability for specific thigh exercises. Mini loop bands, which typically measure 25 to 30 centimeters in length, are the standard choice for lower-body training. Their compact loop design allows them to stay securely anchored around your thighs, knees, or ankles without requiring handles or anchors. These are exceptionally effective for closed-loop movements such as lateral band walks, clamshells, and lying hip abductions, where continuous lateral tension is required to keep the muscles engaged throughout the entire range of motion.

For larger, open-loop movements, long loop bands or tube bands equipped with dedicated ankle straps offer superior versatility. These styles are ideal for standing hip adductions, cable-style kickbacks, and straight-leg extensions. By anchoring one end of a long band to a sturdy, low structure and securing the other end to your ankle, you can perform controlled sweeping motions that target the inner and outer thighs through a much larger range of motion than mini loops allow. The ankle strap interface is particularly beneficial here, as it distributes the pulling force comfortably across the lower leg rather than concentrating pressure on a single point of the foot or ankle.
When choosing between fabric-woven bands and traditional latex or rubber bands, you must weigh the trade-offs in grip, durability, and elasticity. Fabric bands are highly favored for thigh exercises because they are wider, thicker, and inherently resistant to rolling or sliding. They stay flat against your skin or workout leggings, eliminating the painful pinching and pulling of body hair common with rubber. However, fabric bands have a limited stretch capacity and tend to offer a much stiffer, higher starting resistance. Traditional latex or rubber bands offer a smoother, more progressive stretch profile, making them highly adaptable for fine-tuning tension. Yet, they are highly prone to rolling up into tight, high-pressure cords during high-friction movements, and they can degrade rapidly when exposed to sweat and friction.
How to Evaluate and Choose Reliable Resistance Band Brands
With countless fitness brands offering lower-body resistance bands, identifying a high-quality, durable product requires a systematic evaluation of manufacturer specifications rather than relying on marketing claims. Begin by verifying the material composition of the bands. For rubber or latex bands, look for manufacturers that specify the use of multi-layered dipping processes, which generally offer superior tensile strength and snap resistance compared to cheap synthetic TPE (thermoplastic elastomer) alternatives. For fabric bands, check for a high-density weave that incorporates double-stitching along the seams and non-slip inner latex strips to prevent sliding during dynamic movements.
A reliable brand should also provide clear, consistent resistance level indicators. Look for manufacturers that publish detailed tension charts, showing the estimated resistance in kilograms or pounds at specific stretch percentages. Standardized color-coding is helpful, but because color schemes are not universal across the industry, brands that clearly print the tension level (e.g., Light, Medium, Heavy) directly onto each band are much easier to manage during fast-paced workouts. Additionally, prioritize brands that offer comprehensive warranties or satisfaction guarantees, as this indicates confidence in their product’s structural integrity and provides a clear recourse if a band snaps prematurely.
Before making a purchase, analyze verified user feedback on independent fitness forums and retail platforms, focusing specifically on how the bands perform during lower-body workouts. Search for reviews that mention “rolling,” “sliding,” “snapping,” or “stretching out.” If multiple users report that a fabric band loses its elasticity after a few weeks of use, or that a latex band rolls into a thin string during lateral walks, it is a strong indicator of poor material quality or inadequate manufacturing standards. A trustworthy brand will also offer replacement parts or individual bands for sale, allowing you to replace a single worn-out level without being forced to purchase an entirely new multi-band set.
Structuring Your Thigh Exerciser Routine and Progression
Integrating resistance bands into your thigh routine requires a structured approach that balances muscle activation with progressive overload. Begin your workout with a dedicated activation phase using a light resistance band. This phase is not meant to exhaust the muscles, but rather to establish a strong mind-muscle connection and warm up the joints. Perform high-repetition, low-intensity movements such as standing side-leg raises or seated abductions to prepare the inner and outer thighs for the heavier loads to come. Once warmed up, transition to your primary working sets using a medium or heavy band, focusing on compound movements like banded squats, Romanian deadlifts, or glute bridges where the band forces you to actively push your knees outward against the resistance.
Adjusting the physical placement of the band is a highly effective, tool-free method for modifying exercise difficulty and leverage. Placing the band above your knees is the most stable and accessible position, as it reduces the lever arm and places less shear stress on the knee joints, making it ideal for beginners or heavy squat variations. Moving the band down to your ankles increases the lever arm, significantly raising the difficulty and demanding greater stabilization from the hip and outer thigh muscles. For an advanced challenge, placing the band around the arches of your feet during lateral walks directly engages the hip flexors and deep stabilizing muscles of the lower leg.
To ensure continuous progress, you must apply the principles of progressive overload systematically. Do not rush to move up to a heavier band level; instead, first focus on increasing your training volume by adding more repetitions or sets while maintaining flawless form. Another highly effective progression method is to increase the time under tension. When you can comfortably complete all planned sets and repetitions with perfect control and minimal muscle burn, it is time to transition to the next resistance level. Alternatively, you can safely stack two lighter bands together to create a custom, intermediate tension level before jumping to a much stiffer heavy band.
Safety Checks, Maintenance, and When to Replace Your Bands
Because resistance bands store significant kinetic energy when stretched, a sudden snap or slip can cause painful bruising or serious injury. To mitigate this risk, perform a quick visual and tactile inspection of your bands before every single workout. Gently stretch the band and look closely for micro-tears, tiny punctures, white stress marks, thinning areas, or fraying along the edges. Run your fingers along the entire length of the band to feel for any hidden cracks or structural inconsistencies. If you detect even the slightest sign of physical damage, discard the band immediately; a damaged band is highly unstable and cannot be safely repaired.
Proper storage and maintenance are essential for preserving the elasticity and structural integrity of your bands over time. After a sweaty workout, wipe down your bands with a damp cloth to remove body oils, sweat, and dirt, which can slowly degrade the material. Avoid using harsh chemical cleaners or alcohol-based sanitizers, as these will dry out latex and weaken fabric fibers. Allow the bands to air dry completely in a shaded, well-ventilated area away from direct heat sources. Store your bands in a cool, dry place out of direct sunlight, as ultraviolet rays and extreme temperatures cause latex to become brittle, sticky, and highly prone to snapping.
Knowing when to retire a band is a fundamental aspect of workout safety. Over months of regular use, all resistance bands will naturally lose their elasticity, becoming permanently stretched out or softer than their original tension level. If you notice that a band feels significantly looser or no longer retracts to its original shape, it has reached the end of its functional lifespan. Do not attempt to stretch a worn-out band further to compensate for the loss of tension, as this drastically increases the risk of a sudden, violent snap. Proactively replacing your bands ensures your workouts remain both safe and consistently challenging.
Frequently Asked Questions (FAQ)
Can I use the same resistance band for both inner and outer thigh exercises?
No, using a single resistance band for both inner and outer thigh exercises is generally ineffective due to the natural strength imbalance between these opposing muscle groups. The outer thighs can handle moderate to heavy resistance, while the inner thighs require lighter, more controlled tension to prevent strain. To train both areas safely and effectively, you should utilize a multi-band set that allows you to easily switch between lighter tension for adduction and heavier tension for abduction.
Do fabric resistance bands work better than rubber ones for leg day?
Fabric resistance bands are generally superior for lower-body workouts because they are wider, thicker, and feature a textured weave that prevents them from rolling, sliding, or pinching your skin during dynamic movements. However, traditional rubber or latex bands still have a place in leg day; they offer a much larger range of motion and a smoother, more progressive stretch profile, making them better suited for exercises that require deep stretching or ankle-strap attachments.
How do I know if my resistance band is too tight for my thighs?
Your resistance band is too tight if you experience a breakdown in your exercise form, joint pain, or an inability to complete the full range of motion. If you cannot complete your target repetitions without sacrificing alignment or feeling strain in your knee or hip joints, you should immediately downgrade to a lighter band level to protect your joints and ensure the target thigh muscles are doing the actual work.
Community discussion
Share your experience or ask a question. Comments are reviewed before publication.