
Flying a large kite is a classic outdoor activity that brings families together, offering a screen-free way to enjoy Singapore’s beautiful coastal parks. When shopping for a kite, beginners and families often face a confusing array of options, from cheap plastic toys to highly technical stunt kites. Choosing a large kite offers the perfect balance of high visibility, stable flight, and manageable pull. By focusing on reputable brands and forgiving designs, families can ensure a successful, stress-free day of flying.
Selecting the right equipment requires matching the kite’s specifications to your skill level, the local weather, and your transportation methods. A well-designed large kite will self-correct in uneven wind gusts, making the experience rewarding for children and adults alike. Understanding the physical characteristics of beginner-friendly kites is the first step toward a successful outdoor adventure.
What Makes a Large Kite Ideal for Beginners and Families?
In the context of family kite flying, “large” typically refers to models with a wingspan of 40 to 60 inches. While a larger size might seem intimidating at first, it actually provides a distinct aerodynamic advantage over smaller alternatives. The generous surface area allows the kite to capture lighter breezes more efficiently, resulting in a more stable and predictable flight path. This inherent stability gives beginners more time to react to shifts in wind direction, preventing the sudden dives and spins common with smaller, twitchier kites.
Products mentioned in this guide
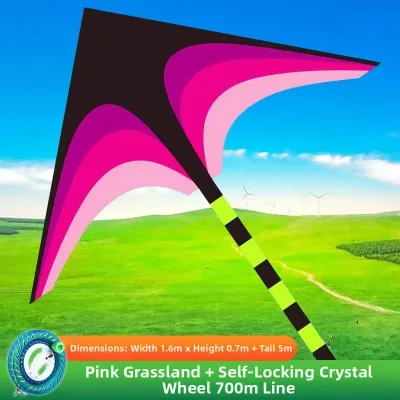
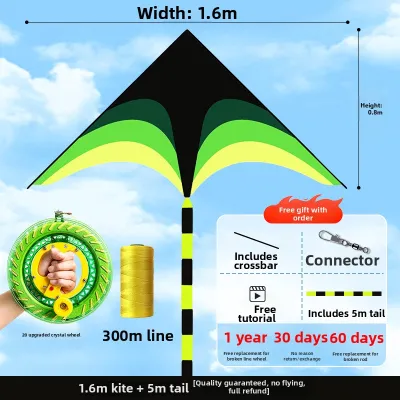
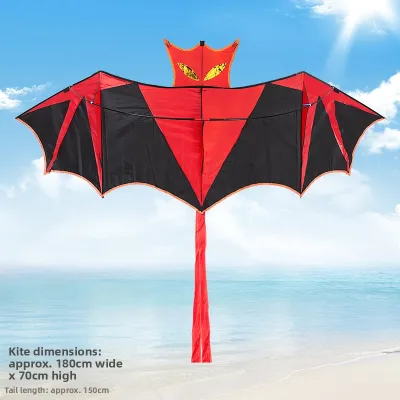
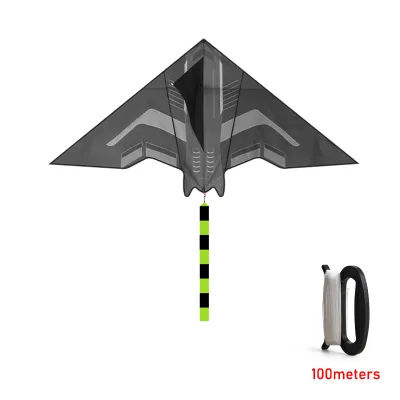
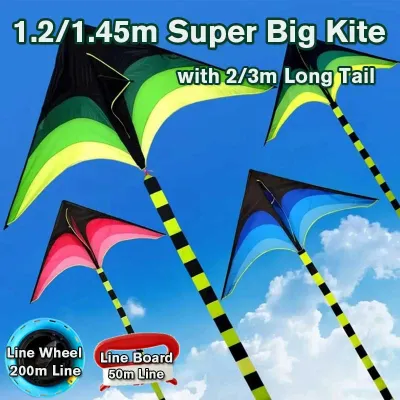
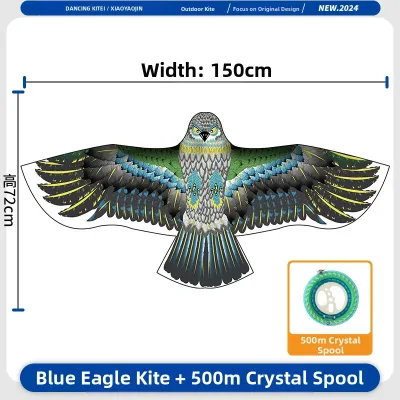
Prices are valid at publication and may change. Please refer to the product page for the latest price.
Frame materials play a critical role in how well a kite performs and how long it survives. For beginners, flexible fiberglass spars are highly recommended over rigid carbon fiber or brittle plastic. Fiberglass is exceptionally resilient, meaning it can bend significantly under the pressure of sudden wind gusts or high-impact crashes without snapping. Carbon fiber, while lightweight, is often too rigid and expensive for casual family use, whereas cheap plastic spars tend to warp in the heat or crack upon impact.
Sail material is another key factor in long-term durability. High-quality family kites feature sails made from ripstop nylon or ripstop polyester. These fabrics are woven with a special reinforcing technique that makes them highly resistant to tearing. If a small puncture does occur, the ripstop grid prevents the tear from spreading across the sail. This is a massive upgrade over thin plastic films, which can tear completely from a single snag on a tree branch or a sharp blade of grass.
Additionally, the bridle and tow-point system dictates how the kite interacts with the wind. A bridle is the network of strings attached to the kite’s frame that connects to the main flying line. For families, an adjustable, multi-point bridle is ideal because it allows you to change the angle of attack based on the wind speed. In lighter winds, adjusting the bridle can help the kite lift more easily, while in stronger winds, it can reduce the pull to keep the flight manageable. Many beginner-friendly kites come with pre-set, easy-to-adjust bridle configurations, eliminating the need for complex knot-tying.
Identifying the Best Kite Brands and Styles for Beginners
When searching for a family kite, it is important to distinguish between specialty kite manufacturers and generic toy brands. Specialty brands focus heavily on aerodynamics, structural engineering, and high-quality materials. These manufacturers design their kites to fly reliably in a wide range of wind conditions, whereas generic toy brands often prioritize low production costs, resulting in kites that are difficult to launch and prone to breaking. Furthermore, established specialty brands typically offer replacement parts, detailed assembly guides, and dedicated customer support.

Before making a purchase, always inspect the product specifications and labels. Look for reinforced stitching at key stress points, such as the pockets where the spars insert and the areas where the bridle attaches to the sail. These high-stress zones are the most common failure points on cheaper models. Additionally, check that the kite package includes a high-quality flying line. Many cheap kites come with thin, monofilament plastic lines that tangle easily and can cut into hands. Reputable brands package their kites with braided polyester or dacron lines on a comfortable, ergonomic winder.
Delta and Diamond Kites for Stable Flight
Delta kites, named for their triangular shape resembling the Greek letter, are widely considered the easiest kites for beginners to fly. Their wide wingspan and built-in fabric keel act as natural stabilizers, allowing the kite to self-correct in turbulent air. Delta kites excel in light to moderate winds and require very little user input to stay aloft. If a delta kite does touch down, its design makes it incredibly easy to relaunch from the ground simply by pulling on the line, making it a highly rewarding choice for young children.
The classic Diamond kite remains a popular choice for families due to its iconic shape and nostalgic appeal. Modern diamond kites from reputable brands have been updated with advanced materials and precise bridle systems that greatly improve their stability. To ensure a steady flight, modern diamond kites are almost always paired with long, colorful fabric tails. These tails are not just decorative; they provide essential aerodynamic drag that prevents the kite from looping or diving when the wind picks up.
Parafoil and Soft Kites for Hassle-Free Setup
Parafoil kites offer a completely different design philosophy by eliminating the rigid frame altogether. Instead of spars, parafoils rely on the wind to inflate internal fabric cells, creating a curved airfoil shape that generates lift. Because there are no fiberglass or carbon fiber rods to assemble, there is zero risk of breaking a frame during a hard crash or accidentally poking a finger during setup. This frameless design makes parafoils virtually indestructible, which is highly advantageous for families with enthusiastic young children.
Another major benefit of parafoil kites is their extreme portability. Without rigid spars, a large parafoil can be rolled up into a compact pouch no larger than a water bottle. This makes them incredibly easy to pack into a backpack or carry on public transport when traveling to Singapore’s parks. Setup takes only a few seconds: simply unpack the kite, untangle the bridle, attach the flying line, and let the wind do the rest of the work.
Navigating Singapore’s Parks, Winds, and Kite Regulations
Flying a large kite in Singapore requires a solid understanding of local regulations to ensure safety and compliance. The Civil Aviation Authority of Singapore (CAAS) enforces strict rules regarding kite flying to protect airspace, especially near military and civilian airports. Large portions of Singapore are designated as no-fly zones or restricted areas, particularly around Changi Airport, Paya Lebar Air Base, and Seletar Airport. Before heading out, it is essential to consult the official CAAS airspace maps to verify that your chosen location is safe and legal for kite flying. Generally, casual kite flying is restricted to a maximum height of 200 feet (approximately 60 meters) above ground level, and flying any kite near aerodromes or within restricted airspace without a permit is strictly prohibited.
Understanding Singapore’s unique tropical weather and wind patterns is also key to a successful outing. The wind conditions in Singapore are heavily influenced by the monsoon seasons. The Northeast Monsoon (typically December to March) and the Southwest Monsoon (typically June to September) bring steady, moderate breezes that are ideal for launching large beginner kites. However, Singapore is also prone to sudden, severe thunderstorms and rapid weather changes. Always check the local weather forecast before leaving home. If you notice dark clouds gathering, hear thunder, or feel sudden, violent wind gusts, safely retrieve your kite immediately. Wet lines can conduct electricity, and sudden storm surges can make a large kite impossible to control.
Fortunately, Singapore offers several world-class open spaces that are perfect for family kite flying. Marina Barrage is perhaps the most famous spot, featuring a spacious, elevated green roof that catches consistent sea breezes from the Singapore Strait. East Coast Park, particularly around Areas C and D, offers miles of open coastline with steady winds and plenty of space to spread out. West Coast Park’s Grand Lawn is another excellent option for families living in the western part of the island. When choosing a spot within these parks, always look for wide-open areas far away from crowded walking paths, cycling tracks, power lines, and dense tree lines.
Maintaining clear safety boundaries is crucial when flying a large kite in public parks. Because large kites generate significant pull, the flying line can become highly tensioned and virtually invisible to passersby. Avoid flying close to playgrounds, busy footpaths, or park connectors where cyclists and runners travel at high speeds. Always ensure you have a clear buffer zone downwind of your position, so that if the kite drops suddenly, it will not land on other park users or drift into nearby water bodies.
Step-by-Step Setup and Launching Tips for Family Outings
A successful family kite-flying experience begins with a methodical pre-flight setup. Before heading out onto the field, find a flat, grassy area to assemble your kite. Carefully inspect the fiberglass spars for any signs of cracking or splintering, and ensure they are securely seated in their designated corner pockets. Check the sail for any small tears or loose stitching, particularly around the bridle attachment points. Finally, run the first few meters of the flying line through your fingers to check for knots, fraying, or weak spots that could snap under tension.
Once the equipment is verified, the “high-start” or partner-launch technique is the most effective and safest way to get a large kite into the air. This method works best with two people: one launcher and one flier. The launcher holds the kite by its frame or keel and walks downwind, away from the flier, letting out about 15 to 20 meters of line. The flier stands upwind, holding the spool securely. When both are in position and a steady breeze is felt, the flier signals the launcher to release the kite. The launcher should gently toss the kite upward into the wind, rather than throwing it forward, while the flier takes a step back and gently pulls the line to create tension and lift.
Managing the spool and line tension is an active process that requires coordination. As the kite climbs, the flier should let out line gradually, maintaining just enough tension to keep the kite stable. If the line is let out too quickly, the kite will lose tension and drift downward; if held too tightly, the kite may pull aggressively or spin. In lighter winds, you can “pump” the line by pulling it in a few meters and then slowly releasing it, which helps the kite climb past turbulent air near the ground into steadier breezes aloft.
Beginners frequently make a few common mistakes that can cut their flying session short. The most common error is over-steering or constantly pulling on the line. Once a large, stable kite reaches its cruising altitude, it will generally fly itself with minimal input; constantly tugging on the line can introduce instability. Another mistake is attempting to launch in “wind shadows”—turbulent, low-wind areas directly behind large trees, buildings, or pavilions. Always move well away from these obstructions to find clean, laminar airflow. Finally, never pull the line aggressively if the kite begins to dive, as this will only accelerate its descent. Instead, take a step forward to slacken the line slightly, allowing the kite’s natural aerodynamics to self-correct and level out.
How to Clean and Store Your Kite for Long-Term Durability
Proper post-flight care is essential for protecting your investment and ensuring your large kite remains airworthy for future family outings. When you are finished flying, take your time winding the flying line back onto the spool. Avoid wrapping the line too tightly, especially if you are winding it around the kite’s frame or spars, as the tension can warp the frame over time. Wind the line in neat, even layers to prevent tangles and knots from forming inside the storage bag. If the line became wet or sandy during the flight, let it dry completely before winding it tightly to prevent rot and UV degradation.
Before packing the kite away, it is crucial to clean off any debris accumulated during the day. This is especially important after flying at coastal locations like East Coast Park or Marina Barrage, where salt spray and fine sand can settle on the fabric. Wipe down the entire sail and the spars with a clean, damp microfiber cloth to remove salt, sand, and dirt. Never use harsh chemical detergents or abrasive brushes, as these can strip away the protective UV and water-resistant coatings on the fabric. Allow the kite to air dry completely in a shaded, well-ventilated area before folding it. Packing a damp kite will rapidly lead to the growth of mold and mildew, which can rot the stitching and ruin the sail.
For long-term storage, keep your kite in a cool, dry place away from direct sunlight and extreme temperatures, such as a hot car trunk or a humid outdoor balcony. Prolonged exposure to heat and humidity can weaken the adhesives used in the reinforcement patches and cause the synthetic fabrics to degrade. If your kite features removable spars, slide them out of their pockets and store them parallel to each other, or place them in a dedicated protective tube to prevent them from bending or warping under pressure.
Frequently Asked Questions (FAQ)
What wind conditions are best for large beginner kites?
Most large beginner kites perform best in steady, light to moderate breezes, typically ranging from 5 to 15 miles per hour (approximately 8 to 24 kilometers per hour). A practical way to assess the wind without a wind meter is to observe your surroundings: the wind is ideal when leaves on trees rustle and small branches begin to move gently. If large tree branches are swaying heavily or umbrellas are difficult to hold, the wind is too strong for safe beginner flying.
Are there height restrictions for flying kites in Singapore?
Yes, kite flying in Singapore is strictly regulated to ensure aviation safety. Under the Civil Aviation Authority of Singapore (CAAS) guidelines, the general height limit for flying kites in permitted public areas is 200 feet (approximately 60 meters) above ground level. Flying a kite above this height, or within restricted zones near military airbases and Changi Airport, is illegal without a permit. Always verify the local airspace status on the official CAAS website before flying.
How do I prevent kite string burns during family flights?
To prevent painful friction burns, never wrap the flying line around your hands, fingers, or any part of your body. Large kites can generate sudden, powerful pull during wind gusts, which can cause the line to slip rapidly through your grip. Always use a proper kite spool or winder equipped with a secure handle and a locking mechanism. For added safety, especially when flying in stronger coastal winds, have the person managing the line wear lightweight, snug-fitting protective gloves.
Community discussion
Share your experience or ask a question. Comments are reviewed before publication.