
Choosing the right resistance level for a flat rubber band is the difference between an effective, joint-friendly workout and a frustrating session plagued by rolling latex or strained muscles. Unlike traditional weights, where the load is constant and clearly stamped in kilograms, flat rubber bands rely on progressive tension that increases as the material stretches. Selecting the appropriate band requires matching your current physical baseline with the specific mechanical demands of your target exercises. Whether you are activating your glutes in a compact living room, building lower-body strength, or recovering from an injury, understanding how to gauge and adjust this tension ensures your training remains both safe and productive.
Assess Your Current Fitness Level and Baseline Strength
To select a safe baseline resistance, evaluate your current physical conditioning, training history, and joint health. If you are new to resistance training or returning after a long hiatus, your muscles and connective tissues require time to adapt to elastic tension. Starting with a lower resistance level allows you to master movement patterns without overloading your joints.
Your training history plays a critical role in this selection process. Individuals who regularly perform bodyweight exercises or lift weights can typically begin with a medium-strength band for lower-body movements, while those starting from scratch should opt for the lightest available option. It is essential to account for any joint sensitivities, past knee or hip injuries, or lower back discomfort, as these conditions demand a highly conservative starting point to prevent flare-ups.
Products mentioned in this guide
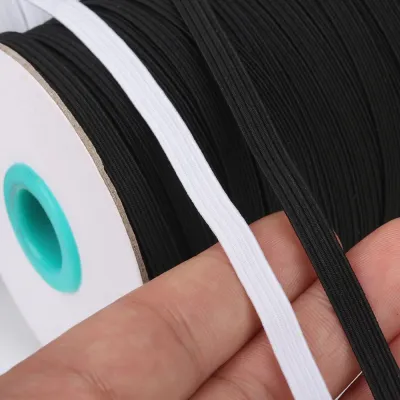


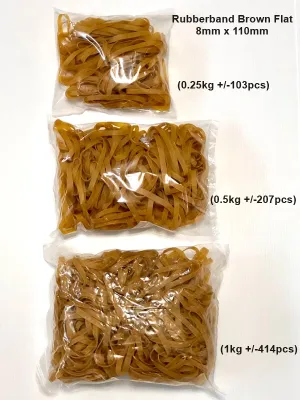
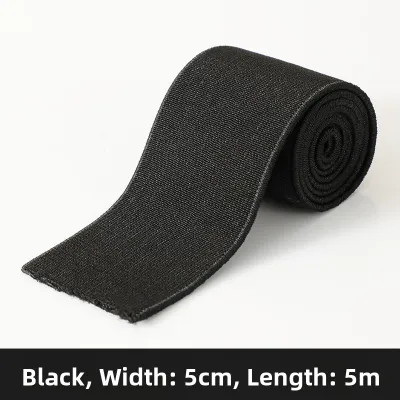
Prices are valid at publication and may change. Please refer to the product page for the latest price.
When shopping for a flat rubber band, manufacturers categorize resistance using general labels such as extra-light, light, medium, heavy, and extra-heavy. Because there is no universal industry standard, a “medium” band from one brand may feel significantly stiffer than a “medium” from another. Rather than relying on estimated weight equivalents, treat these labels as relative guides within a single brand’s ecosystem, and always begin your exercises with the lighter band in your set to test your tolerance.
Match Resistance Levels to Specific Workout Goals
Aligning your band tension with your specific training objectives is crucial for maximizing the benefits of elastic resistance. Different exercises and workout phases place unique demands on your muscles, meaning a single band is rarely sufficient for an entire routine. Your choice of resistance must shift dynamically depending on whether you are preparing your nervous system, building muscle tissue, or restoring joint mobility.

Throughout this process, maintaining proper form and achieving a full range of motion must always take precedence over maximizing resistance. If a band is so stiff that it restricts your movement or forces you to compensate with other muscle groups, the training effect is lost. Selecting the right level involves finding the sweet spot where the band provides continuous, manageable tension throughout the entire exercise path.
Glute Activation and Warm-Ups
Before transitioning to heavy lifts or high-intensity workouts, performing warm-ups with a flat rubber band helps prime your muscles and nervous system. For glute activation exercises, such as lateral band walks or clamshells, a light to medium-light resistance band is highly effective. This level of tension is sufficient to wake up the gluteus medius and maximus without causing premature muscular fatigue that could compromise your main workout.
Using a light band allows you to focus entirely on the mind-muscle connection, ensuring that the target muscles are firing correctly. If the resistance is too heavy during a warm-up, your body will naturally seek the path of least resistance, leading to observable compensation patterns. You might notice your hips hiking upward, your lower back arching excessively, or your knees collapsing inward as you try to force the band open. If you observe these signs, immediately switch to a lighter band to restore proper alignment.
Leg Workouts and Strength Building
When your goal shifts to muscle hypertrophy, endurance, or lower-body strength, you will need to transition to medium, heavy, or extra-heavy flat rubber bands. To stimulate muscle growth, the resistance must challenge your muscles through both the concentric phase (when the muscle shortens, such as pushing outward during a squat) and the eccentric phase (when the muscle lengthens under control). The band should offer enough resistance that the final few repetitions of your set feel challenging but remain technically sound.
You can also modify the effective resistance of a flat rubber band simply by changing its placement on your body. Placing the band higher up on your thighs, just above the knees, shortens the lever arm, making the exercise feel slightly easier and reducing stress on the knee joints. Moving the band down to your ankles or around the arches of your feet increases the lever arm, significantly raising the difficulty of the movement without requiring a thicker band.
Rehabilitation and Mobility
Using flat rubber bands for rehabilitation or mobility work requires a highly cautious approach that prioritizes joint safety and tissue recovery. For these applications, extra-light resistance bands are the standard choice, as they allow for slow, highly controlled, and pain-free movements. The goal here is not to fatigue the muscle to failure, but to gently introduce blood flow, improve joint lubrication, and restore lost ranges of motion.
Safety is paramount during recovery exercises, and you must establish clear stopping conditions. If you experience sharp pain, joint clicking accompanied by discomfort, or sudden muscle spasms, cease the exercise immediately and consult a qualified healthcare professional or physical therapist. Additionally, always check the manufacturer’s specifications regarding material elasticity, safe stretch limits, and care instructions to prevent the band from snapping during delicate rehabilitation movements.
How to Test and Adjust Your Flat Rubber Band Resistance
To ensure you are working at the correct intensity, use the “reps in reserve” (RIR) method to gauge your resistance level. If your workout plan calls for 12 repetitions of an exercise, the resistance should be heavy enough that you feel you could only complete 2 or 3 more clean repetitions after finishing the set (representing 2–3 RIR). If you finish 12 repetitions and feel you could easily perform another 10, the band is too light; if you cannot reach 10 repetitions without your form breaking down, the band is too heavy.
If you do not have a full set of bands on hand, you can easily adjust the tension of a single flat rubber band using simple mechanical adjustments. To increase the resistance without switching to a thicker band, you can widen your stance or grip to pre-stretch the band, fold the band in half to double its thickness, or shorten the distance between your anchor points. These techniques increase the baseline tension of the rubber, making the exercise more challenging from the very start of the movement.
Conversely, if you need to decrease the tension to complete a set with proper form, you can narrow your stance or grip to reduce the initial stretch, or increase the distance from your anchor point. This flexibility makes flat rubber bands highly versatile, but it also means you must inspect your equipment regularly. Before every workout, perform a quick visual and physical check of your bands, looking for micro-tears, discoloration, dry rot, or a loss of elasticity. In warm and humid climates, rubber can degrade more rapidly if stored in direct sunlight or damp areas, making pre-workout inspections essential for preventing sudden snaps.
Signs You Need to Change Your Resistance Level
Recognizing when to progress or regress your resistance level is key to avoiding training plateaus and injuries. If your current band is too light, you will notice a distinct lack of muscle fatigue at the end of your sets, and you will be able to complete your repetitions with excessive speed and minimal effort. When an exercise no longer challenges your stability or requires focused muscular contraction, it is time to move to a higher resistance tier.
On the other hand, attempting to use a band that is too heavy will quickly manifest as form breakdown. If you find yourself swinging your body to momentum-drive the movement, experiencing joint strain in your knees or hips, or failing to control the eccentric return phase of the exercise, the resistance is excessive. A band that is too stiff will snap back quickly, pulling your limbs out of alignment and increasing the risk of acute muscle strains.
To implement progressive overload safely, transition to the next resistance level gradually. When you can comfortably complete all your target sets and repetitions with perfect form and minimal RIR for two consecutive workouts, try introducing the heavier band for just the first set of your next session. As your strength and endurance adapt, you can gradually increase the number of sets performed with the heavier band until you have fully transitioned to the new resistance tier.
Frequently Asked Questions (FAQ)
Can I combine multiple flat rubber bands to increase resistance?
Yes, you can stack multiple flat rubber bands together to increase the total resistance of an exercise. Combining bands alters the tension curve, making the resistance build up more steeply as the bands stretch, which can put additional stress on your anchor points. When stacking bands, perform a thorough safety check to ensure they are aligned flat against each other without twisting, which prevents them from rolling, slipping, or snapping during movement. If you find yourself regularly stacking three or more light bands, it is generally safer, more practical, and more comfortable to purchase a single heavier band designed for that level of tension.
How often should I reassess my flat rubber band resistance level?
As a general guideline, you should reassess your flat rubber band resistance level every four to six weeks of consistent training. This timeframe allows your muscles and nervous system to adapt to the current workload, meaning a band that once felt challenging may now serve better as a warm-up tool. You may also need to reassess your resistance immediately if your workout goals change, if you introduce new exercises that alter your mechanical leverage, or if you are transitioning through different stages of injury recovery under professional guidance.
Community discussion
Share your experience or ask a question. Comments are reviewed before publication.