
Selecting the right power meter is one of the most effective ways to transition from casual riding to structured, data-driven training. When evaluating the Magene power meter lineup, the ideal choice for your bicycle depends on three primary factors: your existing drivetrain components, your preferred installation location, and your specific training data requirements. Because power meters must integrate seamlessly with your bike’s mechanical parts, understanding how these devices measure your effort is the first step toward making an informed decision.
Whether you are navigating the flat, fast park connectors of Singapore or preparing for demanding climbs abroad, a power meter provides an objective measure of your physical output, unaffected by wind, terrain, or fatigue. Magene offers several configurations, including crank-arm, spider-based, and pedal-based systems. By matching these configurations to your frame clearance, bottom bracket standard, and riding discipline, you can find a reliable training tool that fits both your bicycle and your budget.
Understanding Power Meter Measurement Types
Power meters calculate your wattage by measuring torque (how hard you push the pedals) and cadence (how fast your pedals are spinning). The location where these forces are measured determines the type of power meter you need and influences the complexity of installation, the transferability between bikes, and the depth of data you receive.
Products mentioned in this guide
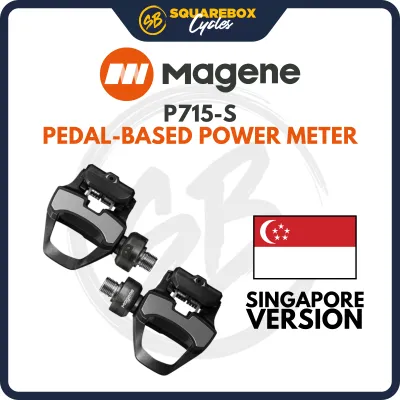
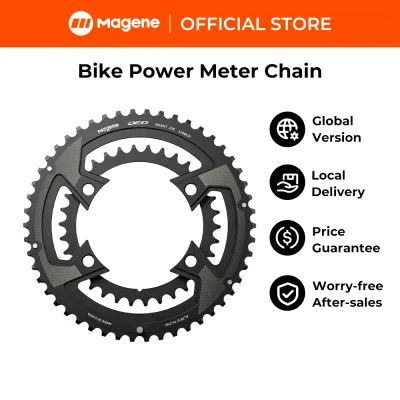
Prices are valid at publication and may change. Please refer to the product page for the latest price.
Single-sided power meters typically measure the force exerted on the left crank arm. Because they only capture data from one leg, they multiply that value by two to estimate your total power output. This method is highly cost-effective and provides a reliable baseline for general training and pacing. However, if you have a natural leg strength imbalance—which is common among many cyclists—this single-sided estimation may slightly overstate or understate your actual total wattage.
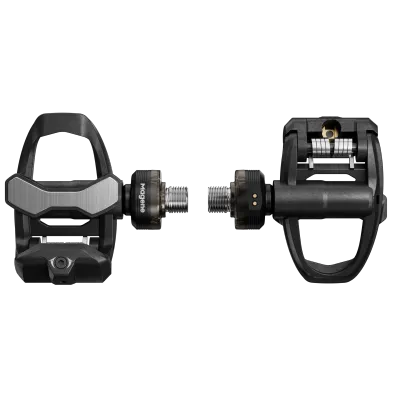
Dual-sided power meters measure both legs independently. This is typically achieved through dual-sided pedals or dual-crank systems. By capturing separate left and right leg data, these systems provide precise insights into your pedaling efficiency, torque effectiveness, and left/right power balance. This level of detail is highly valuable for riders focused on refining their pedaling technique or recovering from a one-sided injury.
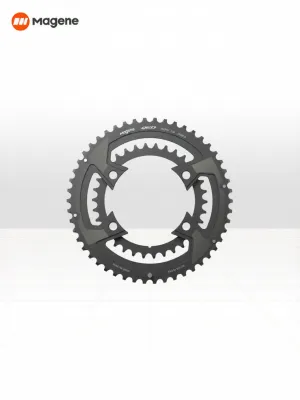
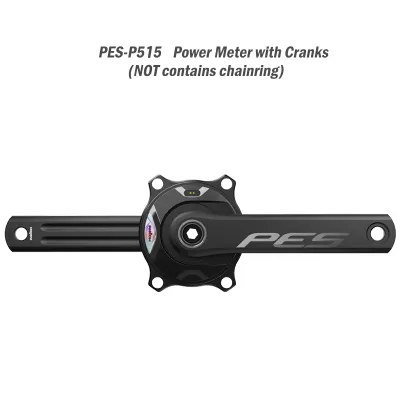
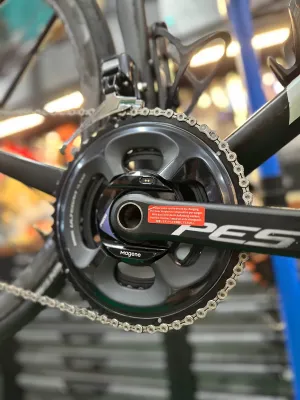
Spider-based power meters sit at the center of your crankset, measuring the combined force of both legs as it is transferred through the chainrings. While a spider-based system does not measure each leg completely independently like dual-sided pedals do, it provides highly consistent and reliable total power data. Many spider-based units use advanced algorithms to estimate left and right power distribution based on the position of the crank rotation, offering a practical middle ground between single-sided simplicity and true dual-sided measurement.
Checking Crankset and Bottom Bracket Compatibility
Before purchasing any power meter, verifying physical compatibility with your bicycle is essential. Different power meter designs interact with different parts of your drivetrain, and a mismatch can prevent installation or damage your frame.

If you are considering a left-crank power meter, you must first check your crank arm material and frame clearance. Left-crank units feature a small sensor pod bonded to the inner face of the crank arm. This pod requires adequate clearance to pass the bike’s chainstay without rubbing. A common way to verify this is the clearance test: slide a 10mm object between your current left crank arm and your frame’s chainstay at the point where a sensor would sit. If there is not enough clearance, a crank-arm power meter will not fit. Additionally, while alloy crank arms are highly compatible with aftermarket or pre-installed crank-arm power meters, carbon fiber crank arms have unique structural shapes and manufacturing processes that often limit compatibility to specific, dedicated models.
For spider-based power meters, compatibility centers on your bottom bracket standard, spindle diameter, and chainring configuration. You must identify your frame’s bottom bracket shell standard (such as BSA threaded, BB86, or PF30) and ensure the power meter’s spindle matches both the bottom bracket and your frame width. Common spindle diameters include 24mm, 28.99mm, and 30mm. Furthermore, you must verify the Bolt Circle Diameter (BCD) and the number of bolts (typically 4-bolt or 5-bolt patterns) on your chainrings to ensure they can mount securely to the new power meter spider.
Pedal-based power meters offer the most straightforward physical compatibility, as they thread directly into standard 9/16-inch crank arm pedal threads. However, compatibility here shifts to your cycling shoes and cleats. You must ensure the pedal system matches your preferred riding style and shoe type. For example, road-specific power pedals typically require three-bolt road cleats, while off-road or gravel riders must verify if the pedal body supports two-bolt mountain bike cleats.
Because drivetrain standards vary widely across bicycle brands and model years, always consult your specific bike frame, crankset, and bottom bracket manufacturer specifications to confirm exact fitment before making a purchase.
Aligning Your Choice with Riding Discipline and Data Needs
Your choice of power meter should also align with where you ride, how you train, and how you manage your equipment. Different cycling disciplines place unique demands on your gear, making certain power meter placements more practical than others.
For competitive road cyclists and triathletes, maximizing aerodynamic efficiency and minimizing weight are often top priorities. In these disciplines, dual-sided data can be highly beneficial for fine-tuning your riding position and maintaining a smooth, balanced power output over long, solo efforts. Spider-based and pedal-based systems are highly popular in this segment because they offer clean integration, minimal aerodynamic drag, and comprehensive data metrics.
If your riding takes you onto gravel paths, rough trails, or mountain bike courses, durability and ground clearance become critical factors. Off-road riding exposes your equipment to rock strikes, mud, water, and debris. In these environments, a spider-based power meter is often the most robust choice because the sensor is tucked safely away in the center of the crankset, shielded by the chainrings. Pedal-based systems, while highly convenient, are more exposed to direct impacts from rocks and trail obstacles, which can risk damaging the sensitive strain gauges housed inside the pedal spindle.
Battery configuration is another practical consideration for long-distance touring or endurance riders. Power meters generally utilize either rechargeable lithium-ion batteries or replaceable coin-cell batteries. Rechargeable systems are highly convenient and environmentally friendly, often featuring magnetic charging ports that seal out moisture effectively. However, if you plan long multi-day trips where charging opportunities are limited, a system that uses easily sourceable replaceable batteries might be more practical, allowing you to carry spares in your saddle bag.
Finally, ensure the power meter supports dual-protocol wireless connectivity, utilizing both ANT+ and Bluetooth Smart. This guarantees that the device can transmit data simultaneously to your handlebar-mounted cycling computer, your smartwatch, or an indoor training setup running on a tablet or computer.
Verifying Authenticity and Planning the Installation
To ensure a smooth ownership experience, it is vital to purchase your power meter through authorized channels and follow precise installation protocols.
When purchasing a Magene power meter, always buy from authorized distributors, official brand stores, or reputable local bike shops. This ensures you receive an authentic product, a valid local warranty, and access to official customer support. Purchasing from unauthorized parallel importers on online marketplaces may leave you without warranty coverage if the device encounters a hardware issue or requires replacement parts.
Once you have your power meter, the initial setup is crucial for data accuracy. Begin by downloading the manufacturer’s companion app on your smartphone. Use the app to register your device, check for the latest firmware updates, and perform the initial calibration. Firmware updates are particularly important, as they often resolve connectivity bugs, improve battery management, and refine power calculation algorithms.
During physical installation, adhering to manufacturer torque specifications is critical. Power meters rely on highly sensitive strain gauges to measure microscopic flex in metal or carbon components. Incorrect torque—either under-tightening or over-tightening—can distort these measurements, leading to inaccurate wattage readings. More importantly, over-tightening bolts on carbon crank arms or delicate bottom bracket components can cause structural cracks or strip threads, ruining expensive parts. Always use a calibrated torque wrench and follow the exact Newton-meter (Nm) values specified in the user manual.
If you are unfamiliar with bottom bracket removal tools, chainring installation, or crankset assembly, do not attempt to force the installation. Stop and consult a professional bike mechanic at your local bike shop. A professional can ensure that your bottom bracket is properly faced, your chainline is correct, and your power meter is installed safely and accurately.
Frequently Asked Questions (FAQ)
Do I need a dual-sided power meter for indoor training?
For the vast majority of indoor training and virtual cycling on platforms like Zwift, a dual-sided power meter is not strictly necessary. Most smart trainers and virtual platforms calculate and display total power accurately, and single-sided power meters provide more than enough consistency for structured workouts, virtual races, and pacing. A dual-sided power meter is only necessary if you require highly specific left/right balance data, are performing targeted pedal-stroke analysis, or are undergoing physical therapy to correct a significant leg strength discrepancy.
How often should I calibrate the power meter?
To maintain high data accuracy, it is best practice to perform a zero-offset calibration before every ride. This process resets the baseline reading of the strain gauges when no force is applied to the pedals. Calibration is especially important when there are significant temperature changes—such as moving your bicycle from an air-conditioned indoor room out into the warm, humid Singapore climate—as temperature shifts can cause materials to expand or contract slightly, affecting the strain gauges. Always consult your specific model’s user manual or the companion app for the exact calibration procedure, which typically involves positioning the crank arms vertically and initiating the zero-offset command through your cycling computer or smartphone app.
Community discussion
Share your experience or ask a question. Comments are reviewed before publication.