
To choose the right pull buoy, you must match its buoyancy, shape, and physical dimensions to your swimming skill level and training objectives. Swimmers aiming to correct a sinking lower body require a high-buoyancy, traditional figure-8 buoy to establish a horizontal profile. Conversely, those seeking to build upper-body strength or refine body rotation benefit from medium-to-low buoyancy models, or specialized asymmetrical designs that challenge core stability. Selecting the ideal gear involves assessing your body composition, identifying your stroke deficiencies, and ensuring the physical fit prevents skin chafing while remaining secure during flip turns.
In Singapore’s active swimming community—whether you are training at a local public pool, preparing for an open-water swim, or refining your stroke in a private facility—the pull buoy is an indispensable training tool. However, grabbing a generic option online can hinder your progress. A poorly matched buoy can overcompensate for technique flaws or cause physical strain. This guide provides a systematic approach to evaluating pull buoys so you can invest in gear that directly supports your athletic development.
Identify Your Primary Training Goal: Technique or Strength
Before looking at specific products, you must define what you want to achieve during your pool sessions. Pull buoys serve two primary training purposes: correcting body alignment (technique) and isolating the upper body to build muscular endurance (strength). Your primary training goal dictates the buoyancy profile and physical shape of the tool you need.
Products mentioned in this guide
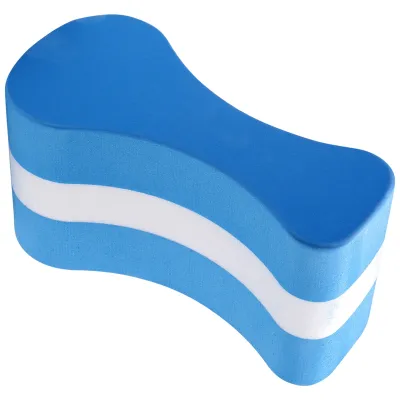
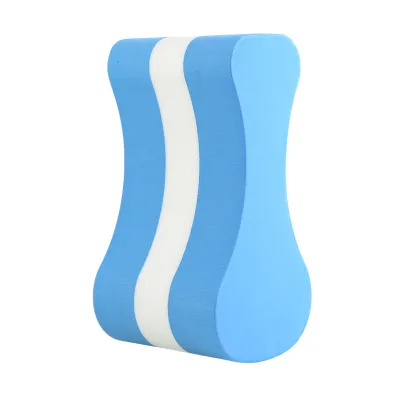
![[Instock] EVA Foam Pull Buoy](https://img.lazcdn.com/g/p/2236775f886845daf428a24a84e439dc.png_400x400q80.png_.webp)
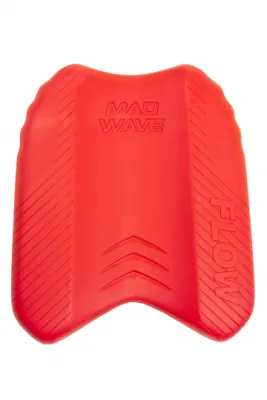
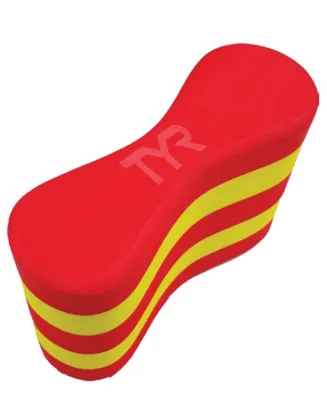
Prices are valid at publication and may change. Please refer to the product page for the latest price.
For swimmers focusing on technique, the main challenge is often a sinking lower half. Sinking legs create hydrodynamic drag, forcing you to expend excessive energy just to stay level. A pull buoy solves this by providing passive flotation to your hips and thighs. This artificial lift mimics an efficient body position, allowing you to relax your lower body and focus entirely on your catch, pull phase, and breathing rhythm. If your goal is to correct a low-riding hip position or master complex stroke drills without the distraction of kicking, you require a buoy that offers significant, reliable lift.
If your focus is strength building, the pull buoy serves as an isolation tool. By squeezing the buoy between your thighs, you completely immobilize your legs, eliminating the propulsive force of your kick. This forces your shoulders, lats, chest, and core to do all the work of pulling you through the water. For strength training, more buoyancy is not always better. An excessively buoyant tool can lift your hips too high, creating an unnatural downhill swimming angle that reduces the resistance your upper body needs to overcome. Instead, strength-focused swimmers often prefer a streamlined, moderate-buoyancy buoy that keeps them level but requires active core engagement to maintain stability.
To determine your primary need, evaluate your current swimming weaknesses. If you find yourself gasping for air because your legs are dragging behind you like an anchor, your priority is technique and maximum alignment support. If you can swim long distances with a balanced stroke but want to build specific shoulder power and upper-body endurance for longer sets, your priority is strength and core isolation.
Key Design Features of a Pull Buoy to Evaluate Before You Buy
When shopping for a pull buoy at local sporting goods stores or browsing specialized online swim shops, look past marketing buzzwords and focus on three objective design features: shape, volume, and material.

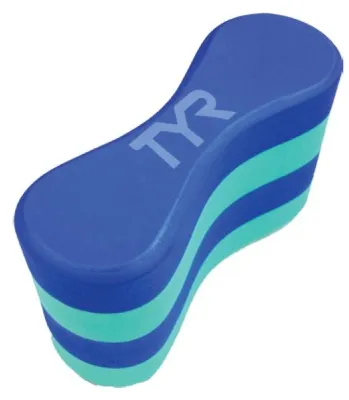
Shape and Contour The physical shape of a pull buoy determines how it interacts with your body and the water. The most common design is the traditional figure-8 shape, which features a narrow center channel and wider, rounded ends. This contour is designed to fit snugly between your upper thighs, utilizing the natural curves of your legs to keep the buoy in place without requiring constant, high-force squeezing. It offers excellent stability and is the ideal starting point for most swimmers. Asymmetrical designs, which have one end larger than the other, allow you to customize the amount of lift by choosing which end faces upward. Cylindrical or block-style buoys are less common today but are sometimes used for specific coaching drills because they offer uniform resistance and require more active leg grip to keep secure.
Volume and Buoyancy Buoyancy is directly related to the volume of the buoy and the density of the foam used. Larger buoys displace more water and provide greater upward force, which is highly beneficial for heavier swimmers or those with dense, muscular legs that sink easily. However, advanced swimmers often seek lower-volume buoys. A smaller buoy provides just enough lift to keep the legs horizontal while offering minimal surface area, reducing water resistance as you glide. Additionally, a lower-volume buoy requires more active core stabilization to prevent your hips from fish-tailing during the stroke, providing a more rigorous workout for your abdominal and lower back muscles.
Material and Durability Nearly all modern pull buoys are constructed from Ethylene-Vinyl Acetate (EVA) foam. However, the quality of this foam varies significantly. Look for high-density, closed-cell EVA foam, which resists water absorption. Low-quality open-cell foams can absorb water over time, causing the buoy to become heavy, waterlogged, and prone to mold growth—a particular concern in Singapore’s humid tropical climate. Closed-cell foam also offers superior resistance to pool chemicals like chlorine and bromine. Always check the product label for chemical-resistance specifications and consult the manufacturer’s care instructions to ensure the material will withstand regular exposure to treated pool water.
Recommended Pull Buoy Profiles for Different Swimmers
To help you select the right gear, we have categorized the most effective pull buoy profiles based on swimmer experience and training objectives.
For Beginners: Maximizing Buoyancy and Body Alignment
Novice swimmers often struggle with multitasking in the water, trying to coordinate their kick, arm stroke, and bilateral breathing simultaneously. For this group, the primary objective of a pull buoy is to simplify the learning process by taking the legs out of the equation entirely.
- Recommended Profile: A standard, high-volume figure-8 pull buoy made from high-density, highly buoyant EVA foam.
- Key Benefits: This profile provides maximum lift, instantly raising the hips and legs to the surface. By establishing a horizontal body position with zero kicking effort, beginners can focus on the mechanics of the arm pull, the entry angle of the hands, and the timing of their breaths. It eliminates the panic of sinking, allowing for relaxed, mindful technique practice.
- Limitations and Risks: While highly beneficial for early-stage learning, relying too heavily on a high-buoyancy buoy can be counterproductive. It can mask poor core engagement and bad posture. If you use it for every set, your core muscles will remain passive, and you may struggle to maintain a flat body position once the buoy is removed. Use it as a targeted drill tool rather than a permanent crutch.
For Intermediate Swimmers: Balancing Buoyancy and Resistance
Intermediate swimmers typically have a reliable stroke and decent body alignment but want to transition from basic flotation to active conditioning and upper-body strength development.
- Recommended Profile: A medium-buoyancy, ergonomically contoured figure-8 buoy, or an asymmetrical model that allows for adjustable lift.
- Key Benefits: A medium-buoyancy profile provides enough support to keep you aligned but does not lift you so high that you lose the feel of the water. The ergonomic contouring ensures the buoy stays locked between your thighs during aggressive flip turns and faster pacing. This balance allows you to perform longer endurance sets, isolating the upper body while forcing your core to do a small amount of stabilization work.
- Key Features to Look For: Look for textured surfaces or subtle ridges along the center channel. These physical features improve grip against wet skin or swimwear fabric, preventing the buoy from slipping backward during high-tempo sets or forceful underwater push-offs.
For Advanced Swimmers: Targeted Strength and Asymmetrical Drills
Experienced athletes, competitive swimmers, and triathletes use pull buoys to introduce specific biomechanical challenges, build elite upper-body power, and refine their body rotation.
- Recommended Profile: Low-buoyancy, highly streamlined, or asymmetrical pull buoys. Some advanced swimmers also utilize specialized ankle-pull buoys or band-and-buoy setups.
- Key Benefits: Low-buoyancy models provide minimal lift, requiring the swimmer to actively engage their lower back, glutes, and abdominal muscles to keep their legs from dragging. Asymmetrical models can be oriented to provide uneven lift, challenging the swimmer to maintain a symmetrical body roll and stroke rate.
- Advanced Drills: Placing a compact pull buoy between the ankles or calves, rather than high up between the thighs, significantly increases the lever length of your body. This placement demands exceptional core strength to prevent your lower body from swaying and increases the rotational resistance during your body roll.
- Safety Boundary: Ankle placement should only be attempted by swimmers with excellent baseline core strength and stroke mechanics. If you have existing lower back vulnerabilities, hip issues, or shoulder impingement, placing the buoy at your ankles can place excessive torque on your joints. Always prioritize safety and return the buoy to the standard thigh position if you feel any joint strain.
How to Ensure a Secure and Comfortable Fit
A pull buoy that does not fit your body properly will quickly become a source of frustration. If the buoy is too wide or too narrow for your physical frame, it can ruin your body alignment and cause painful skin irritation.
To find the right fit, you must match the width of the buoy’s center channel to your natural thigh gap when your legs are relaxed. Swimmers with narrower hips or more slender leg profiles often find standard-sized buoys too wide. A buoy that is too wide forces your legs apart, creating an unnatural swimming posture that can strain your hip flexors and outer glute muscles. Conversely, swimmers with broader builds or muscular thighs may find smaller buoys slip out easily because there is not enough surface contact to secure them.
Perform these observable checks to evaluate the fit of a pull buoy:
- Too Loose: If the buoy constantly slides down toward your knees, twists sideways during your stroke, or slips out completely when you perform a flip turn, the buoy is too small, lacks sufficient gripping texture, or the center channel is too narrow for your thighs.
- Too Tight: If you have to squeeze your thighs together with significant force to keep the buoy in place, or if you feel the hard edges of the foam pressing uncomfortably into your inner thigh muscles, the buoy is too wide or the material is too rigid. This constant squeezing can restrict blood flow, leading to premature muscle fatigue or cramping.
When purchasing a pull buoy, it is highly recommended to test the physical properties of the foam. If shopping at a local retail store, gently squeeze the center channel of the buoy. The foam should have some give to conform to your inner thighs but should quickly spring back to its original shape. If you are purchasing from an online marketplace, carefully review the manufacturer’s dimensions and check the seller’s return and exchange policies. Because foam density and compression rates vary widely between brands, being able to exchange a buoy that feels too stiff or too soft is a valuable safeguard.
Proper Placement and Safety Checks to Prevent Strain
Using a pull buoy correctly is not just about keeping it between your legs; it requires precise placement and constant awareness of your body’s alignment to prevent acute strain or long-term injury.
The standard and safest placement for a pull buoy is high up on your inner thighs, positioned close to your groin. This position places the buoyant force directly under your center of mass, providing optimal lift to your pelvis and lower spine. When positioned correctly, your hips should sit level with the water’s surface, and your spine should remain in a neutral, straight line from your head to your tailbone.
A common and dangerous mistake among swimmers using pull buoys is arching the lower back. This often happens when a swimmer uses a buoy that lacks sufficient volume for their body weight, or when their core muscles are too weak to support their horizontal position. To keep their legs from sinking, they unconsciously hyperextend their lumbar spine, creating a dramatic arch in their lower back. This posture places immense compressive stress on the lumbar vertebrae and can lead to severe lower back pain.
To ensure a safe training session, always perform these safety checks and adhere to these stop conditions:
- Before Your Swim: Ensure your swim gear—including your swimsuit and pull buoy—is free of grit or sand, which can cause severe chafing when trapped between the foam and your skin.
- During Your Swim: Focus on keeping your belly button drawn in toward your spine to engage your deep core muscles. This active engagement supports your lower back and keeps your hips steady.
- Stop Condition – Lower Back: If you experience a dull ache or sharp pain in your lower back while using the pull buoy, stop immediately. Remove the buoy and swim a few easy laps with a gentle kick to release the tension. Do not attempt to push through back pain.
- Stop Condition – Shoulder Discomfort: Because a pull buoy isolates your upper body, your shoulders bear 100% of the workload. If you feel sharp pain in the front of your shoulder (anterior shoulder) or a pinching sensation when your arm enters the water, stop using the buoy. This discomfort often indicates shoulder impingement or rotator cuff strain from overuse.
- Professional Guidance: If you experience persistent pain after your swim sessions, stop using the pull buoy entirely and consult a certified swim coach or a qualified physiotherapist. Equipment should enhance your training, never replace proper biomechanical instruction or medical advice.
Frequently Asked Questions (FAQ)
Can I use a pull buoy if I experience lower back discomfort?
Yes, but you must proceed with extreme caution and use the correct technique. A pull buoy can sometimes relieve lower back discomfort by lifting your legs and reducing the need to kick, which can take pressure off your lumbar spine. However, if the buoy has insufficient buoyancy or if you fail to engage your core, your lower back may arch excessively, worsening your discomfort. If you suffer from chronic lower back pain, always consult a physiotherapist or a certified swim coach before incorporating a pull buoy into your training routine to ensure it does not aggravate your condition.
Is it beneficial to combine a pull buoy with a front-mounted swim snorkel?
Combining a pull buoy with a front-mounted swim snorkel is a highly effective training strategy. By using the pull buoy to float your legs and the snorkel to eliminate the need to turn your head to breathe, you remove almost all external distractions. This setup allows you to focus entirely on your hand entry, catch mechanics, pull path, and body roll. However, this combination requires a solid foundation of breath control and core stability. Beginners should master using each tool individually before attempting to combine them in a single training set.
How should I clean and store my pull buoy to prevent material degradation?
To maximize the lifespan of your pull buoy, rinse it thoroughly with clean, fresh tap water after every pool session. This removes residual chlorine, salt, and body oils that can slowly break down the EVA foam. After rinsing, place the buoy in a well-ventilated, shaded area to air-dry completely. Avoid leaving your pull buoy in direct sunlight, such as on a balcony or in the back of a car in Singapore’s intense heat. Prolonged UV exposure and high temperatures will degrade the foam, causing it to become brittle, lose its buoyancy, or develop a sticky surface texture.
Community discussion
Share your experience or ask a question. Comments are reviewed before publication.