
The most suitable Quad Lock mount for your bicycle depends entirely on your handlebar’s shape, diameter, and available mounting space. For standard round handlebars, an out-front or handlebar clamp mount offers clear visibility and reliable stability. For integrated cockpits, aero bars, or crowded handlebars, a stem mount or specialized adapter provides a secure alternative without compromising your bike’s aerodynamics or structural integrity.
Selecting the wrong mount style can lead to improper clamping, which may damage your handlebars or cause your phone to slip during a ride. By taking a few precise measurements and assessing your cockpit layout, you can easily identify the exact mounting system required for a safe and secure setup.
Quick Diagnostic: Identifying Your Handlebar and Mount Style
Finding the right phone mount starts with a quick assessment of your bicycle’s cockpit. The appropriate mounting solution is determined by three primary factors: the outer diameter of your handlebar, its cross-sectional shape (whether it is a standard round tube or an aerodynamic oval profile), and the physical space available next to your stem.
Products mentioned in this guide
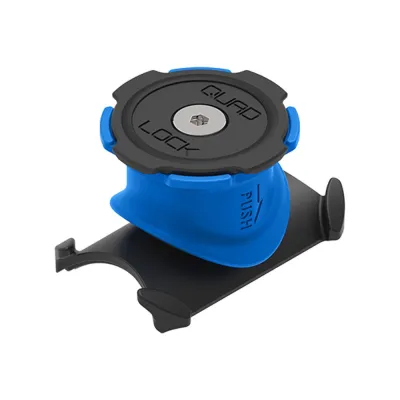
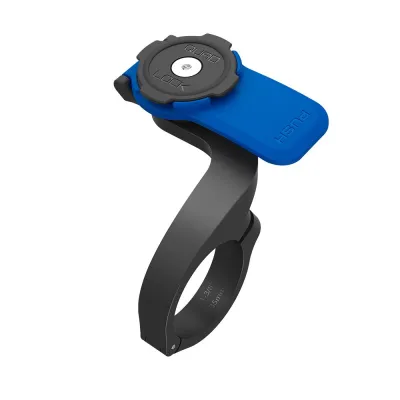
Prices are valid at publication and may change. Please refer to the product page for the latest price.
Before purchasing any mounting hardware, you must inspect your cockpit layout. Taking a few minutes to measure your handlebar and identify potential obstructions—such as brake hoses, gear cables, or integrated computer mounts—will prevent compatibility issues and ensure a secure, vibration-resistant installation.
Measure and Identify Your Handlebar Shape and Diameter
To determine which mount fits your setup, you must first measure the exact outer diameter of your handlebar at the precise location where you plan to clamp the mount. Bicycle handlebars are rarely uniform in thickness; they typically taper from a wider diameter near the center stem to a narrower diameter near the grips. Using a pair of digital or vernier calipers is an accurate way to obtain this measurement, as it provides a direct millimeter reading.

If you do not have calipers, you can use a flexible sewing tape measure or wrap a strip of paper around the tube, mark the overlap, and measure the flat length with a standard ruler to find the circumference. To calculate the diameter from the circumference, divide the measurement by pi (approximately 3.142). For example, a circumference of roughly 100 mm corresponds to a standard 31.8 mm handlebar diameter.
Next, identify the shape of your handlebar. Standard round tubes are the most common and are generally categorized into standard sizes (such as 22.2 mm, 25.4 mm, or 31.8 mm) or oversized options (such as 35 mm). Aero handlebars, frequently found on modern road and gravel bikes, feature an oval or airfoil-shaped top section designed to reduce wind resistance. These non-round profiles cannot accept standard circular clamps without specialized adapters.
Finally, evaluate the available clamping space on your cockpit. Look closely at how your brake hoses, gear cables, and electronic shifting wires exit the handlebar or stem. On integrated cockpits where the handlebar and stem are molded as a single carbon piece, there may be no round clamping surface at all. Note any potential interference from existing accessories, such as front lights, bell mounts, or GPS cycling computers, which might compete for the same physical space.
Match Your Handlebar Specs to the Correct Mount Style
Once you have documented your handlebar’s physical dimensions, you can match these specifications to the appropriate mount style. Each mounting option is engineered for specific riding positions, handlebar shapes, and space constraints.
Out-Front Mounts
Out-front mounts position your phone directly ahead of your stem, keeping the screen in your natural line of sight without requiring you to look down excessively. This style is highly suited for standard and oversized round handlebars on road, gravel, or hybrid bikes where you have sufficient space next to the stem clamp. By extending the phone forward, this mount frees up valuable real estate on your actual handlebars for your hands or other accessories, making it a popular choice for long-distance PCN (Park Connector Network) rides in Singapore.
Stem Mounts
Stem mounts are a practical alternative for bicycles with limited handlebar space, integrated cockpits, or aero bars where clamping directly to a round tube is impossible. This mount style typically attaches directly to the top of your steering column via the stem cap or wraps securely around the stem body itself using heavy-duty O-rings or zip ties. Because it sits flush over the center of your bike’s steering axis, it provides a stable, centered viewing angle that is well-protected from accidental side impacts.
Handlebar Clamp Mounts
Handlebar clamp mounts wrap directly around the circular tube of your handlebar, positioning the phone slightly behind or directly over the bar. This style is versatile for standard round bars on mountain bikes, commuter bikes, or folding bikes where out-front positioning is not preferred or where space ahead of the stem is constrained by cables. It offers a compact footprint and can be angled to suit flat or riser handlebars, ensuring your phone remains secure even when navigating uneven terrain or urban pathways.
Before making a final selection, you must verify the specific clamping range of your chosen mount. Check the manufacturer’s product specifications to confirm the minimum and maximum millimeter limits of the clamp, and ensure any included reduction spacers or shims match your measured handlebar diameter.
Check Clearance, Adapters, and Material Safety Limits
Before finalizing your mounting setup, you must verify that the physical placement of the phone does not interfere with your ability to control the bicycle safely. On drop handlebars or narrow flat bars, check that your knuckles have ample clearance when you are riding in different hand positions, shifting gears, or pulling the brake levers. The phone should never obstruct your grip or restrict the full movement of your steering and braking systems.
If your bicycle features an aerodynamic or non-standard handlebar profile, standard circular clamps will not fit securely. In these cases, you must determine if proprietary aero adapters, specialized stem faceplate mounts, or specific diameter shims are required to achieve a flush, secure fit. Attempting to force a round clamp onto an ovalized bar without the correct adapter can lead to slippage or structural damage.
Material safety is another critical consideration, especially if your bicycle is equipped with carbon fiber handlebars or an integrated carbon cockpit. Carbon fiber is sensitive to localized clamping pressure and can crack if overtightened. Always review the manufacturer’s weight limits, vibration warnings, and recommended torque settings. Using protective rubber pads or carbon assembly paste can help prevent slippage at lower torque levels, protecting your high-end components from damage.
Install Securely and Perform Pre-Ride Safety Checks
Proper installation is key to ensure your phone remains securely attached to your bicycle under all riding conditions. When mounting the clamp to your handlebar or stem, always use a torque wrench to tighten the mounting bolts to the manufacturer’s exact torque specifications. Overtightening can crush delicate carbon fiber or strip the threads on alloy components, while undertightening can cause the mount to rotate or slide during a ride.
Once the mount is installed, perform a static pull-and-twist test before placing your phone in the holder. Grasp the mount firmly and apply moderate pressure in several directions to verify that there is no play, rotation, or slipping along the handlebar. Next, insert your phone into the locking mechanism and ensure you hear or feel the positive engagement of the dual-stage lock, confirming it is fully secured.
Establish a regular maintenance routine to inspect your mounting hardware periodically. Road vibrations, temperature changes, and humidity can cause mounting bolts to loosen over time. Re-check the tightness of all mounting bolts and inspect the phone case lock for wear or debris after your first few rides, and continue to perform these quick checks as part of your pre-ride safety inspection.
Frequently Asked Questions (FAQ)
Can I use a standard round clamp on an aero handlebar?
No, you should not attempt to use a standard round clamp on an aerodynamic or ovalized handlebar. Because round clamps are designed to distribute pressure evenly across a circular surface, placing them on an oval or flat profile results in point-loading, where pressure is concentrated on a very small area. This mismatch prevents a secure grip, increases the risk of the mount rotating during a ride, and can easily scratch, dent, or crack carbon fiber or lightweight aluminum handlebars. Instead, look for dedicated aero mounts, stem-cap mounting systems, or manufacturer-approved adapters designed specifically for your handlebar’s unique profile.
What should I do if my handlebar diameter falls between standard sizes?
If your handlebar diameter falls between standard sizes, you should use the manufacturer-provided thermoplastic shims or spacer rings included with your mounting kit to bridge the gap. These shims are designed to reduce the inner diameter of the clamp to match common handlebar sizes while protecting the handlebar surface from scratches. If you cannot achieve a secure, gap-free fit using the available shims, or if your handlebar has a non-standard taper, it is highly recommended to switch to a stem mount or a stem-cap mount, which bypasses the handlebar tubing entirely for a direct, secure attachment.
Community discussion
Share your experience or ask a question. Comments are reviewed before publication.