
Finding the right saddle bag is a matter of matching your daily riding habits with the physical limits of your bicycle. The ideal choice depends on what you need to carry, how fast you ride, and the specific environment you navigate. A commuter weaving through city traffic needs quick access and weather protection, while a leisure rider on the Park Connector Network (PCN) prioritizes a lightweight, unobtrusive profile. For long-distance touring or bikepacking, stability and high volume become the primary requirements.
To make the right choice, you must understand how different bag designs interact with your bike’s frame and your riding style. Selecting the wrong style can lead to annoying sway, thigh rubbing, or even damage to your rear tire. By evaluating your carrying needs and checking your bike’s physical clearance, you can find a secure storage solution that enhances your ride rather than getting in your way.
Saddle Bag Styles Explained: Seat Packs, Pouches, and Integrated Systems
Saddle bags generally fall into three distinct design categories, each offering a different balance of capacity, stability, and mounting convenience. Understanding these styles is the first step in narrowing down your options.
Products mentioned in this guide
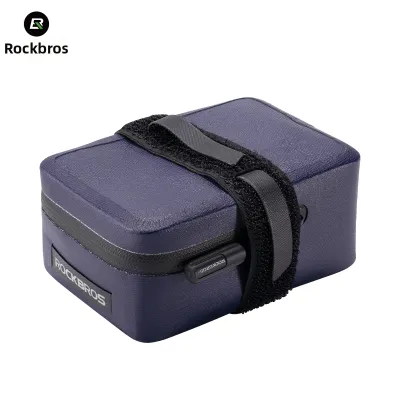
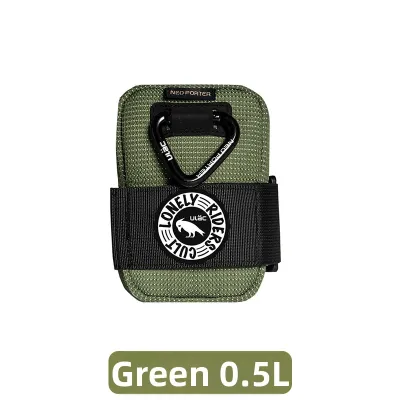
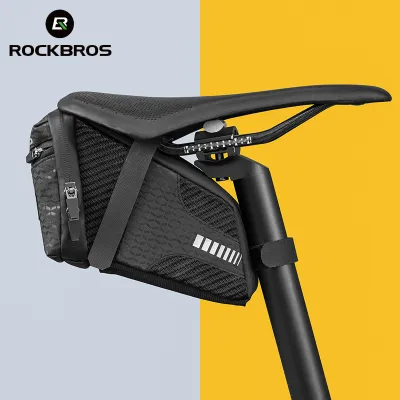
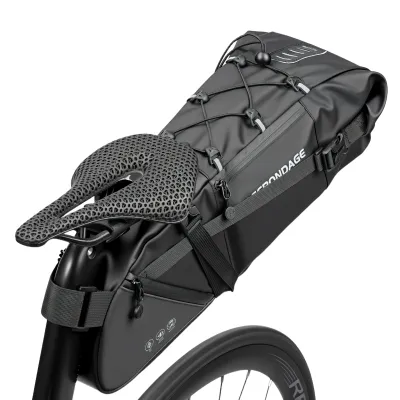
Prices are valid at publication and may change. Please refer to the product page for the latest price.
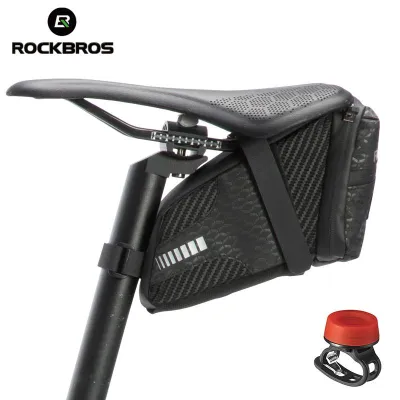
Seat packs, often referred to as strap-on tail bags, are the most common and versatile option. These bags typically secure to your saddle rails and seat post using heavy-duty hook-and-loop straps or buckle systems. They range from medium-sized options suitable for daily essentials to massive, roll-top designs used for multi-day bikepacking. Because they rely on flexible straps, they can fit a wide variety of bicycle frames, though they require careful packing to prevent sagging or swaying when fully loaded.
Under-seat pouches are ultra-compact, low-profile bags designed to tuck neatly beneath the saddle. These pouches are built for minimalist riders who only want to carry essential repair items, such as a spare inner tube, tire levers, a small multi-tool, and a CO2 inflator. They attach tightly to the saddle rails, keeping weight to an absolute minimum and ensuring the bag remains completely out of the way of your legs while pedaling.
Integrated bags utilize a rigid, rail-mounted bracket system rather than flexible straps. The bracket semi-permanently attaches to your saddle rails, allowing the bag to click securely into place and release with the push of a button. This modular design offers exceptional stability, eliminating the sway common with strap-on bags. Integrated systems are highly structured, making them excellent for riders who frequently attach and detach their bags throughout the day.
Choosing a Saddle Bag for Your Daily Commute
Urban commuting introduces unique challenges, including unpredictable weather, security concerns, and the need to carry a mix of personal items and tools. Your commuting saddle bag must be durable enough to handle daily wear and tear while protecting your belongings from the elements.

In tropical climates like Singapore, sudden afternoon downpours are a common occurrence. A commuter saddle bag should feature robust weather resistance, such as waterproof fabrics, welded seams, and water-resistant zippers. Additionally, visibility is a critical safety consideration for low-light morning or evening commutes. Look for bags equipped with highly reflective panels, reflective piping, and a dedicated attachment loop for a clip-on rear safety light.
Capacity planning for a commute requires balancing your cargo needs without overloading the rear of your bike. Your bag should comfortably accommodate daily essentials such as your keys, wallet, phone, a multi-tool, and perhaps a lightweight packable rain jacket or poncho. If you carry a laptop or change of clothes, these are better suited for a backpack or pannier, leaving the saddle bag dedicated to items you need to access quickly or keep separate from your clean clothes.
Security is another major factor when parking your bike in public spaces, office racks, or transit hubs. A bag that is difficult to remove is a liability if you have to leave your bike unattended. For commuters, integrated rail-mounted systems or quick-release strap designs are highly beneficial, allowing you to detach the bag in seconds and carry it with you into the office or store.
Picking a Saddle Bag for Park Connector (PCN) and Leisure Rides
Riding along the Park Connector Network (PCN) or enjoying casual weekend paths calls for a different approach to storage. These rides are typically relaxed, focusing on comfort, scenery, and leisure rather than speed or heavy utility.
For casual paths, a minimalist profile is highly desirable. A bulky, wide bag can easily snag on low-hanging branches or brush against your legs, especially if you ride a folding bike or a hybrid with a more upright riding posture. A compact under-seat pouch keeps your bike looking clean and streamlined, ensuring that your storage solution does not interfere with your relaxed pedaling rhythm.
Quick-access designs are particularly useful during leisure rides. You may want to stop frequently to take photos, apply sunscreen, or grab a quick snack. Choosing a saddle bag with external mesh pockets or an easy-to-zip side opening allows you to retrieve your smartphone, lip balm, or energy gel without having to completely unstrap the bag or search through a deep, dark main compartment.
Weight distribution is also worth considering, even at slower, leisurely speeds. A heavy bag positioned high under the saddle can make the bike feel top-heavy, which can affect your balance when navigating tight turns on shared paths or stopping for pedestrians. Keeping your load light and centered directly under the saddle rails ensures a stable, predictable ride.
Saddle Bag Needs for Long-Distance and Bikepacking
When you transition to long-distance touring, endurance road riding, or multi-day bikepacking, your storage requirements change dramatically. You must carry significantly more gear, including spare clothing, tools, food, and potentially camping equipment, all while maintaining bike stability over rough terrain.
For these demanding journeys, you must evaluate high-volume seat packs against modular integrated systems. High-volume seat packs, which can extend far behind the saddle, offer the space needed for bulky, lightweight items like sleeping bags or spare layers. However, modular systems that feature a rigid outer holster and a removable dry bag are increasingly popular. These systems allow you to leave the heavy harness attached to the bike while easily sliding out the waterproof dry bag to unpack at your campsite or hotel.
To manage heavy, shifting loads, a long-distance bag must feature robust compression straps and internal stiffeners. Without these structural elements, a large bag will sag onto your rear wheel or sway violently from side to side when you pedal out of the saddle. Compression straps allow you to pull the load tight against the seat post, keeping the center of gravity as close to the bike’s frame as possible.
Durability and waterproofing are non-negotiable for multi-day exposure. Check the manufacturer’s specifications for waterproofing standards, looking for fully sealed seams and roll-top closures that prevent water from creeping in during prolonged rain. The materials should consist of high-denier fabrics, such as ripstop nylon or heavy-duty canvas, to resist abrasion from road grit, mud, and occasional scrapes against obstacles.
Cross-Scenario Compatibility: Can One Saddle Bag Do It All?
Many cyclists participate in multiple types of riding, leading to the question of whether a single saddle bag can serve all purposes. While a one-bag solution is highly economical, it requires accepting certain trade-offs.
The primary challenge of a single-bag setup is the conflict between capacity and aerodynamics. A large bikepacking seat pack is far too bulky and heavy for a quick evening spin on the PCN, while a tiny under-seat pouch cannot hold the gear required for an all-day endurance ride. If you try to use a large bag for short rides, you will often find it sags and sways when underfilled, as many large packs rely on a full load to maintain their shape.
Some modular systems offer a middle ground. For example, you can find expandable saddle bags that use roll-top closures or zippered expansion panels, allowing you to compress the bag for short commutes and expand it for longer weekend rides. Alternatively, some brands offer a single mounting bracket that is compatible with different sizes of detachable pouches, allowing you to swap bags depending on the day’s route.
Ultimately, your decision should depend on your primary riding style. If ninety percent of your riding consists of daily commuting, prioritize a medium-sized, highly water-resistant bag with a quick-release mount. If you occasionally embark on long-distance tours, you can supplement your setup with a separate, high-capacity seat pack or use a frame bag to distribute the extra weight.
Pre-Purchase Fit and Clearance Checklist
Before purchasing any saddle bag, you must perform a few physical checks on your bicycle to ensure a safe and secure fit. A poorly fitting bag can damage your bike’s finish, interfere with moving parts, or cause safety hazards while riding.
First, measure your available saddle rail length and seat post exposure. Many saddle bags require a minimum amount of exposed seat post to attach the stabilization straps. If you ride a small frame or have your saddle positioned low, you may not have enough vertical space to secure the straps properly. Additionally, check that your saddle rails have enough straight section to accommodate the bag’s mounting brackets or straps without interfering with the saddle clamp.
Second, verify your rear tire clearance. This is especially critical for full-suspension mountain bikes, folding bikes with small wheels, or bikes with low saddle heights. With the bag fully packed, measure the distance between the bottom of the bag and the top of the rear tire. For full-suspension bikes, you must account for suspension compression; compress the rear shock completely to ensure the tire will not contact the bag on rough terrain, which can cause sudden braking or destroy the bag.
Finally, check the strap routing and physical clearance around your legs. When the bag is mounted and packed, sit on the saddle and pedal slowly. Ensure that your thighs do not rub against the side straps or the body of the bag, as this constant friction can ruin your cycling shorts and cause chafing. Additionally, make sure the straps do not pinch or interfere with any exposed rear derailleur or brake cables running along the seat post or top tube.
Frequently Asked Questions (FAQ)
How do I stop my saddle bag from swaying while riding?
To minimize lateral sway, always pack your heaviest items, such as tools, spare tubes, or lock chains, as close to the seat post and saddle rails as possible. This keeps the center of mass tight against the bike’s pivot point. Once packed, pull all compression and mounting straps as tight as possible. If you are using a very large seat pack for bikepacking, consider investing in an external metal stabilization bracket that clamps to your saddle rails and holds the sides of the bag firmly in place.
Can I use a saddle bag with a dropper seat post?
Yes, but you must take specific precautions to avoid damaging the post’s sensitive stanchion. Standard saddle bag straps can scratch the sliding surface of a dropper post, leading to air or oil leaks. To prevent this, look for saddle bags designed specifically for dropper posts, which often use a rigid, non-abrasive clamp or a specialized adapter sleeve. Always measure your clearance with the dropper post fully compressed to ensure the bag does not collide with the rear tire when the saddle is lowered.
Community discussion
Share your experience or ask a question. Comments are reviewed before publication.