
Selecting the right swim float board requires matching the equipment’s shape, size, and buoyancy to your specific training objectives. Whether you want to build lower-body kick strength, isolate your upper body, or establish basic water confidence, the right board acts as a targeted training aid. However, it is critical to remember that a swim float board is not a life-saving flotation device. It cannot replace formal swim training, water safety skills, or personal judgment. Before entering the water, always assess your swimming ability, verify the pool depth, and ensure you can comfortably recover to a safe standing or floating position without relying on the board.
In local swimming facilities, from community pools to specialized training centers, choosing the right gear ensures your practice sessions are both productive and safe. A poorly matched board can lead to improper body alignment, shoulder strain, or unnecessary fatigue. By understanding how different designs interact with your body weight and stroke mechanics, you can select a tool that enhances your technique rather than hindering it.
Define Your Swimming Training Objectives
Before evaluating specific gear options, you must clarify what you want to achieve during your time in the water. Swimming training is highly technical, and different drills require different levels of support. If your primary goal is to refine your kick technique, you need a board that supports your arms and chest while allowing your legs to do the heavy lifting. This type of training focuses on hip rotation, ankle flexibility, and core engagement.
Products mentioned in this guide
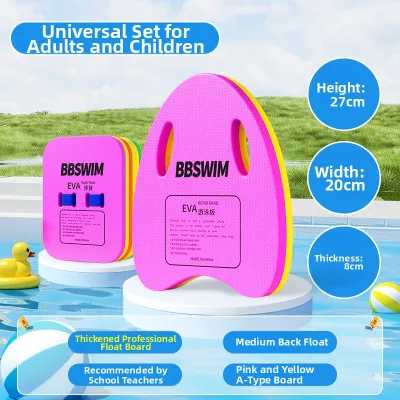
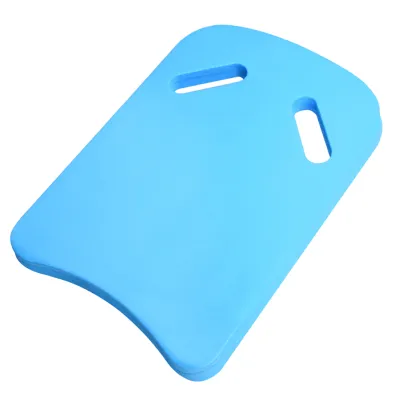
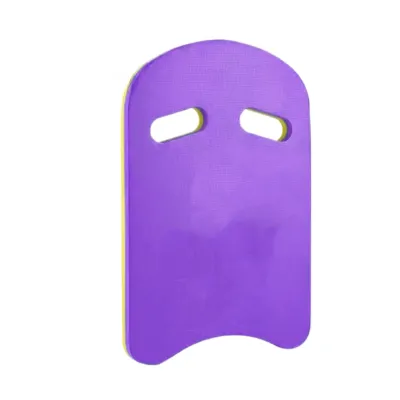
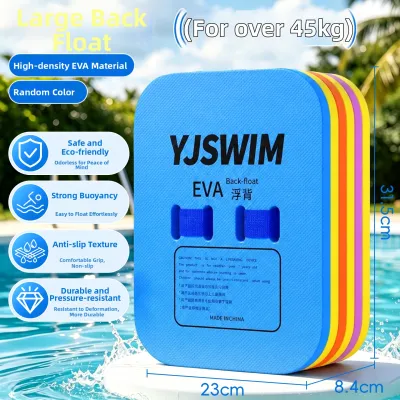
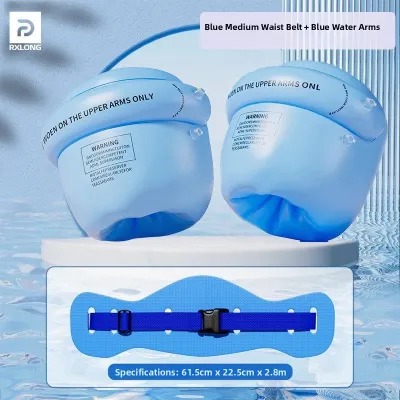
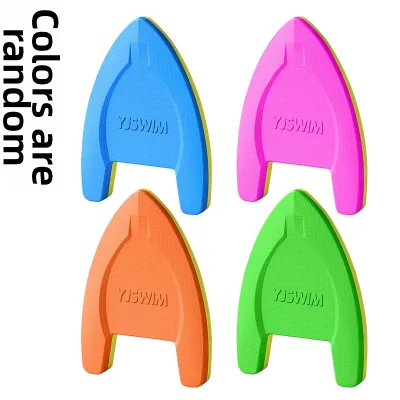
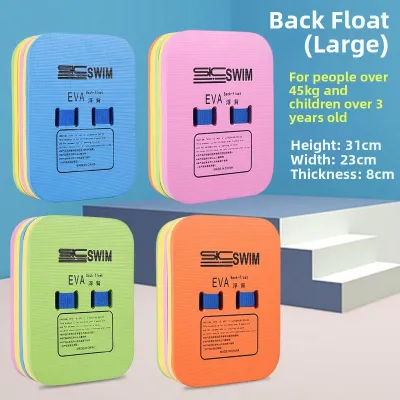
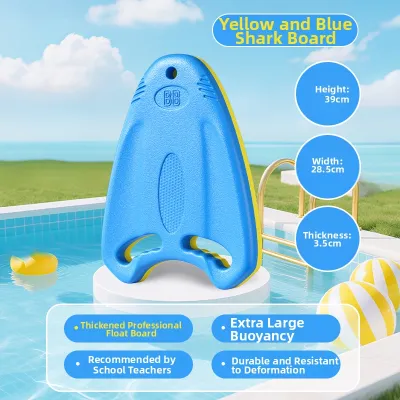
Prices are valid at publication and may change. Please refer to the product page for the latest price.
For swimmers looking to isolate the upper body, the objective shifts from kicking to pulling. In this scenario, you want to immobilize your legs entirely to focus on your arm stroke, catch phase, and shoulder rotation. While some specialized boards can assist with this, using the wrong type of board can force your hips to drop, ruining your body alignment. Clarifying whether you are focusing on lower-body power or upper-body mechanics is the first step in narrowing down your choices.
Beginners and those building general water confidence have entirely different requirements. For these swimmers, the float board serves as a psychological and physical safety net. The goal is to feel secure while practicing basic face-in-water breathing, horizontal body positioning, and gentle kicking. If you are a beginner, your skill level dictates a need for high buoyancy and stability, whereas advanced swimmers will look for streamlined designs that challenge their core stability.
Your training objectives may also evolve as your fitness and technique improve over time. A beginner who starts with a highly buoyant, stable board may eventually transition to a smaller, more streamlined model to challenge their balance and core strength. Recognizing this progression allows you to view your gear selection as a dynamic process that adapts to your growing capabilities in the water.
Additionally, the environment where you train can influence your objectives and gear choices. In a crowded public pool lane, a massive, highly buoyant board can be cumbersome and difficult to maneuver around other swimmers. A compact, streamlined board might be more appropriate for maintaining a tight lane profile and avoiding accidental collisions during busy lap swim hours.
Match Float Board Shapes to Your Drills
The shape of a swim float board directly influences how it moves through the water and how your body aligns during drills. Tapered or V-shaped boards are designed specifically for advanced kick drills and high-speed training. These boards feature a narrow nose that reduces hydrodynamic drag, allowing you to maintain a streamlined position. Because they offer less surface area and lower buoyancy at the front, they require active core engagement to keep your hips high in the water, making them suitable for competitive training.

The reduced surface area of V-shaped boards also encourages a more natural body roll during kicking sets. Instead of keeping your upper body completely flat and rigid, these boards allow for subtle hip and shoulder rotation, mimicking the actual movement of a full swim stroke. This makes the transition from isolated kicking drills to full-stroke swimming much smoother and more effective for developing realistic muscle memory.
U-shaped or contoured boards are a common choice for general kick practice and upper body isolation. These boards typically feature a rounded top and straight sides, often with integrated side grooves or hand grips. The contoured design allows you to rest your forearms comfortably along the top of the board, reducing tension in your shoulders and neck. This ergonomic positioning is useful for long kicking sets where maintaining a relaxed upper body is crucial for preventing fatigue.
For swimmers who experience lower back discomfort during kick sets, contoured boards offer a useful alternative. By allowing your hands to grip the lower portion of the board or rest in dedicated grooves, they help keep your head and chest slightly lower in the water. This subtle adjustment prevents excessive arching of the spine, distributing your body weight more evenly and reducing the risk of post-workout lower back stiffness.
Rectangular or wide boards provide a high level of stability and buoyancy, making them a highly suitable option for beginners and swim schools. The broad surface area resists tipping and supports a significant portion of the swimmer’s upper body weight. This high level of support allows beginners to focus on learning basic leg movements and breathing rhythms without the fear of sinking. However, the increased drag makes these boards less suitable for fast-paced or high-yardage training sessions.
Hybrid or multi-grip boards offer a versatile solution for swimmers who incorporate mixed drills into a single session. These boards often feature unique cutouts, interior handles, or dual-density zones that allow for multiple hand placements. You can hold them at the top for traditional kicking, grip them by the sides for a streamlined profile, or even place them between your thighs as a makeshift pull buoy. This versatility makes them highly convenient for crowded gear bags and varied workout plans.
Triathletes and multi-sport athletes often favor hybrid boards because they allow for rapid transitions between different drill phases. During a single set, an athlete can seamlessly switch from a high-intensity kicking drill to an upper-body pulling set without needing to return to the pool wall to swap equipment. This continuous training flow closely mimics the sustained effort required during open-water races.
Choose the Right Size and Thickness for Your Body
Selecting the correct size and thickness is essential for maintaining proper spinal alignment and preventing shoulder strain. The thickness of a float board determines its overall buoyancy. If a board is too thick for your body weight, it will ride too high in the water, forcing your chest upward and causing your lower back to hyperextend. Conversely, if the board is too thin, it will submerge under your weight, increasing drag and forcing you to strain your neck to keep your head above water.
To find the right balance, you must evaluate the board’s dimensions relative to your physical build. The length of the board should match your arm span and shoulder width. When holding the board at the top, your elbows should rest comfortably near the bottom edge without forcing your shoulders to shrug or spread too wide. A board that is too long will push your arms too far forward, leading to shoulder fatigue, while a board that is too short will not provide enough forearm support.
Your individual shoulder flexibility also plays a critical role in determining the ideal board width. Swimmers with tight shoulders or limited mobility often find wider boards more comfortable, as they allow the arms to remain parallel and relaxed. A board that is too narrow can force the hands close together, putting unnecessary stress on the rotator cuff muscles during extended kicking sets.
Before making a selection, always check the manufacturer’s sizing charts and weight capacity labels. These guidelines are calibrated to ensure the board provides the intended level of flotation for different weight ranges. If you are purchasing gear for a child or a smaller-framed adult, look for junior-sized boards that offer a narrower grip and reduced surface area. Matching the board’s physical specifications to your body measurements ensures a natural, strain-free swimming posture.
If you fall between sizes on a manufacturer’s chart, consider your natural buoyancy and body composition. Swimmers with higher muscle density or lower body fat may require a slightly thicker or larger board to achieve the same level of support as a more naturally buoyant swimmer. Testing different sizes in a controlled pool environment can help you identify the exact level of support your body needs.
Evaluate Material and Grip Features for Comfort
The physical build quality and ergonomic features of a float board determine how comfortable it remains during long training sessions. High-density closed-cell foam, such as Ethylene-Vinyl Acetate (EVA), is a widely used material for durable swim gear. This material is highly durable, resists water absorption, and maintains its shape even after years of exposure to pool chemicals. Avoid cheap, open-cell polystyrene boards, which tend to crumble, absorb water, and lose buoyancy over time.
The closed-cell structure of EVA foam also helps prevent the accumulation of bacteria and mold inside the board. Because water cannot easily penetrate the surface, the board dries quickly and remains hygienic, which is particularly important if you store your gear in a damp swim bag. Investing in a high-density foam board ensures that your training aid remains structurally sound and sanitary over hundreds of pool sessions.
Comfort also depends heavily on the finish of the board’s edges. Look for boards with rounded or beveled edges rather than sharp, square cuts. As you kick, your forearms and chest will constantly rub against the sides of the board; rounded edges minimize friction and help prevent painful skin chafing. Additionally, some high-quality boards feature a soft, textured outer skin that provides a gentle feel against the skin while maintaining structural rigidity.
A secure grip is vital for maintaining control during vigorous kicking sets or flip turns. Verify that the board has a textured surface, molded finger grooves, or integrated hand holes. When your hands are wet and covered in pool water, a smooth plastic or low-grade foam board can easily slip from your grasp, disrupting your rhythm and training flow. A textured grip allows you to maintain a relaxed hold, helping to prevent hand fatigue and forearm cramping during extended drills.
For swimmers who train in cooler outdoor pools or open water, a textured grip is even more critical. Cold water can reduce sensation and grip strength in your fingers, making it harder to hold onto a slick board. A well-designed textured surface ensures you can maintain a secure hold on your training aid, even when your hands are cold or when you are wearing swim gloves for thermal protection.
Care and Maintenance for Longevity
Proper care and maintenance are essential for extending the lifespan of your swim float board and ensuring it remains hygienic. After every session in the pool or open water, thoroughly rinse your board with clean, fresh water. Chlorine, salt, and pool chemicals can slowly degrade the foam material, causing it to become brittle or sticky over time. A quick rinse removes these corrosive elements along with any organic debris or sunscreen residue.
Once rinsed, allow the board to air dry completely in a shaded, well-ventilated area. Avoid leaving your float board in direct sunlight, such as on a hot pool deck or inside a sunny car trunk. Intense ultraviolet (UV) radiation can warp the foam, cause the colors to fade, and accelerate the breakdown of the material’s cellular structure. Additionally, avoid using artificial heat sources like hair dryers or radiators, as extreme heat can melt or permanently deform the board.
For storage, place the board flat or upright in a cool, dry location. Avoid stacking heavy swim bags, weights, or sharp training gear on top of the board, as this can leave permanent indentations or puncture the foam surface. If you store your gear in a mesh bag, ensure the bag is hung up in a dry room to prevent mold and mildew from growing on the damp surfaces. Taking these simple steps helps ensure your training aid remains in peak condition for many seasons to come.
Frequently Asked Questions (FAQ)
Can I use a standard kickboard for upper body pulling drills?
A standard rectangular kickboard is not recommended for upper body pulling drills because its high buoyancy and wide surface area make it difficult to hold securely between your thighs. Attempting to squeeze a standard board between your legs can force your hips into an unnatural, wide stance, leading to hip strain and poor body alignment. For proper arm isolation and shoulder alignment, you should use a specialized pull buoy or a contoured hybrid board designed specifically to fit comfortably between your legs while maintaining a streamlined profile.
How do I know if my float board is too small for me?
You can tell your float board is too small if it consistently submerges under your weight when you rest your arms on it, or if you feel excessive strain in your shoulders and neck while trying to keep your head above water. If the board does not provide adequate buoyancy, your hips and legs will sink, destroying your horizontal body position and making your kicking drills highly inefficient. To verify the correct fit, check the manufacturer’s weight capacity labels and ensure your forearms can rest comfortably on the board without your elbows hanging off the bottom edge.
Community discussion
Share your experience or ask a question. Comments are reviewed before publication.