
Finding the right thigh exerciser for home workouts requires balancing your personal fitness goals, available space, and the specific muscle groups you want to target. A well-chosen device allows you to perform targeted lower-body movements safely and consistently without the need for bulky commercial gym machines. By focusing on adjustable resistance, ergonomic design, and equipment type, you can select a tool that integrates seamlessly into your daily routine and supports long-term strength development.
Understand the Types of Thigh Exercisers
To make an informed purchase, you must first understand the mechanical designs available on the market. Thigh exercisers generally fall into three primary categories: spring-loaded clamps, resistance bands, and sliding discs. Each mechanism offers a distinct type of resistance and targets the lower body in different ways, making it essential to match the equipment to your specific training style.
Spring-loaded clamps, often referred to as thigh masters, are classic tools designed primarily for isolation exercises. These devices consist of two metal loops covered in foam, connected by a central spring hinge. When you squeeze the loops together, the spring provides progressive mechanical resistance. This design is highly effective for targeting the adductor muscles on the inner thighs, as well as the chest and arms when squeezed with the upper body. They require virtually zero setup time, are highly portable, and can be stored easily in a drawer or closet.
Products mentioned in this guide
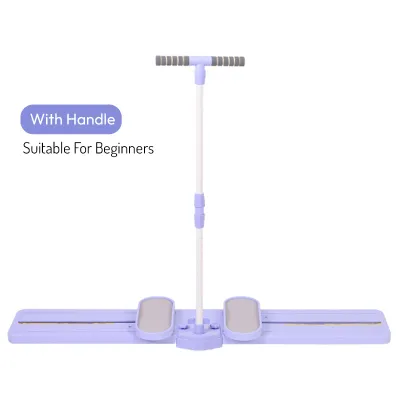
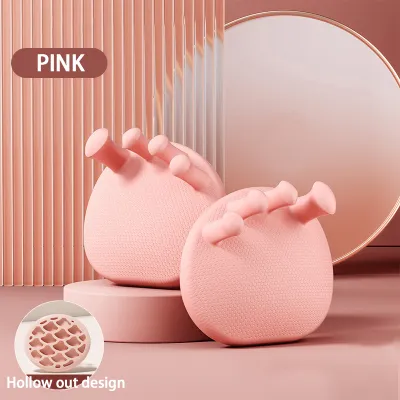
Prices are valid at publication and may change. Please refer to the product page for the latest price.
Resistance bands, including loop bands and fabric hip bands, offer a highly versatile alternative. Instead of a rigid mechanical spring, these bands rely on the elastic properties of latex or woven fabric to create tension. They are particularly effective for targeting the abductor muscles on the outer thighs, as well as the glutes, through movements like lateral walks, clamshells, and banded squats. Because they conform to your body, they provide a smooth, continuous resistance profile that increases as the band stretches. They take up almost no space, making them the ultimate travel-friendly option for home workouts.
Sliding discs, or core sliders, represent a low-impact option that utilizes body weight and friction. These small, double-sided discs are placed under your feet or hands, allowing you to slide smoothly across carpeted or hard floors. By performing sliding lunges, lateral slides, or hamstring curls, you engage the entire lower body, including the quadriceps, hamstrings, and inner thighs, while simultaneously challenging your core stability. Sliding discs require a bit more floor space during use but are incredibly compact to store and offer a highly dynamic workout experience.
Understanding muscle engagement is key to choosing between these designs. If your primary goal is to tone and strengthen the inner thighs, a spring-loaded clamp is the most direct tool. If you want to focus on hip stability, outer thigh strength, and glute activation, resistance bands are generally more suitable. For those seeking functional, full-body movements that incorporate the thighs, sliding discs provide a comprehensive solution. Evaluating these differences ensures you select a tool that aligns with your physical needs.
Key Features to Evaluate Before Buying
Once you have decided on the type of thigh exerciser that fits your goals, you must evaluate the specific physical and functional features of individual models. High-quality equipment should not only be effective but also comfortable and durable enough to withstand regular use. Paying close attention to product specifications, materials, and construction details will help you avoid common pitfalls like rapid wear, discomfort, or inadequate resistance.

Resistance adjustability is one of the most critical factors for long-term progress. Your muscles adapt to stress over time, meaning a fixed-resistance device may quickly become too easy, stalling your progress. Look for spring-loaded clamps that feature adjustable tension dials, allowing you to increase the resistance as your strength improves. For resistance bands, opt for multi-packs that include light, medium, and heavy options, or bands with adjustable buckles. This flexibility ensures you can apply progressive overload, which is essential for building muscle tone and endurance.
Comfort and ergonomics play a major role in how often you will actually use the equipment. Because thigh exercises involve repetitive squeezing or stretching against sensitive areas of the skin and joints, adequate padding is non-negotiable. For spring-loaded devices, check the thickness and density of the foam or rubber coating covering the metal frame. Thin or low-quality foam can bottom out quickly, causing painful pressure points on your inner knees or thighs. For resistance bands, wider fabric bands are generally more comfortable than thin latex loops, as they are less likely to roll up, pinch the skin, or slide out of place during movement.
Build quality and safety indicators must be carefully verified before making a purchase. For spring-loaded clamps, inspect the housing around the central spring; it should be fully enclosed or securely fastened to prevent hair, skin, or clothing from getting caught in the coils. The frame itself should be constructed from durable materials like steel or reinforced plastic to prevent bending or snapping under pressure. For resistance bands, look for double-stitching on fabric options and high-tensile latex for rubber bands to minimize the risk of snapping. Checking the manufacturer’s stated weight limits or maximum tension ratings can provide a clear indication of the product’s overall durability.
Finally, consider the grip, stability, and budget features of the device. A thigh exerciser that constantly slips during a workout is not only frustrating but can also lead to improper form or minor injuries. Look for textured surfaces, non-slip rubber inserts, or ribbed patterns on the contact points of spring clamps. While basic models may only cost around S$15 to S$30 on an online marketplace, investing in a durable, adjustable model ensures better long-term value. If you are choosing sliding discs, ensure one side is smooth plastic for carpeted floors and the other side is covered in non-slip foam or fabric for hard surfaces.
Matching the Exerciser to Your Fitness Level and Goals
Selecting the right thigh exerciser is not a one-size-fits-all decision; the equipment must match your current physical condition and long-term training objectives. Using a device that is too challenging can lead to poor form and joint strain, while a tool that is too light will fail to stimulate muscle growth or endurance. By assessing your fitness level, you can choose a device that provides the right balance of safety and challenge.
For beginners or individuals returning to fitness after a long hiatus, low-impact and highly controllable resistance is ideal. Lightweight fabric resistance bands or low-tension spring clamps are excellent starting points. These tools allow you to focus on mastering the correct movement patterns and building baseline muscular endurance without overloading your joints. Beginners should look for equipment that allows for gentle, controlled repetitions, ensuring that the primary focus remains on muscle activation rather than struggling against overwhelming resistance.
Advanced users seeking hypertrophy or high-intensity muscular endurance require equipment that can deliver significant tension. For these goals, heavy-duty spring-loaded clamps with high resistance ratings or heavy-resistance fabric bands are necessary. Advanced trainees should also look for versatile equipment that can be integrated into compound movements. For example, wearing a heavy resistance band while performing squats or lunges adds lateral tension, forcing the glutes and outer thighs to work harder throughout the entire range of motion.
It is also important to verify if the equipment supports complementary movements to ensure a balanced lower-body workout. While isolating the inner or outer thighs is beneficial, overall leg development requires working the quadriceps, hamstrings, and glutes in unison. Look for thigh exercisers that can be easily incorporated into glute bridges, donkey kicks, or standing leg raises. Choosing a versatile tool ensures you can perform a well-rounded routine that promotes balanced muscle development and reduces the risk of strength imbalances.
Space and Setup Considerations for Home Use
One of the greatest advantages of home workout equipment is convenience, but this can quickly be compromised if the device is difficult to use or store in your living space. Before purchasing a thigh exerciser, you must consider how it will fit into your home environment. Taking the time to plan for space, noise, and storage will ensure a seamless integration into your daily routine.
First, measure the required clearance for a full range of motion in your designated workout area, especially if you live in a compact high-rise apartment. While thigh exercisers themselves are relatively small, the exercises you perform with them often require significant physical space. For example, performing lateral band walks or sliding lunges requires several meters of clear floor space to execute safely. Ensure your workout area is free of furniture, sharp corners, and tripping hazards, allowing you to move dynamically without restriction.
Noise levels and floor protection are also important considerations, especially if you live in a shared living space or have downstairs neighbors. Spring-loaded clamps are generally quiet, but some lower-quality models may squeak or click during use, which can be distracting. Sliding discs can generate friction noise and potentially scratch delicate hardwood or laminate flooring if used incorrectly. To protect your floors and minimize noise, consider using a high-density exercise mat as a protective barrier, and ensure you use the correct side of the sliding disc for your specific floor type.
Finally, plan for convenient storage solutions to keep your workout space tidy and safe. Cluttered living areas can become safety hazards and may discourage you from exercising regularly. Fortunately, most thigh exercisers are highly compact. Resistance bands can be rolled up and stored in a small pouch, while sliding discs can be stacked and tucked away in a drawer. If you choose a spring-loaded clamp, look for models that can be folded flat or disassembled for easy storage under a bed or in a closet when not in use.
Frequently Asked Questions (FAQ)
Can a thigh exerciser help with knee rehabilitation?
While general fitness equipment can support lower-body strength, standard thigh exercisers are not designed to replace medically approved rehabilitation tools. If you are recovering from a knee injury or surgery, it is critical to consult a physiotherapist or qualified medical professional before starting any new resistance routine. A professional can guide you on the appropriate tension levels and specific movement patterns required for your recovery. Generally, low-impact isometric holds or controlled, short-range movements are safer for knee stability, and you should stop immediately if you experience any sharp pain or joint discomfort.
How often should I use a thigh exerciser to see results?
For optimal results and safe muscle recovery, it is generally recommended to use a thigh exerciser two to three times per week, allowing at least 48 hours of rest between intense sessions. Lower-body muscles require adequate recovery time to repair and grow stronger. To achieve a balanced physique, integrate thigh-specific isolation work with compound exercises like squats and lunges. Always monitor your body for signs of excessive fatigue or persistent muscle soreness, and adjust your training volume and frequency according to your personal fitness level and the manufacturer’s guidelines.
Community discussion
Share your experience or ask a question. Comments are reviewed before publication.