
For daily bicycle commuters in Singapore, navigating the transition between bright public roads, shaded park connectors, and sudden tropical downpours requires highly reliable equipment. A high-quality USB-C rechargeable bicycle light has become an essential safety tool, offering the convenience of modern charging standards alongside robust illumination. By understanding how to evaluate brightness, beam patterns, battery runtimes, and weather sealing, you can select a lighting setup that keeps you visible and safe on every journey.
Choosing the right light involves matching technical specifications to your specific commuting routes and parking habits. Whether you ride a folding bicycle on the Park Connector Network (PCN) or a road bike on busy commuter routes, your lights must withstand high humidity, intense rain, and frequent mounting and dismounting. This guide breaks down the essential factors to consider when selecting USB-C bicycle lights tailored for daily commuting in Singapore.
Why USB-C is the Standard for Urban Commuters
The transition from older micro-USB ports to USB-C has revolutionized how cyclists manage their safety gear. For daily commuters, the primary benefit of USB-C is the convenience of a single, universal cable standard. Most modern smartphones, laptops, wireless earbuds, and portable power banks already use USB-C, meaning you can carry one cable to charge all your devices. This eliminates cable clutter in your commuter bag and ensures you can easily top up your lights at your office desk, a cafe, or a public charging station.
Products mentioned in this guide
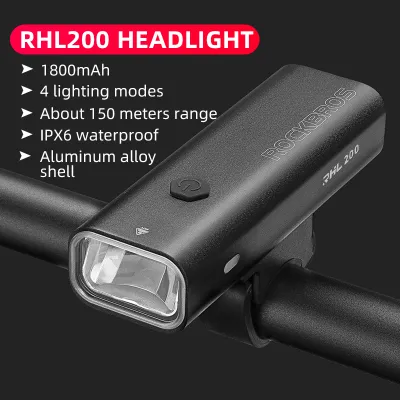
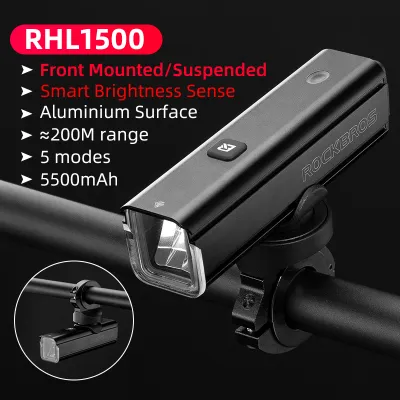
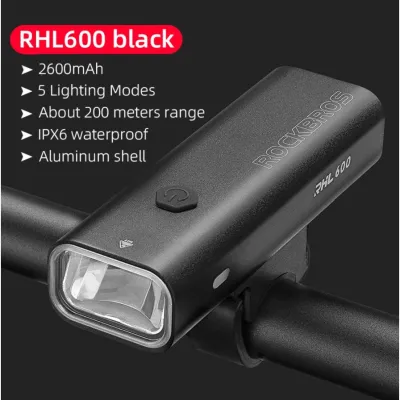
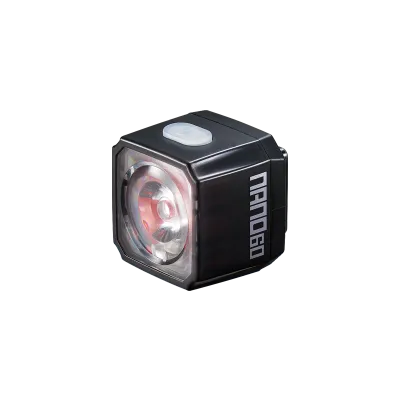
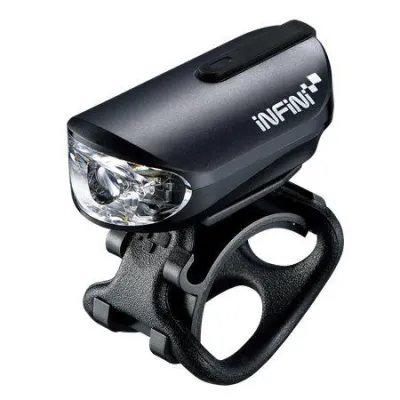
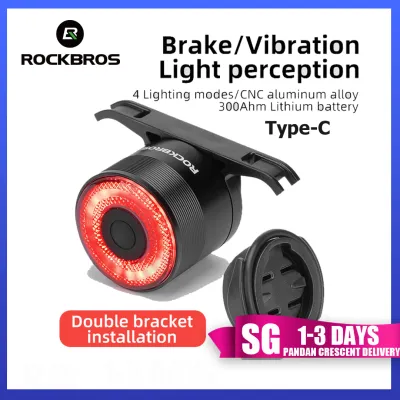
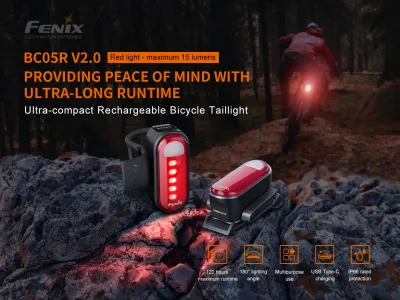
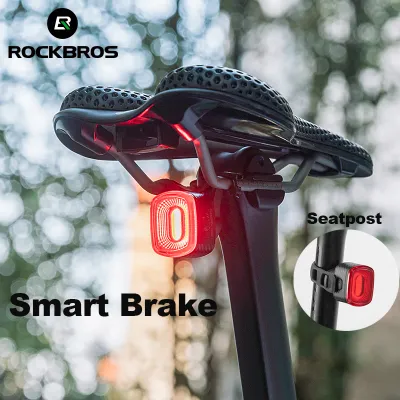
Prices are valid at publication and may change. Please refer to the product page for the latest price.
Beyond convenience, USB-C technology supports faster charging speeds and more efficient power delivery. Older micro-USB ports are often limited to lower charging currents, resulting in long wait times to fully charge a high-capacity battery. USB-C ports allow the light to draw its maximum supported current safely, significantly reducing the time your lights spend tethered to a wall outlet. This rapid charging capability is incredibly valuable when you realize your lights are low just before your evening commute home.
The physical design of the USB-C connector also offers a major practical advantage: reversibility. Unlike micro-USB plugs, which must be oriented correctly to avoid damaging the internal pins of the port, USB-C connectors can be plugged in either way. This user-friendly design prevents accidental damage to the charging port, which is one of the most common causes of bicycle light failure. It also makes plugging in your lights in low-light conditions, such as a dark office basement or a sheltered bicycle bay, completely hassle-free.
Furthermore, USB-C ports are physically more robust than their predecessors. The internal tongue of a USB-C port is designed to withstand thousands of insertion cycles, making it highly durable for daily commuters who charge their lights multiple times a week. This physical durability ensures that your safety equipment remains reliable over years of continuous use, reducing the need for frequent replacements.
Matching Light Output to Your Commuting Route
Selecting the appropriate brightness for your bicycle light requires understanding the difference between “seeing” the path ahead and “being seen” by other road users. A light that is perfect for navigating a pitch-black trail may be unnecessarily bright and blinding on a well-lit city street, while a low-power safety light will fail to illuminate obstacles on an unlit path. Commuters must evaluate their specific route to determine the correct balance of light output and beam shape.

To make an informed decision, it is helpful to understand the difference between lumens and lux. Lumens measure the total amount of light emitted by the source in all directions, representing the raw power of the light. Lux, on the other hand, measures the intensity of light concentrated on a specific surface area at a given distance. A light with high lumens but a poorly designed lens will scatter light everywhere, blinding oncoming traffic while failing to illuminate the road. A well-designed lens focuses the available lumens into a controlled beam pattern, providing high lux where you need it most.
Most modern USB-C bicycle lights offer multiple operating modes, including high steady, medium steady, low steady, and various flashing or pulsing patterns. Having access to these modes allows you to adjust your light output on the fly, matching your immediate surroundings while conserving battery power. For instance, you can use a high steady mode on dark paths and switch to a battery-saving flash mode when riding under bright streetlights.
Park Connectors and Unlit Paths
Singapore’s Park Connector Network (PCN) and shared paths offer excellent car-free routes for commuters, but many sections run through green corridors, coastal parks, or residential fringes that receive minimal ambient street lighting. When riding on these unlit or poorly lit paths, your front light must provide sufficient illumination to help you see the path surface clearly. You need to spot pedestrians, joggers, stray twigs, fallen leaves, and uneven pavement early enough to react safely.
For these dark environments, look for a front light with a wide beam spread rather than a narrow, spot-like beam. A wide beam illuminates the edges of the path, helping you maintain situational awareness and spot obstacles on the margins. The light output should ideally be adjustable, with a medium or high setting that provides clear visibility up to 10 to 15 meters ahead, allowing you to maintain a safe commuting speed of 15 to 25 km/h.
Because you share these paths with pedestrians and oncoming cyclists, you must be mindful of beam alignment. High-output lights pointed directly forward can easily blind oncoming path users, creating a serious safety hazard. To prevent this, choose a light mount that allows you to angle the beam downward toward the ground, or look for lights with a shaped beam cutoff. These specialized lenses direct the light downward onto the path surface and prevent it from rising into the eyes of oncoming users, ensuring a safe and polite riding experience.
Well-Lit City Streets and Shared Roads
When your commute takes you onto public roads alongside motor vehicles, your lighting priority shifts from illuminating the road surface to ensuring you are highly visible to drivers. On well-lit urban roads, streetlights provide ample visibility of the asphalt, but the sheer volume of visual clutter—including car headlights, brake lights, street signs, and commercial neon lighting—can make a cyclist blend into the background.
To stand out in traffic, your lights must feature excellent side visibility. Look for front and rear lights designed with side cutouts or wrap-around lenses that allow light to escape laterally. This side-illumination is critical for safety at intersections, roundabouts, and driveways, where motorists pulling out from side streets need to spot you from the side. A light that only projects directly forward or backward leaves you vulnerable to side-impact risks.
On illuminated roads, flashing or pulsing modes are highly effective because the rapid change in light intensity naturally draws the human eye, alerting drivers to your presence. Using a flashing mode also significantly reduces power consumption compared to a constant high-beam mode, allowing you to preserve battery life during long commutes. For rear lights, a gentle pulsing pattern is often preferred over a rapid, high-intensity strobe, as it helps motorists judge your distance and speed more accurately in dark conditions.
Critical Specs to Evaluate Before Buying
When shopping for a USB-C bicycle light, navigating manufacturer specifications can be challenging. It is common for brands to highlight maximum performance figures on their packaging, but these numbers often represent best-case scenarios rather than daily commuting realities. To make a smart purchase, you must learn to interpret these specifications critically and evaluate how they translate to real-world reliability.
One of the most important steps is understanding that maximum brightness and maximum runtime are mutually exclusive. A light advertised as “1000 lumens with up to 30 hours of battery life” will typically only run for about an hour at the full 1000-lumen setting. The 30-hour runtime is achieved on the lowest, least-demanding flashing or eco mode. Always look for a detailed runtime chart on the packaging or manufacturer website to see how long the light will last on the specific brightness setting you plan to use daily.
Physical build quality is another critical factor that determines the lifespan of your light. Commuting lights are subjected to constant road vibrations, occasional drops, and exposure to the elements. Look for lights constructed with robust materials, such as anodized aluminum or high-impact polycarbonate. Aluminum bodies not only offer superior impact resistance but also act as heat sinks, dissipating the heat generated by high-output LEDs to protect the internal battery and circuitry from overheating.
Battery Life and Charging Convenience
For a daily commuter, battery management is a key part of your routine. You want a light that offers reliable runtime so you do not find yourself riding in the dark halfway through your journey. When evaluating battery capacity, look for lights that use high-quality lithium-ion or lithium-polymer cells. These battery chemistries offer high energy density and do not suffer from “memory effect,” meaning you can top them up at any charge level without reducing their overall lifespan.
To avoid the anxiety of a sudden blackout, choose a light equipped with a clear and accurate battery level indicator. Basic lights often use a single LED that changes color (such as green to red) when the battery is low, but this gives you very little warning. More advanced lights feature multi-segment LED bars or digital percentage displays that show exactly how much charge remains. This precision allows you to plan your charging schedule effectively, knowing whether you can squeeze in one more trip or if you need to plug in immediately.
Another highly useful feature for long commutes or emergencies is pass-through charging. This technology allows the light to operate while it is connected to an external power source, such as a portable power bank. If your light supports pass-through charging, you can mount a small power bank to your bicycle frame or stem and run a short USB-C cable to the light, effectively extending your runtime indefinitely. This is an excellent backup solution for unexpected overtime at work or long weekend rides.
Weather Resistance for Tropical Climates
Singapore’s tropical climate is characterized by high humidity, intense heat, and sudden, heavy downpours. A bicycle light with poor weather sealing will quickly fail when moisture penetrates the casing, causing short circuits or corroding the internal electronics. Therefore, evaluating weather resistance is one of the most critical steps for local commuters.
To determine how well a light can withstand rain, check its Ingress Protection (IP) rating. This rating consists of two letters followed by two numbers (or an “X” if dust resistance is not rated). The second digit represents water resistance, and you should look for the following standards:
- IPX4: Protects against splashing water from any direction. This is suitable for light drizzle but may fail during heavy tropical storms.
- IPX5: Protects against water jets projected from any angle. This is the recommended minimum for daily commuting, ensuring the light survives moderate to heavy rain.
- IPX6: Protects against powerful water jets. This offers excellent protection against severe downpours and high-pressure road spray from your tires.
- IPX7: Protects against temporary immersion in water up to 1 meter deep for 30 minutes. This provides the ultimate peace of mind, ensuring the light remains fully functional even if dropped into a deep puddle.
Beyond the official rating, physically inspect the design of the USB-C port cover. The cover should be made of thick, flexible silicone or rubber that fits tightly into the port with a noticeable friction seal. Avoid lights with flimsy, loose-fitting plastic flaps that can easily pop open when riding over bumps or rough terrain. Additionally, look for lights where the charging port is located on the underside of the body, as this positioning uses gravity to shed water away from the seal rather than allowing it to pool on top.
Finally, review the manufacturer’s warranty terms regarding water damage. Some brands offer comprehensive warranties that cover water ingress, while others explicitly exclude it if the port cover was not fully sealed. Purchasing your lights from reputable local retailers or authorized distributors in Singapore ensures you have access to reliable customer support and straightforward warranty claims if a seal does fail during a heavy downpour.
Mounting Options and Anti-Theft Considerations
A bicycle light is only as good as its mounting system. For daily commuters, the mount must be secure enough to hold the light steady over bumpy roads, durable enough to withstand constant exposure to sun and rain, and practical enough to fit your daily parking routine. You must carefully consider how the light attaches to your bike and how easy it is to remove when you park in public spaces.
There are two primary types of mounting systems: quick-release mounts and tool-required brackets.
- Quick-Release Mounts: These typically use flexible silicone straps, rubber bands, or plastic clip-in mechanisms. They allow you to attach or remove the entire light assembly in seconds without using any tools. This is highly convenient for commuters who must park their bicycles in public areas, such as MRT station bicycle bays, bus interchanges, or public housing void decks. Removing your lights and taking them with you is the most effective way to prevent opportunistic theft.
- Tool-Required Brackets: These mounts use plastic or metal clamps secured to the handlebars or seatpost with hex bolts or screws. While the bracket itself is highly secure and difficult to steal, the light body usually slides out of the bracket via a quick-release tab. This design gives you the best of both worlds: the mounting bracket remains permanently and securely attached to your bike, while the light itself can be slipped off and carried in your pocket or bag.
When evaluating mounting straps, keep Singapore’s climate in mind. High humidity and intense UV exposure can cause cheap rubber and silicone straps to degrade, dry out, and crack over time. If you choose a light that relies on a silicone strap, inspect it regularly for micro-tears or signs of stretching. It is wise to choose brands that sell replacement mounting straps separately, so you do not have to replace the entire light if a simple rubber strap breaks.
For commuters riding folding bicycles, mounting compatibility requires extra attention. When a folding bike is collapsed, handlebars and seatposts often fold into tight configurations. Ensure that your mounted lights do not interfere with the folding mechanism or get crushed by other frame parts when the bike is folded. Compact lights with low-profile mounts or quick-release mechanisms are highly recommended for folding bike users.
Building Your Final Shortlist: A Pre-Purchase Checklist
Before finalizing your purchase of a USB-C bicycle light, it is helpful to run through a structured checklist to ensure the product meets all your practical commuting needs. This step-by-step evaluation will help you avoid common compatibility issues and ensure you get the best value for your money.
1. Physical Port and Cable Verification
- Port Accessibility: Locate the USB-C port on the light. Is it easily accessible, or is it blocked by the mounting bracket?
- Recessed Ports: Check if the port is deeply recessed. If it is, ensure that standard USB-C cables can fit into the opening, or verify that the package includes a compatible slim-profile cable.
- Seal Quality: Confirm that the silicone port cover fits tightly and creates a visible, snug seal when closed.
2. Mounting and Handlebar Compatibility
- Handlebar Diameter: Measure the diameter of your handlebars (common sizes are 25.4mm, 31.8mm, and 35mm) and check if the included bracket or strap fits.
- Seatpost Shape: For rear lights, verify if the mount is compatible with your seatpost shape (round, aero, or D-shaped).
- Alternative Mounting: If you use a saddlebag, pannier rack, or rear basket, check if the rear light can be clipped directly onto your gear rather than the seatpost, which may be blocked.
- Angle Adjustment: Ensure the mount allows you to adjust the vertical angle of the light easily so you can point the beam downward to avoid blinding others.
3. Battery and Charging Logistics
- Runtime Verification: Review the manufacturer's runtime chart. Does the light offer at least 1.5 to 2 hours of continuous runtime on your preferred medium or high steady mode?
- Battery Indicators: Does the light feature a clear battery level indicator (multi-segment LEDs or a digital display) so you can monitor charge levels on the go?
- Pass-Through Support: If you plan on taking long rides, does the light support pass-through charging so you can power it with a portable power bank while riding?
4. Retailer and Warranty Support
- Authorized Sellers: Are you purchasing from an authorized local distributor or a reputable online marketplace seller?
- Local Warranty: Does the product come with a local warranty, and what is the process for claiming a replacement if the light fails due to water ingress?
- User Feedback: Read customer reviews from other riders in tropical climates to verify real-world durability, battery performance, and water resistance.
By systematically checking these details, you can confidently select a USB-C bicycle light setup that offers the perfect blend of performance, convenience, and long-term reliability for your daily commute.
Frequently Asked Questions (FAQ)
Can I use a power bank to charge my bike light while riding?
You can use a power bank to charge your bicycle light while riding only if the light explicitly supports pass-through charging. Many budget-friendly lights are designed to automatically shut off or enter a low-power charging state when plugged into a power source, making them unusable while in motion. If your light does support pass-through charging, you must manage the cable routing carefully. Use zip ties or hook-and-loop straps to secure the USB-C cable along your handlebars or frame, ensuring there is no loose slack that could snag on your front wheel, brake levers, or steering mechanism. Additionally, be aware that plugging a cable into the light breaks the weather seal of the USB-C port. If it begins to rain, you must unplug the cable immediately and secure the silicone port cover to prevent water damage to the internal electronics.
Do I need both a front and rear light for daytime commuting?
While front and rear lights are legally required during hours of darkness on public roads in Singapore, using them during the day is highly recommended for safety. Daytime running lights significantly improve your contrast against bright tropical sunlight, deep shadows cast by trees or buildings, and general urban visual clutter. For daytime commuting, select lights that feature a dedicated high-output flash or pulse mode. These irregular flash patterns are designed to catch the attention of motorists and pedestrians from a distance, helping to prevent common accidents at junctions, roundabouts, and driveways where drivers might otherwise overlook a cyclist. Using a rear light during the day is particularly effective on shared roads, giving drivers ample warning to slow down and pass you safely.
Community discussion
Share your experience or ask a question. Comments are reviewed before publication.