
To keep your sports water bottle hygienic and completely leakproof, you must regularly clean and occasionally replace its rubber seal, also known as the gasket. Over time, moisture, beverage residue, and environmental dust can accumulate in the tight grooves of the lid, leading to mold growth or a compromised seal. Fortunately, maintaining this component is a straightforward process that requires only basic household items and a gentle touch. By establishing a routine cleaning schedule and knowing when to swap out a worn gasket, you can extend the lifespan of your bottle and ensure every sip remains fresh and clean.
In warm and humid climates, such as Singapore’s year-round tropical weather, moisture-loving bacteria and mold can develop rapidly in dark, damp spaces. A neglected bottle lid is the perfect environment for these microorganisms to thrive. Regularly inspecting, deep cleaning, and properly reassembling the rubber components of your lid will not only prevent messy spills in your gym bag or backpack but also protect your health. This guide provides a comprehensive, step-by-step approach to maintaining and replacing your bottle’s rubber seal safely and effectively.
Quick Guide to Owala Seal Maintenance
Knowing whether to perform a routine clean or completely replace your rubber seal depends on a few simple visual and physical cues. Routine cleaning is typically sufficient if you notice mild odors, slight discoloration, or minor dust and residue along the edges of the gasket. These issues can usually be resolved with a thorough wash and dry, restoring the seal to its original hygienic state without the need for a new part.
Products mentioned in this guide
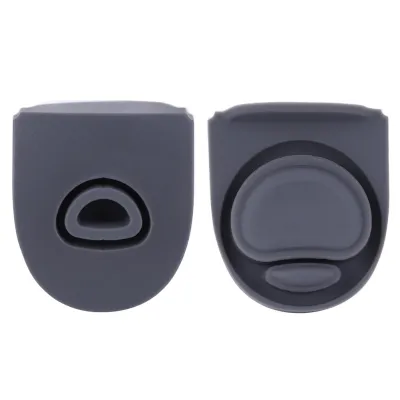
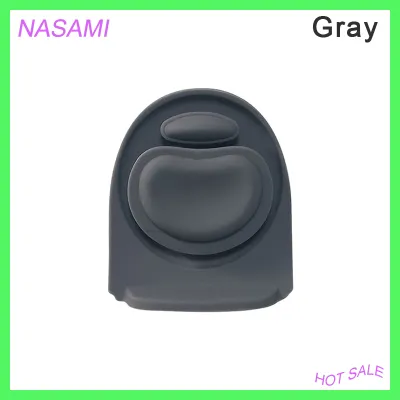
![[SG FREE ] 5 Pcs Replacement Stopper For Owala Free Sip Silicone Anti-Spill Lid Stopper Water Bottle Top Lid Compatible](https://img.lazcdn.com/g/p/21d3ec353da12b5b61dfa044398a0eee.jpg_400x400q80.jpg_.webp)
Prices are valid at publication and may change. Please refer to the product page for the latest price.
On the other hand, certain indicators clearly signal that the rubber seal has reached the end of its usable life and must be replaced. If you observe deep-seated mold spots that do not wash away, physical cracking, tearing, extreme stretching, or if the bottle continues to leak despite proper assembly, it is time for a replacement. A compromised gasket cannot maintain the necessary vacuum, leading to persistent leaks and potential contamination.
Before undertaking any maintenance, always review the manufacturer’s care instructions for your specific bottle model. Applying extreme heat, boiling water, or harsh chemical solvents can permanently warp the plastic lid or degrade the silicone material of the seal. Taking a cautious, gentle approach ensures you do not accidentally damage the lid assembly during the maintenance process.
What You Need to Clean or Replace the Seal
Preparing the correct tools beforehand makes the cleaning or replacement process quick and prevents accidental damage to your bottle lid. For routine cleaning, you will need mild dish soap, warm water, a soft-bristled brush (such as a clean toothbrush or a dedicated bottle cleaning brush), and cotton swabs to reach into the narrowest channels of the lid.

When removing the seal, the choice of tool is critical to avoiding permanent damage. Use a blunt plastic spudger, a silicone removal tool, or the flat, dull edge of a butter knife to gently lift the gasket out of its groove. These blunt tools allow you to pry the rubber loose without scratching the surrounding plastic or puncturing the seal itself.
Never use sharp metal objects such as sewing needles, safety pins, pocket knives, or scissors to extract the seal. Sharp edges can easily slice through the delicate silicone, rendering it useless, and can leave deep scratches in the lid’s plastic channel. These scratches create microscopic crevices where bacteria and mold can hide, making future cleaning much more difficult. Additionally, avoid abrasive scrubbers, steel wool, and bleach-based cleaners, which can rapidly degrade the rubber’s elasticity and food-safe properties.
How to Clean the Owala Rubber Seal
To begin the deep cleaning process, find a clean, well-lit workspace and lay down a clean towel. Carefully insert your blunt plastic tool under the edge of the rubber seal inside the lid. Slowly and gently pry upward, working your way around the perimeter of the gasket until it pops out of its groove. Do not yank or pull forcefully from a single point, as this can stretch or tear the silicone.
Once the seal is removed, prepare a small bowl of warm water mixed with a few drops of mild dish soap. Submerge both the rubber seal and the lid in the soapy water. Use your soft-bristled brush to gently scrub all surfaces of the silicone gasket, paying close attention to the ridges and the underside where residue tends to accumulate. Use a soapy cotton swab to clean the deep, narrow channel inside the plastic lid where the seal normally sits.
After scrubbing, rinse both the seal and the lid thoroughly under clean, running water. Ensure all soap residue is completely washed away, as dried soap can affect the taste of your water and attract dirt. Shake off excess water and place the components on a dry towel in a well-ventilated area. Allow them to air-dry completely before reassembly; trapping even a small amount of moisture inside the lid groove can lead to rapid mold regrowth within days.
To reassemble, ensure the lid and seal are entirely dry. Align the rubber seal with the lid groove, making sure the correct side faces downward according to your bottle’s design. Press the seal firmly and evenly into the channel using your clean fingers or the flat end of your blunt tool. Run your finger along the entire path of the seal to verify that it sits completely flat, with no twists, bumps, or raised edges that could break the airtight seal.
How to Remove and Replace the Owala Seal
If your existing rubber seal is stretched out, cracked, or heavily stained, you will need to remove it and install a fresh replacement. Use your blunt plastic tool to lift the damaged gasket out of the lid channel. If the old seal is sticky or degraded, it may cling to the plastic; work slowly to ensure you remove all fragments of the old rubber from the groove, leaving a clean surface for the new installation.
Before installing the new seal, perform a quick compatibility check. Ensure the replacement gasket matches your specific bottle model and capacity. For example, a seal designed for a 24-ounce bottle may not fit a 32-ounce bottle, and seals are often shaped differently depending on whether the lid uses a free-flowing spout or a straw mechanism. Trying to force an incompatible seal into the lid will result in leaks and can damage the plastic housing.
To install the new gasket, position it evenly over the clean, dry lid groove. Gently press the rubber into the channel, starting from one side and working your way around the circle. Avoid stretching the silicone excessively as you press it in, as over-stretching can cause the material to bunch up, creating a small gap where water can escape. The gasket should sit snugly and flatly within the groove without any visible distortion.
Once the new seal is fully seated, perform a quick water leak test to verify the installation. Fill your bottle with tap water, screw the lid on securely, and close the spout lock. Invert the bottle over a sink and shake it gently in various directions. Check closely around the lid seam, the button area, and the spout for any escaping droplets. If the bottle remains completely dry, your replacement was successful.
Troubleshooting Leaks After Cleaning or Replacement
If your bottle continues to leak after you have cleaned or replaced the rubber seal, do not panic. The most common cause of post-maintenance leaks is improper seating. Even a tiny, almost invisible twist in the gasket or a microscopic piece of lint trapped underneath can prevent the silicone from forming a proper vacuum. Remove the seal, inspect the groove for debris, and press it back into place, ensuring it is perfectly flat.
If the seal is seated correctly but water still escapes, inspect the plastic lid and the bottle’s metal or plastic threads. Look closely under a bright light for hairline cracks, warping from heat exposure, or cross-threading damage. If the bottle has been dropped onto a hard surface, the lid or the neck of the bottle may have deformed slightly. In such cases, a new rubber seal cannot resolve the issue because the structural components no longer align properly.
Additionally, evaluate other potential failure points on the lid assembly. Many sports bottles feature secondary sealing components, such as a small silicone plug inside the flip-top cap or a tiny vent hole seal. If these smaller parts are missing, misaligned, or damaged, water can escape even if the main rim gasket is brand new. Inspect these areas to ensure all rubber parts are intact and properly positioned.
If you have verified that the gasket is perfect, the lid has no cracks, and all secondary seals are in place, but the leak persists, stop attempting DIY repairs. Continuing to tighten the lid excessively can strip the threads and cause permanent damage. At this stage, contact the manufacturer’s customer support team or purchase a complete replacement lid assembly to restore your bottle’s leakproof performance.
Where to Find Genuine Owala Replacement Parts
To maintain the safety and performance of your water bottle, always prioritize sourcing replacement seals directly from the official brand website or authorized brand stores on major online marketplaces. Purchasing from official channels guarantees that the replacement parts are made from high-quality, food-grade silicone that is free from harmful chemicals and designed to withstand regular use.
When searching for parts on online marketplaces, carefully read the product descriptions to verify compatibility. Look for listings that explicitly state the bottle model and volume they are designed for. Avoid purchasing generic, unbranded rubber O-rings or universal gasket kits. While these generic options may look similar, they often differ by fractions of a millimeter in thickness or diameter, which is enough to cause persistent leaks or make the lid incredibly difficult to screw on.
Finally, check the seller’s return and exchange policies before finalizing your purchase. This is especially important if you are unsure of your bottle’s exact model or size. Having a flexible return policy ensures that if you accidentally order the wrong size, you can easily exchange it for the correct gasket without incurring unnecessary costs.
Frequently Asked Questions (FAQ)
Can I put the Owala lid and rubber seal in the dishwasher?
While many modern sports bottle lids are labeled as top-rack dishwasher safe, it is highly recommended to remove the rubber seal before running them through a cycle. The intense heat of a dishwasher, combined with highly concentrated detergents, can accelerate the degradation of the silicone gasket, causing it to lose its elasticity and warp over time. Furthermore, the dishwasher cannot effectively clean the tight space underneath the seal, which can trap dirty water and soap residue, leading to mold growth. For the best results and longevity, wash the rubber seal by hand.
How often should I replace the rubber seal on my water bottle?
There is no strict calendar schedule for replacing a rubber seal; instead, replacement should be based on regular visual and tactile inspections. If you use your bottle daily, expose it to sugary or acidic beverages, or live in a hot, humid environment, the rubber may degrade faster. Inspect the seal every few weeks for signs of wear, such as a sticky texture, loss of stretchiness, deep discoloration, or persistent odors that do not disappear after washing. If you notice any of these physical changes or if the bottle begins to drip, replace the seal immediately.
Is it safe to use a generic silicone O-ring if I cannot find an official replacement?
Using generic, uncertified silicone O-rings is generally not recommended for food and beverage containers. Official replacement parts are certified as food-safe, ensuring they do not leach harmful chemicals into your drinking water. Additionally, generic O-rings rarely match the precise dimensional specifications of your bottle’s lid channel. Even a tiny mismatch in thickness or diameter can prevent the lid from sealing correctly, leading to leaks, or make the lid so tight that you risk stripping the plastic threads when opening and closing the bottle.
Community discussion
Share your experience or ask a question. Comments are reviewed before publication.