
To clean a hydration bag after using sports drinks, you must thoroughly flush, scrub, and dry every component—including the bladder, tube, and bite valve—immediately after your activity. Sports drinks contain sugars, electrolytes, and acids that quickly foster mold growth and leave sticky residues. A simple rinse is not enough; a dedicated routine using mild soap, specialized brushes, and proper drying techniques is essential to preserve your gear and protect your health.
Filling your hydration bag with sports drinks or electrolyte mixes is an excellent way to sustain energy during long runs or endurance events. However, the sugars, carbohydrates, and acids in these beverages create an ideal breeding ground for bacteria and mold. If you leave even a small amount of residue inside your hydration bladder, you will likely return to find a sticky, discolored, and foul-smelling system that is difficult to salvage.
To keep your hydration bag hygienic, you must establish a consistent cleaning routine that targets every part of the system, from the main reservoir to the narrow drinking tube and bite valve. A simple rinse with tap water is rarely sufficient to remove the microscopic sugar film left behind by sports nutrition products. Instead, a systematic approach using the right tools, mild cleaning agents, and thorough drying techniques is required to prevent mold colonization and protect your gear.
Products mentioned in this guide
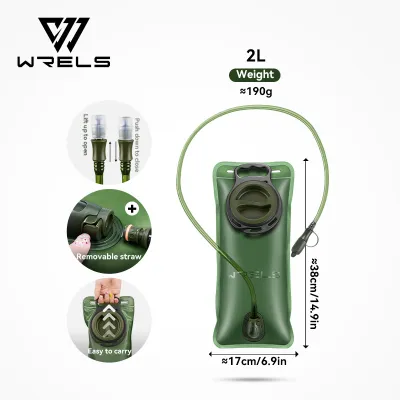
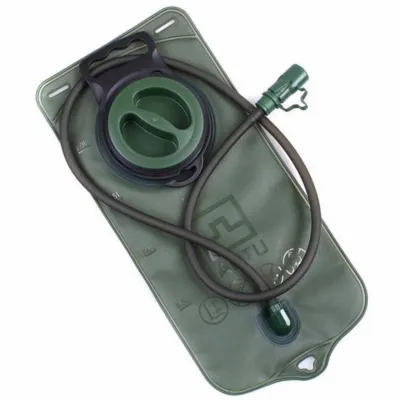
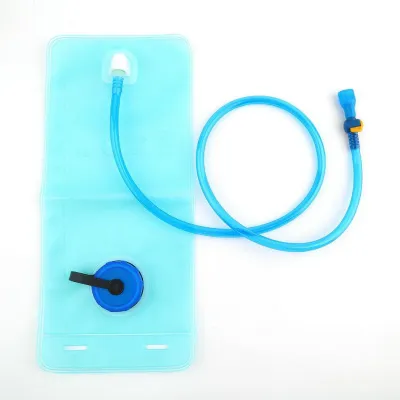
Prices are valid at publication and may change. Please refer to the product page for the latest price.
Why Sports Drinks Require a Thorough Cleaning Routine
Plain water carries a low risk of rapid microbial growth, but sports drinks completely alter the environment inside your hydration bag. The sugars, carbohydrates, and organic acids in these beverages serve as an immediate food source for bacteria, yeast, and mold spores. In the dark, damp, and enclosed space of a hydration bladder, these microorganisms multiply rapidly, forming a stubborn, slimy biofilm.
This biofilm ruins the taste of your water and can pose health risks. Furthermore, sticky residue does not stay in the main bladder. As you drink, the sugary liquid coats the entire length of the flexible drinking tube and settles in the crevices of the bite valve. Over time, this residue hardens, clogging the flow of fluid and creating pockets of mold that are difficult to reach.
In warm and humid climates, such as in Singapore, this microbial activity accelerates. High ambient humidity prevents trapped moisture from evaporating quickly, creating a perfect incubator for fungal spores. Early signs of buildup include a slippery feel on the inner walls, dark spots in the tube, a cloudy appearance in the plastic, or a persistent musty odor.
Essential Tools and Safe Cleaning Solutions
To clean your hydration system effectively without causing damage, specialized tools are highly recommended. A standard kitchen sponge cannot reach the corners of a flexible bladder, and it is useless for the long, narrow drinking tube. A dedicated hydration bladder cleaning kit is the best solution. These kits typically include a large reservoir brush, a long, flexible wire brush for the tube, a small brush for the bite valve, and a drying frame to keep the bladder expanded.

For cleaning agents, gentleness is essential. Mild, unscented dish soap is the safest option for regular maintenance. Alternatively, you can use manufacturer-approved cleaning tablets, which dissolve quickly to target residues without leaving behind artificial perfumes. Avoid harsh chemicals like undiluted bleach, highly concentrated vinegar, or industrial solvents, as they can degrade the thermoplastic polyurethane (TPU) and silicone seals, causing premature leaks.
Temperature and friction also require care. While boiling water might seem ideal for sterilization, high heat can warp the plastic and melt adhesive seals. Always check your manufacturer’s manual for maximum safe water temperatures. Additionally, avoid abrasive scrubbers or steel wool, which scratch the smooth inner lining of the bladder, creating microscopic grooves where bacteria can easily cling.
Step-by-Step Routine: Washing the Bladder, Tube, and Bite Valve
Begin your cleaning routine as soon as possible after your activity. Start by emptying any leftover sports drink from the reservoir. Perform an initial rinse by filling the bladder with warm water, sealing it, shaking it vigorously, and pouring the water out. This step flushes out the bulk of the loose sugars before you begin scrubbing.
Next, prepare your cleaning solution. Fill the bladder with warm water and add a few drops of mild, unscented dish soap or a specialized cleaning tablet. If using a tablet, let it sit for the recommended duration to break down the sticky film. Take the large reservoir brush and gently scrub the entire interior surface of the bladder, paying close attention to the corners, bottom seams, and the area around the opening port.
After scrubbing the reservoir, address the drinking tube. Detach the tube from the bladder if your model features a quick-connect system. Insert the long, flexible tube brush into the opening of the tube. Gently push the brush through the entire length, rotating it to scrub away the sticky film coating the inner walls, then pull it out and rinse.
The bite valve requires separate attention because its small, moving parts easily trap sugary liquids. Carefully disassemble the bite valve from the tube, following the manufacturer’s guidelines to avoid tearing the silicone. Use the small bite valve brush to clean the internal passages, removing any visible buildup or stickiness.
Once all components are scrubbed, perform a comprehensive rinse. Flush the bladder, tube, and bite valve repeatedly with clean, warm water. Run water through the tube several times to ensure all soap suds and loosened residues are completely washed away. Continue rinsing until the water runs perfectly clear and the surfaces feel clean and smooth rather than slippery.
Deep Cleaning for Stubborn Odors, Mold, or Sticky Buildup
If you accidentally leave sports drink in your hydration bag for several days, or if a musty odor persists after a standard wash, a deep clean is necessary. For stubborn odors, safe household alternatives are highly effective. A solution of warm water mixed with two tablespoons of baking soda is excellent for neutralizing odors. Alternatively, a highly diluted solution of lemon juice and warm water can help break down persistent organic residues, provided you rinse the system thoroughly afterward.
Before attempting any deep cleaning method, consult the manufacturer’s care label to verify maximum soaking times and temperature limits. Some materials can tolerate a mild baking soda soak for several hours, while others may degrade if exposed to acidic or alkaline solutions for extended periods. Never leave cleaning solutions in the bladder overnight unless the manufacturer explicitly states it is safe to do so.
During your deep clean, perform a meticulous visual inspection of the bite valve, tube connections, and interior corners of the bladder. Look closely for dark grey, black, or green spots, which indicate mold colonization. If mold has penetrated deep into the porous silicone of the bite valve or the inner lining of the tube, it may be impossible to remove safely, posing a continuous hygiene risk.
If the mold cannot be scrubbed away, or if the plastic has become brittle, sticky, or permanently discolored, you must replace the components. Most manufacturers sell replacement tubes and bite valves separately, allowing you to restore your system without purchasing an entirely new bladder. However, if the main reservoir’s structural integrity is compromised, replacing the entire hydration bag is the safest course of action.
Proper Drying and Storage to Prevent Future Mold Growth
Even the most thorough washing routine is useless if you do not dry your hydration bag properly. Residual moisture is the primary catalyst for mold and bacterial growth, especially when the bag is stored in a closed cupboard. To dry the bladder effectively, use a dedicated drying rack, a plastic insert, or a clean kitchen whisk placed inside the reservoir to keep the inner walls from collapsing against each other, allowing air to circulate freely.
Hang the bladder upside down in a well-ventilated area out of direct sunlight. Direct sunlight and high heat can degrade the TPU material over time, making it brittle and prone to cracking. Ensure the opening points downward so that any remaining water droplets can drain out naturally. For the drinking tube, hang it vertically, ensuring there are no loops or bends where water can pool.
Before reassembling or storing your hydration system, verify that every single component is completely dry to the touch. This includes the threads of the screw cap, the quick-connect ports, and the internal channels of the bite valve. Storing the bag with even a tiny amount of moisture inside risks mold growth before your next use.
For long-term storage, keep your clean, dry hydration bag in a cool, dry place away from direct heat. An alternative and highly effective storage method is to place the completely clean, dry, and sealed bladder inside the freezer. The freezing temperature prevents any microscopic bacterial or mold spores from multiplying, ensuring your bag remains fresh. Just ensure the bladder is fully dry before freezing to prevent ice crystals from damaging the material, and allow it to warm up to room temperature before bending or filling it.
Frequently Asked Questions (FAQ)
Can I put my hydration bag in the dishwasher?
You should generally avoid putting your hydration bag in the dishwasher unless the manufacturer explicitly states that it is dishwasher-safe on the top rack. The high heat of a dishwasher’s wash and dry cycles can easily warp the flexible TPU material, melt the adhesive seals, and damage the quick-connect mechanisms, leading to permanent leaks. Furthermore, standard dishwasher detergents are highly abrasive and contain strong chemicals that can degrade the plastic over time or leave behind a chemical residue that is difficult to rinse out and unsafe to ingest. Hand washing remains the safest and most reliable method to preserve the lifespan of your gear.
How often should I clean the bag if I only use plain water?
If you only use plain, clean water in your hydration bag, you do not need to perform a full scrub after every single use, but basic maintenance is still required. After each outing, empty any remaining water, rinse the bladder, and hang it up to dry completely. You should perform a thorough wash with mild soap and brushes every few weeks, or sooner if you notice a plastic taste, cloudiness, or if the bag has been stored damp. Regular visual and olfactory checks are your best guide; if the interior walls feel slippery or if there is any hint of a musty odor, it is time for a proper cleaning session.
Community discussion
Share your experience or ask a question. Comments are reviewed before publication.