
Starting a lower-body strength routine does not require a commercial gym membership or heavy, space-consuming iron weights. For beginners, a leg band exercise routine offers an accessible, highly effective pathway to building lower-body strength, improving joint stability, and activating major muscle groups like the glutes, hamstrings, and quadriceps. By utilizing elastic tension, these versatile tools allow you to perform essential movement patterns in almost any setting, whether in a compact apartment or a local park. This guide breaks down the fundamental exercises, proper techniques, and safety protocols to help you establish a safe and consistent lower-body workout routine.
Using resistance bands allows you to stimulate muscle growth and improve functional fitness with minimal risk. Because elastic bands do not rely on gravity to create resistance, they allow you to apply force from multiple angles, which helps target stabilizing muscles that are often neglected during traditional free-weight exercises. Whether your goal is to tone your legs, support joint health, or build a foundation for more advanced training, mastering the basics of band training is an excellent first step.
Benefits of Resistance Bands for Beginner Leg Workouts
Resistance bands provide a highly joint-friendly alternative to heavy free weights like dumbbells and barbells. Traditional weight training places a constant gravitational load on your skeletal system, which can sometimes stress sensitive joints if your form is not yet perfect. In contrast, resistance bands create a smooth, progressive loading profile that matches the natural strength curve of human muscles. This means the resistance is lowest at the start of the movement where your joints are in their most vulnerable positions, and highest at the peak of contraction where your muscles are strongest.
Products mentioned in this guide
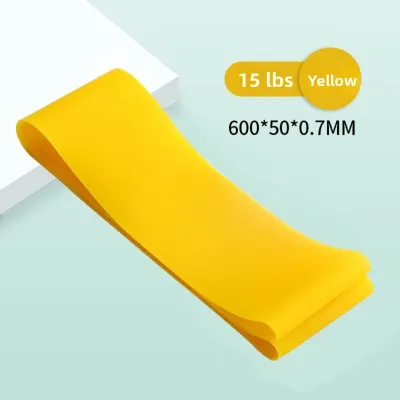

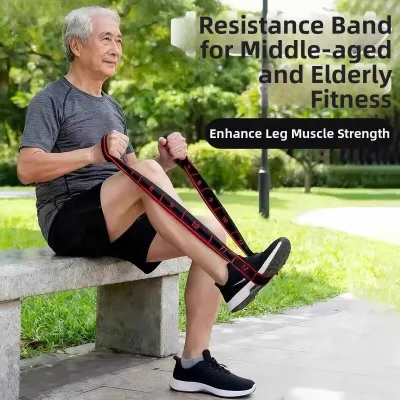

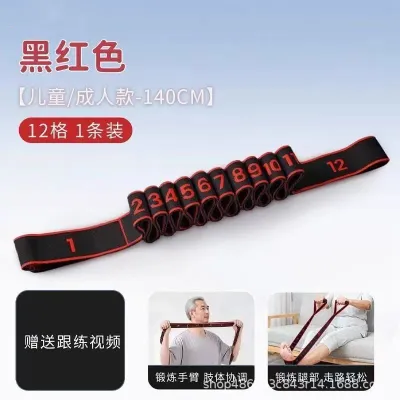
Prices are valid at publication and may change. Please refer to the product page for the latest price.
This unique loading mechanism is driven by the concepts of constant tension and variable resistance. When you lift a free weight, momentum can sometimes carry the weight through certain portions of the movement, reducing muscle activation. Resistance bands require continuous force throughout both the lifting (concentric) and lowering (eccentric) phases of the exercise. Because the band resists your movement every millimeter of the way, your muscles must remain fully engaged, leading to efficient muscle fiber recruitment and rapid improvements in neuromuscular coordination.
Additionally, the portability and convenience of resistance bands make them an ideal choice for home-based workouts. In urban living environments where dedicated workout space is often limited, a complete set of bands can be easily stored in a small drawer or carried in a backpack. They are lightweight, require no setup time, and can turn any small living room or outdoor fitness corner into a fully functional training zone. This elimination of logistical barriers makes it significantly easier for beginners to maintain consistency in their fitness routines.
How to Choose the Right Resistance Band for Leg Day
Selecting the appropriate equipment is crucial for ensuring both the safety and effectiveness of your lower-body workouts. The two most common types of bands used for leg exercises are mini loop bands and long loop or tube bands. Mini loop bands are typically 25 to 30 centimeters long and are designed to fit around your thighs, calves, or ankles. They are highly effective for isolating the glutes, hips, and outer thighs. Long loop bands or tube bands with handles are much longer and are ideal for compound movements like squats and lunges, where you must anchor the band under your feet and stretch it up to your shoulders.

When purchasing your first set of bands, which typically cost between S$15 and S$40 at local sporting goods stores or online marketplaces, look for a package that includes multiple resistance levels. These levels are usually color-coded, ranging from extra-light to extra-heavy. Beginners should always start with a light to medium band. Using a band that is too heavy will force your body to compensate by using momentum or recruiting secondary muscles, which compromises your form and increases the risk of strain. You should only progress to a heavier band once you can complete all recommended repetitions with perfect control.
Before starting any exercise session, performing a quick condition check on your bands is a mandatory safety prerequisite. Over time, exposure to sweat, UV light, and friction can cause latex or fabric bands to degrade. Stretch each band slightly under a bright light and inspect it thoroughly for micro-tears, small punctures, cracking, or severe discoloration. A band that snaps under tension can cause painful bruising or eye injuries. If you detect any signs of wear, discard the band immediately and replace it.
Essential Safety Rules and Form Cues for Band Training
Maintaining a controlled tempo is the golden rule of resistance band training. A common beginner mistake is allowing the band to snap back quickly during the return phase of an exercise. To maximize your strength gains and protect your joints, you must actively resist the pull of the band as you return to the starting position. Aim for a tempo of two seconds to stretch the band, a brief one-second pause at the point of maximum tension, and three controlled seconds to return. This slow eccentric phase keeps the target muscles under tension longer, promoting better strength development.
Proper knee tracking is another critical form principle that prevents joint strain. During lower-body movements like squats and lateral walks, the tension of the band will naturally try to pull your knees inward. Allowing your knees to collapse inward—a movement known as valgus collapse—places excessive stress on the knee joints and ligaments. Always focus on actively pushing your knees outward so they remain vertically aligned with your second and third toes throughout the entire range of motion.
Correct band placement is essential to prevent skin pinching, slipping, and joint discomfort. When performing exercises that target the hips and glutes, place the band flat against your clothing two to three inches above your knee joint. Never place a high-tension band directly over the kneecap or any other joint structure, as this can cause friction and unnatural joint pressure. For exercises targeting the lower legs or ankles, ensure the band is flat and secure around the ankles or the mid-foot to prevent it from rolling up or snapping upward.
Finally, establish a clear stop condition for your workouts. While a deep muscular burn and mild fatigue are normal signs of a productive workout, sharp, stabbing, or localized joint pain is not. If you experience any sudden discomfort in your knees, hips, or lower back, cease the exercise immediately. Do not attempt to push through joint pain; instead, rest, check your alignment, and if necessary, reduce the resistance or consult a certified fitness professional.
4 Fundamental Leg Band Exercises for Beginners
Banded Squats
The banded squat is a foundational compound exercise that targets the quadriceps, glutes, and hamstrings while teaching proper hip mechanics.
- Setup: Place a mini loop band flat around your thighs, approximately two to three inches above your knees. Stand with your feet shoulder-width apart, pointing your toes slightly outward (about 5 to 15 degrees) to allow for comfortable hip tracking.
- Execution: Initiate the movement by hinging at your hips and bending your knees, as if you are sitting back into a chair. Keep your chest upright, your gaze forward, and your core engaged. As you descend, actively press your knees outward against the resistance of the band. Lower yourself until your thighs are parallel to the floor, or as deep as your flexibility allows without rounding your lower back. Drive through your heels to return to the starting position, squeezing your glutes at the top.
- Common Mistakes: Avoid letting your knees collapse inward during either the descent or ascent. Additionally, ensure your heels remain firmly planted on the floor; rising onto your toes shifts excess stress onto your knee joints.
Lateral Band Walks
This exercise specifically targets the gluteus medius and hip abductors, which are crucial for pelvic stability and knee alignment.
- Setup: Place a mini loop band around your ankles or around the arches of your feet for greater resistance. Stand with your feet hip-width apart to create initial tension on the band, and sink into a shallow quarter-squat athletic stance.
- Execution: Keeping your torso stable and your hips level, take a controlled step to the right with your right foot. Step wide enough to increase the tension significantly, but not so wide that you lose balance. Slowly bring your left foot toward your right foot to return to the hip-width starting position, maintaining constant tension on the band. Take 10 to 12 steps in one direction, then reverse the movement to walk back to the starting point.
- Common Mistakes: Do not drag your trailing foot or let your feet come completely together, as this releases the beneficial tension on the band. Avoid swaying your upper body side to side to swing your legs; the movement should originate entirely from your hips.
Banded Glute Bridges
The banded glute bridge isolates the glutes and hamstrings while teaching safe hip extension without overloading the lower back.
- Setup: Lie flat on your back on a exercise mat with your knees bent and your feet flat on the floor, about hip-width apart. Position a mini loop band just above your knees, ensuring it lies flat against your thighs.
- Execution: Rest your arms flat by your sides. Squeeze your glutes, press your knees outward against the band, and drive through your heels to lift your hips toward the ceiling. Lift until your body forms a straight line from your shoulders to your knees. Hold this top position for one to two seconds, actively squeezing your glutes and pressing against the band, then slowly lower your hips back down until they lightly touch the mat before starting the next repetition.
- Common Mistakes: Avoid arching your lower back excessively at the top of the movement. Your ribs should remain tucked, and the lift should be driven by hip extension (glutes) rather than spinal hyperextension.
Seated Leg Abductions
This seated exercise provides a highly stable environment to isolate the outer thighs and deep hip stabilizers, making it perfect for absolute beginners.
- Setup: Sit upright on the edge of a sturdy chair or bench. Place a mini loop band around your thighs, just above your knees. Position your feet flat on the floor, hip-width apart, so there is light tension on the band.
- Execution: Place your hands on your hips or the sides of the chair for support. Keeping your core tight and your feet planted firmly on the floor, slowly push your knees outward as far as comfortable. Pause for a second at the point of maximum stretch, feeling the contraction in your outer hips, then slowly control the return of your knees to the starting position.
- Common Mistakes: Do not lean your torso backward or forward to generate momentum. Keep your upper body completely still, and ensure your feet do not roll onto their outer edges as you push your knees apart.
How to Structure Your First Leg Band Workout
To get the most out of your training, structure your leg band routine systematically. Begin with a five-minute dynamic warm-up without the bands. Focus on gentle movements like bodyweight squats, leg swings, and hip circles to increase blood flow, lubricate your joints, and prepare your nervous system for exercise. Skipping a warm-up increases the risk of muscle strains, especially when transitioning from a sedentary state.
Once warmed up, perform the four fundamental exercises in a structured sequence. For beginners, a straight-set approach is highly effective. Complete all sets of one exercise before moving to the next.
- Banded Squats: 2 to 3 sets of 12 to 15 repetitions
- Lateral Band Walks: 2 to 3 sets of 10 to 12 steps in each direction
- Banded Glute Bridges: 2 to 3 sets of 12 to 15 repetitions
- Seated Leg Abductions: 2 to 3 sets of 15 repetitions
Rest for approximately 60 seconds between each set. This rest period allows your muscles to replenish their energy stores, ensuring you can maintain proper form in the subsequent set. After completing the entire workout, spend five minutes performing static stretches for your quadriceps, hamstrings, and glutes to promote flexibility and aid recovery.
As your body adapts, you will need to apply progressive overload to continue making progress. You will know it is time to progress when you can complete 15 repetitions of an exercise with perfect form and feel only mild fatigue (a subjective effort of about 5 out of 10). To increase the challenge, you can transition to a thicker band with higher resistance, slow down your movement tempo to increase time under tension, or increase your training volume to 3 or 4 sets per exercise.
Frequently Asked Questions (FAQ)
How often should beginners train legs with bands?
Beginners should aim to train their legs with resistance bands two times per week, leaving at least 48 hours of rest between sessions. This recovery window is essential, as muscles do not grow during the workout itself; they repair and strengthen during periods of rest. Depending on your overall weekly schedule and recovery capacity, you can gradually increase this to three times per week once your muscles adapt to the training stimulus and morning muscle soreness becomes minimal.
Can resistance bands build muscle as effectively as weights?
For beginners and intermediate trainees, resistance bands can build muscle highly effectively. They provide sufficient tension to stimulate muscle hypertrophy and improve muscular endurance, especially in the glutes and hips. However, as you build significant strength, you may eventually reach the maximum resistance limit of standard bands. While bands remain excellent for joint health, stability, and warm-ups, advanced lifters seeking maximal strength and high levels of muscle mass will eventually need to incorporate heavy free weights or gym machines to continue progressing.
Community discussion
Share your experience or ask a question. Comments are reviewed before publication.