
Staying hydrated is essential for any cyclist, especially when navigating warm, humid routes or embarking on long road rides. A bottle holder, also known as a bottle cage, is a simple yet critical accessory that keeps your water within arm’s reach. However, improper installation can lead to stripped threads, damaged frame tubes, or a loose bottle that could fall and cause a serious accident on busy paths.
Installing a bottle holder correctly involves identifying your frame’s material, preparing the mounting threads, using the correct tools, and tightening the bolts to precise torque specifications. By following a systematic approach, you can secure your hydration system without risking cosmetic or structural damage to your bicycle. This guide outlines the exact steps and precautions needed to complete the installation safely.
Tools and Preparation for Bottle Holder Installation
Before beginning the installation, gathering the correct tools is essential to prevent stripping the bolt heads or damaging your bicycle frame. Most standard bicycle bottle cage bolts require a 4mm hex key, though some lightweight or custom bolts may use a 3mm or 5mm hex key. Using a high-quality, unworn hex wrench ensures a snug fit inside the bolt head, minimizing the risk of rounding the edges.
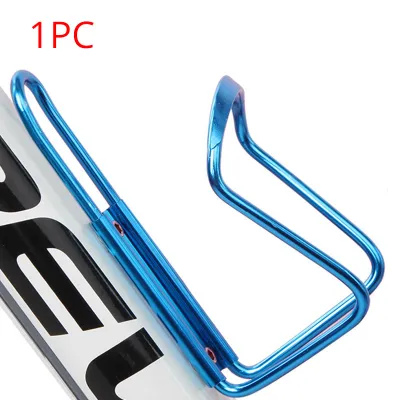
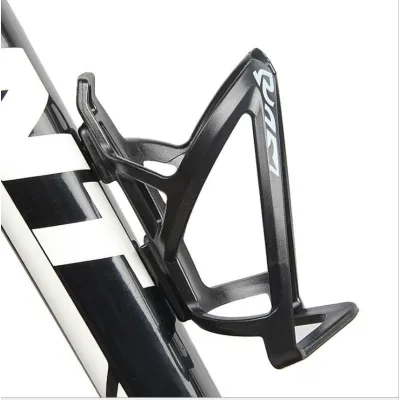
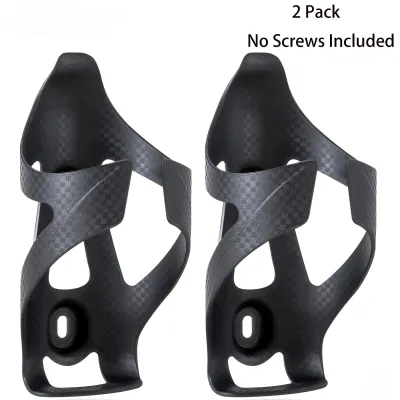
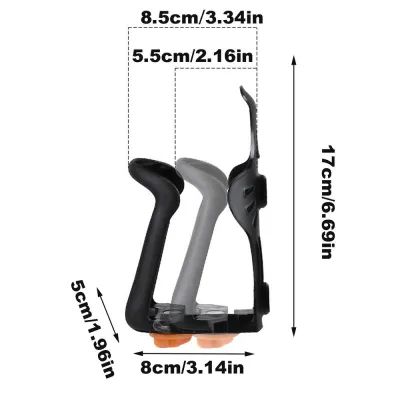
Products mentioned in this guide
![SG Seller VOZUKO Water Bottle Holder Nylon Minimalist Tactical Molle Bottle Carrier Strap Bottle Rope Belt Bottle Bag for Walking Running Cycling Hiking [089]](https://img.lazcdn.com/g/p/728a3bbd537609e1c3bf3dffe1b3a9ac.jpg_400x400q80.jpg_.webp)
Prices are valid at publication and may change. Please refer to the product page for the latest price.
Thread preparation is another critical factor in a long-lasting installation. For metal frames, such as aluminum, steel, or titanium, applying a mild, medium-strength threadlocker or a dedicated anti-seize compound to the bolt threads is highly recommended. This preparation prevents the bolts from backing out due to road vibrations while protecting the threads from galvanic corrosion caused by sweat, rain, and humidity.
Cleaning the mounting area before installation prevents dirt and grit from getting trapped between the bottle holder and the frame. Prepare a clean microfiber cloth and a mild degreaser or isopropyl alcohol to wipe down the frame’s mounting surface. Removing accumulated road grime and sweat residue ensures a flush fit and protects your frame’s paint finish from abrasive wear.
Finally, a calibrated torque wrench is highly recommended, particularly if you are working with carbon fiber frames or lightweight alloy components. Standard hand-tightening makes it easy to accidentally apply too much force, which can crack carbon tubes or strip the threaded inserts embedded in the frame. A torque wrench allows you to adhere strictly to the manufacturer’s specified torque limits.
Assessing Your Bicycle Frame and Mounting Points
Bicycle frames are constructed from various materials, including aluminum, steel, titanium, and carbon fiber, each requiring different levels of care during accessory installation. Metal frames are generally more forgiving of minor over-tightening, but their threaded inserts can still strip if excessive force is applied. Carbon fiber frames require extreme caution, as the material is highly sensitive to localized crushing forces.

Locate the threaded inserts, often called braze-ons or rivnuts, on your bicycle’s down tube or seat tube. Before mounting any hardware, consult your bicycle owner’s manual or the manufacturer’s website to find the specific torque limits for these mounting points. Standard bottle cage bolts on metal frames typically require a torque of 3 to 4 Newton-meters, while carbon frames often have much lower limits that must not be exceeded.
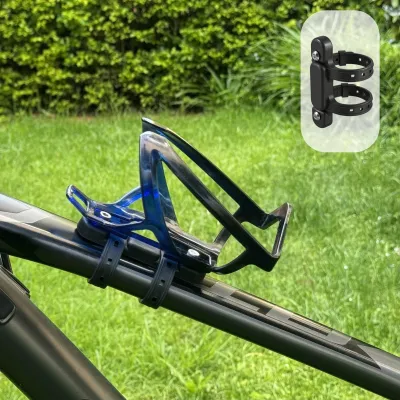
If your bicycle frame lacks pre-drilled threaded inserts, you will need to evaluate alternative mounting options. Vintage steel frames, folding bicycles, and certain mountain bikes often require strap-on adapters or clamp-on mounting systems. These alternative systems must be selected carefully to ensure they do not pinch or deform thin-walled frame tubing when tightened.
Before positioning the bottle holder, check for potential clearance issues within the frame triangle. Ensure the bottle holder and the bottle itself will not interfere with front derailleur clamps, rear suspension linkages, or internally routed cables. Additionally, verify that you can easily insert and remove the bottle without striking the top tube, especially on smaller frame sizes or compact frame geometries.
Step-by-Step Guide to Mounting the Bottle Holder
Begin by thoroughly cleaning the area around the frame’s threaded inserts using isopropyl alcohol and a clean cloth. Inspect the internal threads of the inserts for any signs of dirt, paint buildup, or existing corrosion. If you detect debris inside the threads, gently clean them out using a dry cotton swab to ensure the bolts can thread in smoothly without binding.
Apply a small drop of medium-strength threadlocker or anti-seize compound to the threads of each mounting bolt. If you are installing the holder on a carbon fiber frame and the manufacturer recommends it, apply a small amount of carbon assembly paste to the contact area between the frame and the bottle holder. This paste increases friction, reducing the torque required to keep the holder from slipping or twisting.
Align the mounting slots of the bottle holder with the threaded inserts on the frame. Insert the first bolt through the holder and into the frame thread, turning it by hand for at least three to four full rotations. Always start threading the bolts by hand rather than using a tool; this simple step prevents cross-threading, which can permanently ruin the frame’s threaded inserts.
Insert the second bolt by hand in the same manner, ensuring the bottle holder remains aligned and flush against the frame. Once both bolts are started, use your hex key to turn them until they are lightly snug against the bottle holder. If the holder has adjustable mounting slots, slide the holder into your preferred position to maximize clearance before final tightening.
Using a calibrated torque wrench, tighten the bolts in an alternating pattern, turning each bolt a little at a time to distribute the pressure evenly. Stop tightening immediately once the torque wrench clicks or indicates that you have reached the manufacturer’s specified torque limit. If you are working on a metal frame without a torque wrench, tighten the bolts until they are firm, then add a gentle quarter-turn, avoiding excessive leverage.
For frames without threaded inserts, position the protective rubber shims or silicone tape over the frame tubing where the strap-on mount will sit. Place the strap-on mount over the protective padding, thread the straps or clamps through the mount, and tighten them gradually. Ensure the mount is secure enough to resist twisting, but do not tighten metal clamps to the point where they deform or pinch the frame tubing.
Verifying Fit and Maintaining the Installation
Once the installation is complete, place your preferred water bottle into the holder to test the fit and retention. The bottle should slide into the holder smoothly and remain securely in place without rattling. Practice removing and inserting the bottle while standing next to the bicycle to ensure you can access your hydration easily without struggling, which could distract you during a ride.
Check for any physical interference between the bottle holder and other components of the bicycle. Ensure the bottle does not rub against the frame paint, press against gear cables, or touch your knees while pedaling. If you have installed the holder on a full-suspension mountain bike, compress the rear suspension fully to verify that the rear shock linkage does not strike the bottle or holder.
Road vibrations, temperature changes, and moisture can cause mounting bolts to loosen over time, potentially leading to a loose bottle cage that could fall into your wheels. Establish a routine to check the tightness of the mounting bolts after your first two or three rides following installation. Periodically inspect the bolts every few months, especially if you frequently ride on rough surfaces or in wet weather.
If you ride regularly in highly humid environments or along coastal routes, sweat and salt can accumulate around the bottle holder bolts, accelerating corrosion. Once a year, consider removing the bolts completely, cleaning the threads, and reapplying fresh anti-seize compound or threadlocker. This simple maintenance step ensures the bolts remain easy to remove and prevents them from seizing permanently inside your frame.
Frequently Asked Questions (FAQ)
Can I install a bottle holder on a carbon fiber frame safely?
Yes, you can safely install a bottle holder on a carbon fiber frame, provided you follow strict safety precautions to protect the delicate composite material. Always use a calibrated torque wrench and adhere strictly to the torque limits specified by your frame manufacturer, which are typically very low. Never use permanent or high-strength threadlockers, as the chemicals can degrade the epoxy resins used in carbon fiber construction.
Avoid using improvised clamps or metal straps on carbon fiber tubes, as these can easily crush the thin walls of the frame. Only use the factory-installed threaded inserts provided by the manufacturer for mounting accessories. If you feel any unusual resistance while tightening the bolts, or if you hear any cracking noises, stop immediately and take your bicycle to a professional mechanic for inspection.
What should I do if my bike frame does not have mounting holes?
If your bicycle frame lacks standard threaded mounting holes, you can use high-quality strap-on bottle cage adapters or hook-and-loop strap systems. These adapters allow you to mount a standard bottle holder to almost any tube on your frame without drilling or causing permanent modification. Always place a thick rubber shim or silicone protective tape underneath the straps to protect your paint and prevent the mount from sliding.
Alternatively, you can explore alternative mounting locations that do not rely on the main frame triangle. Dedicated adapters allow you to mount bottle holders behind your saddle rails, on your handlebars, or directly onto your seatpost. These alternative locations are highly effective for folding bicycles, triathlon setups, or small frames where space inside the main triangle is limited.
Community discussion
Share your experience or ask a question. Comments are reviewed before publication.