
Mounting a bicycle on the wall is an excellent way to reclaim floor space, especially in space-conscious Singapore apartments. However, a poorly installed bike hook poses a serious risk to your bicycle, your home’s structural integrity, and anyone walking nearby. Safely securing a wall-mounted bike hook requires a systematic approach: identifying your wall material, calculating the total load, choosing compatible heavy-duty hardware, and executing precise drilling and mounting steps. By taking the time to assess your wall and use the correct tools, you can create a rock-solid storage solution that keeps your bicycle secure without causing costly damage to your living space.
Assess Your Wall Type and Bike Weight
Before purchasing any mounting hardware, you must determine exactly what lies behind your wall’s paint. In Singapore, residential properties—particularly Housing & Development Board (HDB) flats and condominiums—typically feature two main types of walls. Structural walls and external boundary walls are almost always made of solid reinforced concrete or thick brickwork covered in plaster. Conversely, internal partition walls separating rooms in newer developments are often constructed from drywall (gypsum board) mounted on lightweight metal or wooden studs.
To identify your wall type, perform a simple tap test. Knock gently on the wall surface with your knuckles; a solid, dull sound indicates concrete or brick, while a hollow, resonant echo suggests a drywall partition. Alternatively, you can press firmly against the wall or drill a tiny, inconspicuous pilot hole in a hidden corner to inspect the dust. White, powdery gypsum dust confirms drywall, while grey, gritty dust indicates concrete or mortar.
Products mentioned in this guide
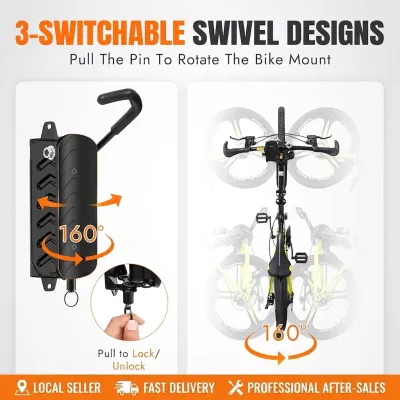
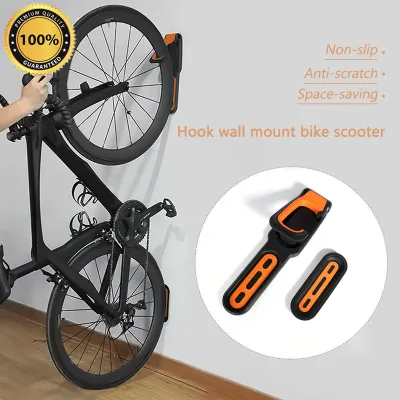
Prices are valid at publication and may change. Please refer to the product page for the latest price.
Next, you must calculate the total weight your hook will support. Place your bicycle on a scale, ensuring you include all permanently attached accessories. Baskets, heavy U-locks, mudguards, kickstands, and child seats add significant weight that many riders overlook. A standard road bike might weigh only 8 to 10 kilograms, but a fully equipped commuter bike or an electric bicycle (e-bike) can easily exceed 20 to 25 kilograms.
Once you have this total weight, select a bike hook and mounting hardware with a load rating that comfortably exceeds your measurement. Never assume a hook is safe just because it looks sturdy. Always check the manufacturer’s specifications for the hook and the load limits printed on your anchor packaging. Remember that hollow partition walls require fundamentally different load-bearing strategies and specialized anchors compared to solid masonry, as drywall lacks the shear strength to hold standard screws under tension.
Gather the Right Tools and Hardware
Using the wrong tools is a recipe for stripped screws, cracked plaster, and loose mounts. To ensure a professional-grade installation, gather a reliable stud finder (essential for drywall), a power drill, a spirit level, a pencil, safety glasses, and a vacuum cleaner to catch dust. If you are drilling into solid concrete or brick, a standard power drill will struggle; you will need a rotary hammer drill or an impact drill equipped with a carbide-tipped masonry drill bit. For drywall or wooden studs, a standard drill with high-speed steel (HSS) or wood drill bits is sufficient.

The choice of fasteners must match your wall type precisely. For wooden studs behind drywall, use heavy-duty wood screws that penetrate at least 38 to 50 millimetres into the center of the stud. For solid concrete or brick walls, use high-quality masonry anchors, such as sleeve anchors, concrete screws, or heavy-duty nylon expansion plugs. For drywall installations where no stud is available, heavy-duty metal toggle bolts or snap toggles are mandatory.
Avoid using the cheap, lightweight plastic wall plugs that are often bundled in basic hardware kits. These generic plugs are typically designed for light picture frames or small shelves, not the dynamic, downward leverage exerted by a hanging bicycle. Instead, purchase reputable, load-rated anchors separately from a local hardware store.
Finally, verify that the screw diameter and length are fully compatible with the mounting holes on your bike hook. The screw head must be large enough to hold the hook’s mounting plate securely without slipping through the holes, and the screw length must accommodate both the thickness of the hook plate and the required depth of the wall anchor.
Step-by-Step Installation Guide
Mounting your bike hook requires precision, patience, and strict adherence to safety boundaries. Rushing through the preparation, drilling, or anchoring phases is the primary cause of wall damage, stripped fasteners, and eventual hook failure. By following a structured, step-by-step process, you can ensure the installation is secure enough to support your bicycle for years to come.
Locate the Studs or Mark Drill Points
If you are mounting your hook on a drywall partition, your primary goal is to anchor the hook directly into a structural stud. Slide a reliable stud finder horizontally across the wall surface, marking both the left and right edges of the stud at your desired height. Draw a vertical line down the center of these marks to identify the strongest mounting zone. For solid concrete or brick walls, studs are not an issue, but alignment is critical. Place the bike hook’s mounting plate against the wall at your chosen height, use a spirit level to ensure it sits perfectly horizontal, and use a pencil to mark the exact center of each mounting hole. Before you begin drilling, perform a critical safety check. Verify that there are no electrical conduits, light switches, power sockets, or plumbing pipes directly behind or aligned with your marked drill points. In Singaporean homes, utility lines often run vertically or horizontally from nearby switches and fixtures, so avoid drilling in these direct paths.
Drill and Insert Anchors
Select a drill bit that matches the exact diameter specified by your anchor manufacturer. If the drill bit is too large, the anchor will spin or slip out; if it is too small, you may crack the wall or break the anchor trying to force it in. For concrete walls, set your drill to hammer mode, hold it perfectly perpendicular to the wall, and drill to a depth slightly deeper than the length of the anchor. Wrap a piece of masking tape around your drill bit to act as a visual depth guide. Once the hole is drilled, use a vacuum cleaner nozzle or a small blower to clear out all masonry dust and debris from the hole. Dust left inside acts as a lubricant, significantly reducing the anchor’s grip. Tap your masonry anchors or nylon plugs gently into the holes using a hammer until they sit completely flush with the plaster surface. For drywall toggle bolts, thread the metal toggle onto the screw, compress the wings, and push it through the drilled hole until you hear the wings spring open behind the drywall. Stop drilling immediately if you encounter unexpected resistance, metal plates, or if the wall material crumbles excessively.
Mount the Bike Hook and Test
Align the bike hook’s mounting plate with your prepared anchors or stud markings. Insert the screws through the plate and drive them home using your drill or a manual screwdriver. Tighten the screws firmly, but avoid over-tightening, which can strip the threads in a nylon anchor, snap the screw head, or crack the surrounding drywall. Once the hook is mounted, do not hang your bicycle immediately. Perform a manual weight test by applying gradual, heavy downward pressure on the hook with your hands, simulating the weight of your bicycle. Watch the wall surface and the hook base closely during this test. Check for any signs of wall cracking, anchor pulling, or hook bending. If you notice any shifting, loose movement, or crumbling plaster, stop immediately; the installation is unsafe and must be redone with stronger anchors or in a different location.
Common Mistakes and When to Stop
Many DIY installation failures stem from preventable errors. One of the most common mistakes is relying on standard plastic expansion plugs in drywall; these plugs rely on friction against the gypsum, which quickly fails under the leverage of a hanging bike. Another frequent error is ignoring stud finder readings or failing to clear drilling dust, both of which compromise the physical connection between the fastener and the wall.
You must establish clear stop conditions during your project. Stop immediately if the wall material crumbles continuously into a fine sand, if your stud finder gives highly inconsistent or erratic readings, or if the hook shifts even slightly during your manual pressure test. These symptoms indicate that the wall material is structurally compromised or unsuitable for the load.
If you are renting a property in Singapore, check your tenancy agreement before drilling, as many landlords prohibit structural modifications or drilling into concrete walls. If you are unsure of your wall’s structural integrity, or if you lack the heavy-duty tools required to drill into reinforced concrete, stop and consult a qualified local contractor or professional handyman. It is far better to pay for professional installation than to deal with a collapsed wall, a damaged bicycle, or a voided tenancy deposit.
Frequently Asked Questions (FAQ)
This section addresses common practical concerns to help you optimize your bike storage setup safely.
Can I install a bike hook on drywall without a stud?
Yes, you can install a bike hook on drywall without a stud, but you must never use standard plastic expansion anchors. These basic plugs cannot handle the dynamic, pulling forces exerted when you lift and hang a bicycle. Instead, you must use heavy-duty metal toggle bolts or snap toggles, which expand behind the drywall panel to distribute the weight across a much larger surface area. However, keep in mind that mounting directly into a structural wooden or metal stud remains the safest, most reliable method for heavy bicycles, especially electric bikes or heavy mountain bikes.
How high should I mount the bike hook?
To determine the ideal mounting height, measure your bicycle’s total length and add at least 15 to 20 centimetres of clearance for the hook mechanism and lifting space. Choose a height that allows you to lift the bike comfortably onto the hook without straining your back, shoulders, or arms. If you are using a vertical hook where the rear wheel rests against the wall, ensure the rear tire has a protective pad to prevent scuffing. Finally, verify that the handlebars, pedals, and wheels will not scrape the ceiling, adjacent walls, or nearby light fixtures when the bike is fully suspended.
Community discussion
Share your experience or ask a question. Comments are reviewed before publication.