
Selecting the correct finger saver is essential for protecting your joints from impact and strain without compromising your performance on the field, court, or climbing wall. A poorly fitted brace can either restrict your blood circulation or fail to provide the necessary stabilization, leaving you vulnerable to injury. By understanding your sport’s specific physical demands, measuring your hand accurately, and verifying the fit through dynamic movement, you can find a support that keeps you active and protected.
Identify Your Sport's Protection and Mobility Needs
Before selecting a finger saver, you must evaluate the specific physical demands of your activity. Different sports place unique stresses on your hands, meaning a brace designed for one movement pattern may be entirely unsuitable for another. For example, high-impact ball sports like basketball, netball, or volleyball often require padded protection to absorb sudden forces and prevent hyperextension. In contrast, activities like climbing, weightlifting, or archery demand maximum grip and tactile feedback, where bulky padding would hinder your performance.
You also need to identify which specific joints require stabilization. The finger contains multiple joints, including the proximal interphalangeal joint in the middle and the distal interphalangeal joint near the fingertip. A volleyball player might need a sleeve that covers the middle joint to prevent jamming, while a climber might look for targeted support around the base of the finger to protect tendons during intense crimping maneuvers.
Products mentioned in this guide
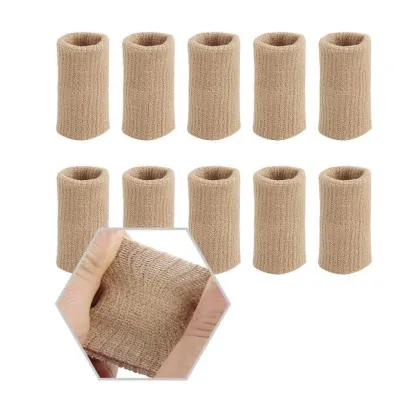
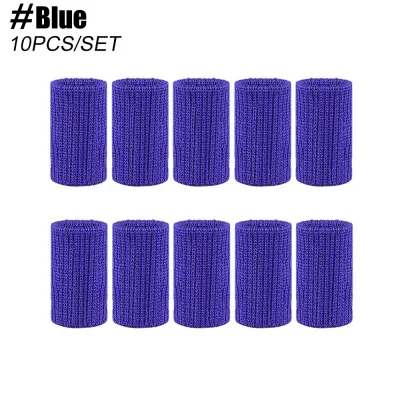
Prices are valid at publication and may change. Please refer to the product page for the latest price.
Finally, always check the official rules or league guidelines for your sport. Many competitive leagues have strict regulations regarding the materials allowed on the field or court. For instance, rigid plastic or metal splints are often banned in contact sports to protect other players, meaning you will need to opt for soft, fabric-based compression sleeves or buddy-tape styles instead.
Step-by-Step Guide to Measuring Your Fingers
To find a finger saver that fits securely without cutting off your circulation, you must obtain precise measurements of your hand. Relying on generic sizing labels like small, medium, or large can lead to a poor fit, as sizing standards vary significantly between different manufacturers.

To begin, gather a flexible fabric measuring tape. If you do not have one, you can use a piece of non-elastic string and a standard metric ruler. Wrap the tape or string around the widest part of the target finger joint, which is typically the middle knuckle. Pull it snug so that it rests flat against your skin, but avoid pulling it so tight that it compresses the flesh or restricts movement. Mark the point where the end meets, and measure this length against your ruler to find your joint circumference.
Next, measure the circumference at the base of your finger, as some sleeve-style supports rely on a secure fit at the base to prevent slipping. If you are choosing a full-finger splint or a multi-joint brace, you will also need to measure the length of your finger segments. Measure the distance between the joint creases on the palm side of your hand to ensure the brace will not block the movement of unaffected joints.
Once you have these measurements, cross-reference them directly with the manufacturer’s specific sizing chart. If your measurements fall between two sizes, check the product instructions; generally, a tighter fit offers more rigid support, while a slightly larger size provides better comfort and circulation during prolonged wear.
Compare Finger Saver Styles and Materials
Finger savers come in several distinct designs, each tailored to different levels of support and mobility. Rigid splints, which often feature built-in plastic or metal stays, are designed to immobilize the joint completely, making them suitable for recovery phases or sports where joint movement must be strictly limited. Flexible compression sleeves, usually made of elastic knit or neoprene, offer mild support, keep the joint warm, and help manage swelling while allowing a near-full range of motion. Buddy-tape styles or dual-finger sleeves link two fingers together, using the strength of the healthy finger to support the injured one during active play.
When evaluating materials, look for fabrics that match your playing environment. For high-sweat activities or hot climates, prioritize moisture-wicking, breathable synthetic blends or perforated neoprene. These materials help channel sweat away from your skin, reducing the risk of slippage, chafing, and unpleasant odors during long training sessions.
The closure mechanism is another critical factor for security and convenience. Slip-on sleeves offer a low-profile fit that slides easily under gloves, but they cannot be adjusted if your finger swells. Hook-and-loop straps allow you to customize the tension and make quick adjustments on the sidelines, though they can sometimes snag on clothing. Silicone grip strips along the inner lining are also highly useful for keeping slip-on designs from sliding off when your hands get wet.
Test the Fit, Comfort, and Range of Motion
Once your finger saver arrives, you must test its fit under controlled conditions before heading out to play. Put the brace on and wear it for five to ten minutes while resting. During this time, perform a circulation check by monitoring your fingertip. If you experience any numbness, tingling, throbbing, or if the skin turns pale or blue, the brace is too tight and must be removed immediately to prevent tissue damage.
After confirming that your circulation is unaffected, test the functional range of motion required for your sport. Try making a tight fist, extending your fingers fully, and mimicking the specific grip used for your equipment, such as holding a racket, bat, or ball. The brace should provide a secure, stabilizing sensation without pinching your skin or digging into your webbing.
Next, simulate dynamic, sport-specific movements to see how the brace behaves under pressure. Shake your hand vigorously, mimic a catching motion, or apply pressure to a flat surface. If the finger saver slips, twists, or shifts out of position, it is either too large or the closure mechanism is insufficient for your activity level.
Remember that protective equipment is meant to support your body, not replace proper medical care or physical training. If you experience increased pain, persistent swelling, or skin irritation while wearing the brace, stop using it immediately and consult a healthcare professional.
Maintain Your Finger Saver and Know When to Replace It
Proper maintenance preserves the elasticity, hygiene, and structural integrity of your finger saver, ensuring it continues to protect your hand effectively. Always refer to the manufacturer’s care label for specific washing instructions. In general, hand-washing your brace in cool water with a mild detergent is the recommended way to clean it, as the high heat of washing machines and tumble dryers can degrade elastic fibers, weaken hook-and-loop fasteners, and warp plastic inserts. Allow the brace to air-dry completely in a well-ventilated area away from direct sunlight.
Regularly inspect your equipment for signs of wear and tear. Look closely at the stitching, the elasticity of the fabric, and the condition of the closures. Frayed edges, stretched-out bands, cracked plastic stays, or hook-and-loop straps that no longer hold securely are clear indicators that the brace can no longer perform its protective function.
Using a worn-out finger saver can give you a false sense of security while leaving your joint vulnerable to re-injury. Replace your support as soon as you notice a loss of compression, structural sagging, or when it no longer holds your joint in the correct alignment during movement.
Frequently Asked Questions (FAQ)
Can I use a finger saver for a fractured or dislocated finger?
No, standard over-the-counter finger savers are not designed to treat moderate to severe injuries like fractures, dislocations, or complete ligament tears. These retail supports are intended for minor sprains, impact protection, and post-recovery stabilization during sports. If you suspect a bone is broken or a joint is dislocated, seek immediate evaluation from a qualified medical professional. Attempting to self-treat a severe injury with a sports brace can lead to improper healing, chronic joint instability, and long-term mobility loss.
How tight should a finger saver feel during sports?
A properly fitted finger saver should feel snug, supportive, and comfortably compressive, similar to a firm bandage. It should restrict unwanted lateral movement or hyperextension while allowing you to perform necessary athletic actions. The brace should never feel so tight that it causes pain, throbbing, coldness, or discoloration in your fingertip. Regularly check your hand during breaks in play to ensure your skin maintains its natural color and temperature, adjusting the straps or sizing down if you notice any signs of restricted blood flow.
Community discussion
Share your experience or ask a question. Comments are reviewed before publication.