
Packing the salomon adv skin 12 efficiently is the difference between a smooth, rhythmic long run and a frustrating session spent fighting bounce, chafing, and hard-to-reach nutrition. When you are deep into a multi-hour effort—especially in hot, humid conditions where sweat rates are high—your gear organization must be second nature. This hydration vest is highly regarded for its wrap-around fit and accessible pocket layout, but maximizing its 12-liter capacity requires a systematic approach to weight distribution and pocket assignment.
By organizing your hydration, energy gels, and safety gear based on how frequently you need them, you can maintain your running form and avoid stopping to rummage through your pack. This guide breaks down how to balance your load, secure your nutrition, and adjust your vest to ensure a comfortable, bounce-free run.
Understanding the Salomon ADV Skin 12 Compartment Layout
Before loading any gear, it is essential to understand the distinct storage zones of the Salomon ADV Skin 12. The vest is designed like a garment, wrapping snugly around your torso to distribute weight evenly across your upper body. The storage is divided into three primary areas: the front chest, the side ribs, and the rear panel. Each zone serves a specific purpose based on accessibility and weight capacity.
Products mentioned in this guide
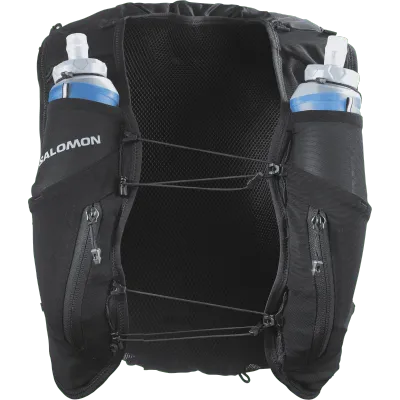
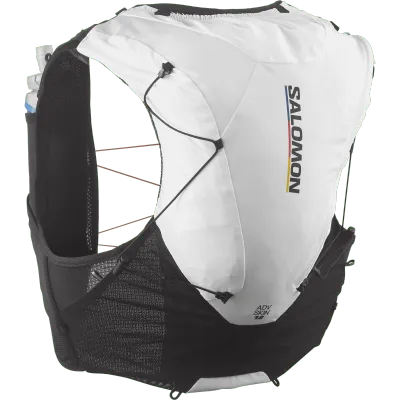
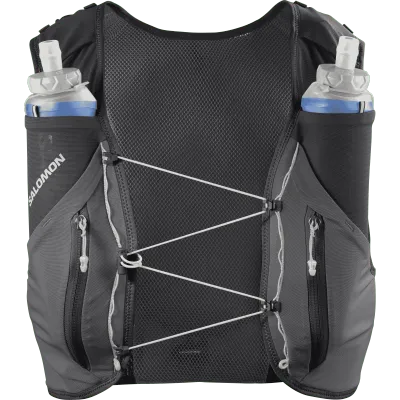
Prices are valid at publication and may change. Please refer to the product page for the latest price.
Your packing strategy should follow one core principle: assign items based on your frequency of use and whether you need one-handed access while moving. The front and side compartments are your active zones, designed for items you need to grab without stopping. The rear compartments are your passive zones, reserved for bulkier gear, extra fluids, and emergency supplies that you only need occasionally or during planned stops.
Before every long run, take a moment to inspect the integrity of your vest. Check the elasticity of the mesh pockets, ensure the zippers slide smoothly, and verify that the front elastic toggles and rear bungees are intact. Over time, heavy use can stretch out technical fabrics, so confirming that all closures are secure is your first defense against lost gear and annoying pocket bounce during dynamic movement.
Step-by-Step Guide to Packing Hydration and Nutrition
Loading your vest systematically ensures that your center of gravity remains stable and your nutrition is always within arm’s reach. Follow this step-by-step sequence to pack your hydration and fuel efficiently.

Loading the Front Soft Flasks
Your primary hydration belongs in the two dedicated front chest pockets, which are designed to hold 500ml soft flasks. Slide the empty or partially filled flasks into these pockets first, before packing the surrounding compartments, to ensure they seat fully. To prevent the flasks from slipping down as you drink and the volume decreases, loop the integrated elastic top bungees securely over the top of the flask caps.
If you prefer using a hydration bladder for self-supported ultra-distances, slide it into the insulated rear sleeve before packing any other rear gear. Route the drinking tube through the designated shoulder guides and under-arm loops to keep it secure. Proper routing is crucial to prevent the tube from rubbing against your neck or chest, which can cause painful chafing over long distances.
Always balance your liquid volume equally between the left and right front flasks. Running with one full flask and one empty flask creates an asymmetrical load that can alter your running posture and lead to shoulder discomfort. If you carry water in one flask and an electrolyte mix in the other, sip from them alternately to keep the weight distribution relatively balanced.
Organizing Energy Gels and Quick Snacks
With your flasks secured, utilize the lower front stretch pockets and the side rib pockets for your high-frequency nutrition. These pockets are highly elastic and can hold multiple energy gels, chews, or salt capsules. Store your primary fuel here so you can retrieve it with one hand without breaking your running stride.
To make your fueling seamless, organize your nutrition by consumption sequence or type. For example, place your standard, non-caffeinated gels in the left front pocket and your caffeinated or high-sodium gels in the right pocket. If you use salt capsules, keep them in a small, waterproof zip-top bag inside a zippered side pocket to protect them from sweat and humidity.
Managing sticky gel wrappers is a common challenge on long runs. Designate one specific zippered side pocket or the small shoulder stretch pocket exclusively as a trash container. Folding empty wrappers neatly and zipping them away keeps the rest of your vest clean, prevents sticky residue from ruining your gear, and ensures you do not accidentally drop litter on the trail.
Stowing Backup Nutrition and Gear in the Rear
The rear of the Salomon ADV Skin 12 features a main zippered compartment and a large, lower pass-through pocket (often called the kangaroo pocket). Use the main rear compartment for items you do not need while actively running. This includes solid foods like energy bars, backup gels, a lightweight windbreaker, a headlamp, and a basic first-aid kit or emergency blanket.
The lower rear kangaroo pocket is open on both sides, allowing you to reach behind your back and pull out items while moving. This is the ideal spot for a packable rain jacket, a wet cap, or arm sleeves. If you shed a layer mid-run, you can easily stuff it into this stretch mesh pocket without taking the vest off.
When packing the rear, always place heavier backup items close to your spine and centered vertically. Keeping the heaviest gear low and tight against your back minimizes the pendulum effect, preventing the pack from swaying or pulling you backward when you are running downhill or negotiating technical terrain.
Balancing Weight and Preventing Chafing
Even a perfectly organized vest can cause discomfort if it is not adjusted correctly to your body. Once your gear is packed, put the vest on and utilize the Quick Link sternum strap system. This elastic cord system allows you to adjust the tension across your chest. It should be snug enough to eliminate bounce, but flexible enough to stretch as your lungs expand during deep breathing.
Next, locate the side bungee cords in the lower rib area. Pulling these cords compresses the volume of the rear compartment. If you are not using the full 12-liter capacity, compressing the pack ensures that your gear remains pinned flat against your back rather than shifting around as you run.
Pay close attention to how hard or sharp-edged items are positioned. Items like mobile phones, car keys, rigid gel caps, or solid nutrition bars should never be placed in pockets where they press directly against your ribs, collarbone, or soft tissue. Under the repetitive impact of running, these hard points will press into your skin, leading to bruising or severe chafing.
Before you head out on your run, perform a quick “shake test.” Put on the fully loaded vest, stand in place, and jump up and down a few times. Listen for any loud sloshing (which can be minimized by squeezing the air out of your soft flasks) and feel for any shifting weight or localized pressure points. If anything feels loose or rubs uncomfortably, adjust the straps or relocate the offending item before you start your workout.
Adjusting Your Packing Strategy for Run Duration and Conditions
Your packing configuration should adapt to the specific demands of your run, taking into account the distance, availability of support, and local weather conditions. A self-supported 30-kilometer trail run requires a very different setup than a marathon with aid stations every 5 kilometers.
For self-supported efforts, prioritize fluid capacity. You may need to carry two full front flasks and a 1.5-liter rear bladder, leaving less room in the rear compartment for gear. Conversely, for races with frequent aid stations, you can leave the rear bladder behind and carry only the front flasks, using the saved space and weight to run lighter and faster.
In hot and humid tropical climates, your body’s ability to digest solid food is often compromised as blood flow is diverted to the skin for cooling. In these conditions, prioritize liquid nutrition, hydration mixes, and highly digestible hydrogels over solid bars. You will also need to carry more electrolytes to replace what is lost in sweat, so ensure your salt capsules are packed in an easily accessible, sweat-proof pocket.
If you are tackling a multi-hour mountain run or an ultra-marathon that requires carrying mandatory safety gear, focus on sourcing ultralight, highly compressible equipment. A minimalist, packable windshirt takes up a fraction of the space of a standard running jacket, allowing you to maximize the vest’s 12-liter capacity without adding unnecessary bulk or weight to your shoulders.
Frequently Asked Questions (FAQ)
Can I use rigid water bottles instead of soft flasks in the front pockets?
While you can physically fit some small, rigid bottles into the front stretch pockets of the Salomon ADV Skin 12, it is not recommended. Rigid bottles do not compress as you drink, which can cause them to bounce aggressively and rub against your collarbone and ribs, leading to bruising and chafing. Soft flasks are designed to shrink as they empty, which eliminates air pockets, reduces liquid sloshing, and allows the flasks to conform comfortably to your body shape.
How do I prevent energy gels from getting too hot or sticky in the vest?
To keep your energy gels from becoming overly warm and viscous from your body heat, avoid storing them in the tight zippered pockets that sit directly against your skin. Instead, place them in the outer front stretch pockets or the side rib compartments, which benefit from better airflow. Additionally, storing your gels in the rear compartment next to a cold hydration bladder can help keep them cool during the early stages of your run.
Community discussion
Share your experience or ask a question. Comments are reviewed before publication.