
Proper positioning and tightening of your OES fitness belt are essential to unlock its true benefit: creating a rigid wall for your abdominal muscles to brace against. To get the most support, the belt should sit firmly around your midsection—typically across your belly button—and be tightened just enough to allow a full, deep diaphragmatic breath while providing a solid boundary when you brace. Positioning it too high or too low, or pulling it so tight that you cannot breathe, compromises your stability and safety during heavy lifts.
Using a lifting belt is not about squeezing your waist as tightly as possible to ‘hold’ your spine in place. Instead, it acts as an external feedback mechanism. When you perform heavy compound movements, your core must expand and brace outward. The belt resists this expansion, which increases intra-abdominal pressure and stabilizes your entire torso.
To achieve this state of active stability, you must learn how to customize the fit to your unique anatomy. Every lifter has a different torso length, rib cage structure, and hip height. Finding your personal sweet spot requires a systematic approach to placement, tension, and movement-specific adjustments.
Products mentioned in this guide

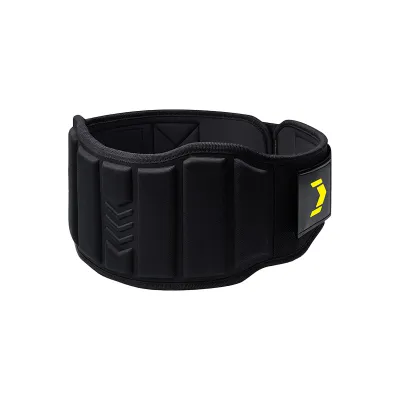
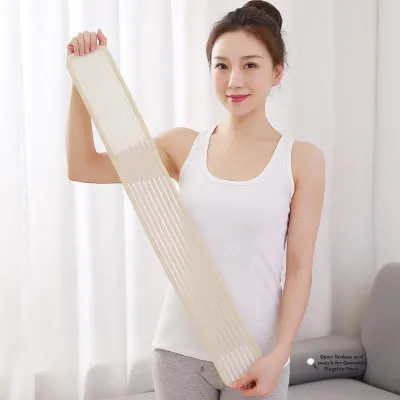
Prices are valid at publication and may change. Please refer to the product page for the latest price.
Understanding How Your Belt Actually Supports Your Core
A common misconception is that a lifting belt mechanically keeps the spine straight through passive compression. In reality, a fitness belt is a passive tool that requires active muscle engagement to function, providing a physical boundary for your abdominal wall, obliques, and lower back to push against.
When preparing for a heavy lift, you take a deep breath into your abdomen and contract your core muscles. This action, known as the Valsalva maneuver, expands your midsection against the rigid belt, increasing intra-abdominal pressure. This internal pressure acts like an inflated balloon inside your abdominal cavity, supporting your spine from the inside out and reducing shear forces on your lumbar vertebrae.
An incorrect position disrupts this entire pressure system. Wearing the belt too high restricts your rib cage, preventing a full diaphragmatic breath and limiting bracing capacity. Conversely, wearing it too low causes the belt to ride on your hip bones, offering virtually no core support and causing painful bruising during deep movements.
Before fitting your belt, check the manufacturer’s guidelines on the OES product label. Different models, whether made of stiff leather or flexible nylon, have specific recommendations for placement and fastening. Additionally, new leather belts often require a break-in period to conform to your body shape, so observe how the material flexes during your initial sessions.
Finding Your Optimal Belt Placement on Your Torso
Finding the right vertical position for your belt is an individualized process that depends on your torso length and hip structure. A reliable baseline starting point is to align the center of the belt directly over your navel. For many lifters, this position places the belt just above the iliac crest (the top edge of your hip bones), allowing the material to wrap securely around the soft tissue of the midsection.

Once you have positioned the belt at this baseline height, perform a quick diagnostic test. Without adding any weight, perform a slow, deep bodyweight squat. Pay close attention to how the belt feels as you reach the bottom of the movement, where your hips and torso are closest together.
During this test, check for any physical pinching or digging. If the top edge of the belt presses painfully into your lower ribs, or if the bottom edge digs sharply into your hip bones, the placement needs adjustment. Lifters with shorter torsos often need to shift the belt slightly upward to avoid rib impingement, while those with longer torsos may find comfort slightly lower.
Adjust the belt up or down by about an inch at a time until you find a position that feels secure but non-restrictive. The final resting position should allow the belt to sit completely flat against your clothing or skin. It should remain firmly in place without sliding down or shifting when you bend over to set up for your lift.
Tightening the Belt for Maximum Bracing and Breathing
Achieving the correct tightness is a balance between security and mobility. Many lifters make the mistake of pulling their belt as tight as humanly possible, believing that tighter always equals safer. However, an overly tight belt is counterproductive because it prevents you from expanding your abdomen, which actually reduces the intra-abdominal pressure needed to protect your spine.
To find the perfect tension, use the ‘breathing test’ rather than relying on a specific notch or velcro marker. Once the belt is fastened, you must be able to take a full, deep diaphragmatic breath. If you feel like you can only take shallow chest breaths, or if you feel lightheaded before you even start the lift, the belt is too tight and must be loosened.
A good rule of thumb is that you should be able to slide your flat hand or a couple of fingers between your stomach and the belt when your muscles are completely relaxed. This small gap provides the necessary clearance for your abdomen to expand. When you actively brace, your stomach should expand to fill this gap, pressing firmly against the belt in a 360-degree fashion.
This 360-degree bracing cue is critical for maximum support. You should not just push your belly forward; you must also push your obliques and lower back outward into the sides and rear of the belt. This creates a uniform cylinder of pressure around your entire midsection.
Always consult your specific OES product manual for instructions on operating your belt’s fastening mechanism. Whether your model features a traditional single-prong buckle, a quick-release lever, or a heavy-duty velcro strap, ensure that the mechanism is fully engaged and locked before you begin your set. Never attempt to lift if the buckle is partially latched or if the velcro is clogged with lint and failing to grip.
Adjusting Your Fit for Squats, Deadlifts, and Presses
Your optimal belt position and tightness will likely change depending on the specific compound movement you are performing. Different exercises place different demands on your hips, spine, and rib cage, meaning a single setup is rarely perfect for every lift. Experimenting with light, sub-maximal weights is the best way to map out your personal sweet spot for each exercise.
For squats, most lifters prefer a standard, level placement directly over the navel. This position provides maximum abdominal support while allowing you to hit full depth without the belt hitting your thighs. However, if you find that the belt digs into your hips at the bottom of a squat, you can try angling the front of the belt slightly upward to clear your hip crease.
For deadlifts, the setup is highly dependent on your starting position. Because you must bend over to grip the bar, a belt that is too low or too tight can severely restrict your ability to get into a flat-backed starting position. Many lifters prefer to wear their belt slightly higher on the torso or one notch looser for deadlifts. This adjustment allows for a comfortable hip hinge and lets you pull your chest up to set your spine before the pull.
For overhead presses, the primary concern is rib cage clearance and thoracic mobility. Pressing a weight overhead requires a stable lower back but also demands significant extension through your upper back. If your belt is positioned too high, it can restrict your thoracic extension and limit your shoulder mobility. Positioning the belt slightly lower can help stabilize your core while leaving your upper torso free to move.
Safety Checks, Gear Inspection, and When to Stop
A lifting belt is a highly effective training tool, but it is only as reliable as its physical condition. Before every training session, take a moment to inspect your OES belt for signs of wear and tear. Check for fraying stitching along the edges, cracks in leather models, or any signs of metal fatigue in buckle and lever components. If any part of the fastening mechanism appears compromised, do not use the belt.
It is vital to remember that a fitness belt is not a shield against injury, nor does it correct poor lifting mechanics. A belt cannot compensate for a rounded back, improper foot placement, or lifting weights that exceed your current physical capacity. If you experience sharp, pinching, or radiating pain in your back or joints, stop the lift immediately.
To maintain healthy circulation and breathing patterns, always loosen or remove your belt between sets. Keeping a belt tightly fastened during your rest periods can unnecessarily elevate your blood pressure and prevent your heart rate from recovering. Use your rest periods to breathe naturally and let your core muscles relax.
Finally, pay close attention to how your body responds during and after your workouts. If you experience numbness, tingling, or persistent discomfort in your legs, hips, or lower back, cease using the belt immediately. These symptoms can indicate nerve compression or underlying spinal issues, and you should consult a qualified medical professional or physical therapist before returning to heavy lifting.
Frequently Asked Questions (FAQ)
Should I wear my OES fitness belt for every exercise?
No, you should not wear your lifting belt for every exercise in your routine. Belts are specifically designed to assist with heavy, axial-loading compound movements where your spine is under direct load, such as squats, deadlifts, overhead presses, and heavy rows.
For isolation exercises, machine work, or light warm-up sets, a belt is generally unnecessary and can even be counterproductive. Relying on a belt for light movements can prevent your deep stabilizing muscles from developing natural strength. Keep the belt in your gym bag for your main, heavy lifts, and let your core do the work during your accessory training.
How do I know if my belt is too loose or too tight?
You can determine if your belt is improperly adjusted by observing how it behaves during a lift and how your body feels. A belt is too loose if it shifts, slides up, or rotates on your torso during a movement, or if you cannot feel your abdominal wall making firm contact with the material when you brace.
Conversely, a belt is too tight if you cannot take a full, deep breath into your stomach, if you feel lightheaded or dizzy before starting your repetition, or if you experience sharp pinching or numbness in your hips or legs. A properly adjusted belt should feel snug and secure, acting as a firm wall that you can actively push against without restricting your breathing.
Community discussion
Share your experience or ask a question. Comments are reviewed before publication.