
Starting a gyro ball requires a quick, coordinated initial spin—either via a pull-cord or a manual thumb-start mechanism—followed by synchronized, circular wrist movements to build and maintain momentum. Using this compact device at home, especially in space-conscious settings like Singapore flats, offers an efficient way to strengthen the forearms, wrists, and grip without bulky weights. However, safety depends on maintaining a neutral wrist alignment, controlling the rotational speed, and recognizing physical limits to prevent repetitive strain injuries.
Unlike traditional dumbbells, a gyro ball generates dynamic resistance that scales with your input. This means the faster you spin the internal rotor, the more force your muscles must resist. While this makes the device highly customizable, it also demands proper technique to avoid sudden joint overload. By mastering the starting sequence and maintaining controlled, steady movements, you can safely integrate this tool into your home fitness routine.
Preparing for Your Gyro Ball Workout
Before spinning the rotor, inspect the device thoroughly. Check the outer plastic shell for any hairline cracks or structural damage that could compromise its integrity under high rotational speeds. Slide your thumb over the internal rotor to ensure it spins freely along its track without catching, grinding, or showing signs of obstruction.
Products mentioned in this guide

![🇸🇬 [READY STOCK] Wrist Trainer Ball Auto-Start Wrist Strengthener Gyroscopic Forearm Exerciser Gyro Ball for Strengthen Arms Fingers Wrist Bones and Muscles](https://img.lazcdn.com/g/p/1ee8320cbb3982ef6d209f800bfb4499.png_400x400q80.png_.webp)

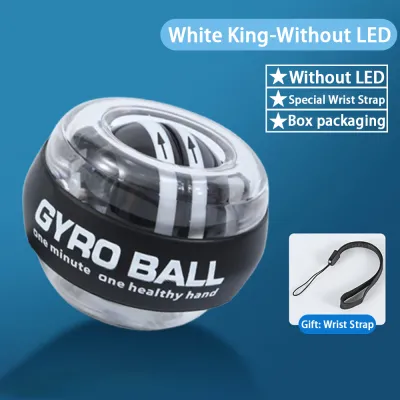
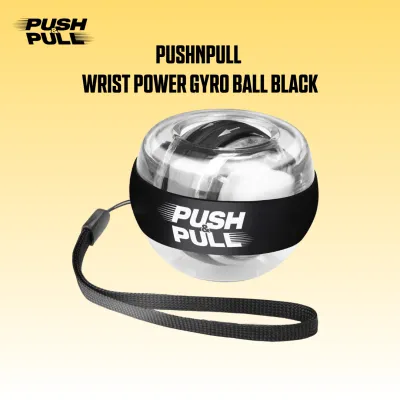
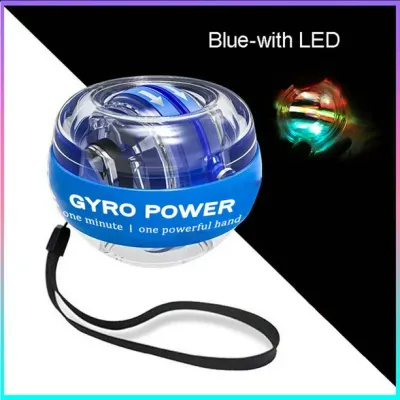

Prices are valid at publication and may change. Please refer to the product page for the latest price.
Examine the rubber grip band wrapped around the equator of the ball. This band must be clean, dry, and securely fitted to prevent the device from slipping out of your hand during operation. Clear your immediate physical surroundings. In a typical home layout, ensure you are standing or sitting away from glass coffee tables, television screens, or other household members to avoid accidental impact if the ball slips.
Consult the manufacturer’s instruction sheet for specific guidelines regarding the starting direction, maximum recommended speeds, and any model-specific safety tethers. If your model includes a wrist strap, secure it to your wrist before starting to prevent the ball from flying out of your hand if you lose your grip.
Step-by-Step Guide to Starting the Gyro Ball
Starting a gyro ball requires mastering one of two common mechanisms: the pull-cord method or the auto-start (thumb-wind) method.

For pull-cord models, insert the plastic tip of the cord into the small hole on the rotor. Wind the cord tightly along the center groove by rotating the rotor with your thumbs, leaving about several centimeters of cord free. Hold the ball securely in your non-dominant hand with the rotor facing upward, then pull the cord straight and rapidly away from the ball.
For auto-start models, place both thumbs on the exposed rotor. Push the rotor firmly in the direction of the arrows printed on its surface, winding it against internal spring tension. Continue winding for several full rotations until you feel significant resistance, then release both thumbs simultaneously to launch the spin.
Immediately after releasing the cord or spring, transition the ball to your active hand. Hold the ball with your fingers wrapped securely around the rubber grip band, keeping your palm facing downward or slightly inward.
Keep your wrist in a neutral, straight alignment during this initial phase. Do not attempt to swing your entire arm; instead, wait a split second to feel the subtle gyroscopic pull of the spinning rotor before initiating your wrist movements.
Operating Techniques and Wrist Positioning
Once the rotor is spinning, you must synchronize your wrist movements with the internal momentum to keep the ball active. Begin making small, slow, circular motions with your wrist. Imagine holding a glass of water and gently swirling the liquid inside without spilling it. The diameter of your wrist circles should be small—roughly the size of a small coin.
Listen to the pitch of the gyro ball. A low, steady hum indicates that your wrist movements are synchronized with the rotor. If you hear a clacking sound, your movements are out of sync; slow down your circles and focus on feeling the resistance before accelerating.
To increase the resistance, gradually increase the speed of your circular wrist motions. The faster the rotor spins, the more gyroscopic force it generates, requiring more muscle activation to hold and control. To decrease the resistance, simply slow down your wrist rotations. The rotor will naturally lose momentum and slow down on its own.
Maintain a neutral wrist posture throughout the exercise. Avoid extreme bending, such as excessive flexion (bending the wrist forward) or extension (bending the wrist backward), as these positions place unnecessary stress on the tendons and carpal tunnel.
Adjust your grip pressure dynamically. Your grip should be firm enough to maintain complete control over the device, but relaxed enough to prevent premature fatigue in your fingers and forearms. Squeezing the ball too tightly restricts wrist mobility and accelerates muscle exhaustion.
Recognizing Strain and When to Stop
While gyro ball training is an effective way to build grip and forearm strength, it can lead to overuse injuries if you ignore physical warning signs. Pay close attention to any sharp pain, burning sensations, or localized throbbing in your wrist joint, forearm, or elbow. These symptoms indicate that the tendons are being overloaded and require immediate rest.
Stop the exercise immediately if you experience numbness, tingling, or a “pins and needles” sensation in your fingers. This is a common sign of nerve compression, which can be exacerbated by improper wrist alignment or excessive vibration.
Monitor your grip strength during the session. If you feel your fingers weakening or find it difficult to hold the ball securely, stop the workout. Continuing to spin the ball with a fatigued grip increases the risk of dropping the device, which can damage the internal mechanism or cause injury.
Be aware of mechanical warning signs. If the gyro ball begins to vibrate excessively, wobble violently, or slip from your hand, cease operation. To stop the device safely, do not touch the spinning rotor with your fingers or press it against your body. Instead, simply stop moving your wrist and hold the ball securely in the air. Allow the rotor to decelerate naturally until it comes to a complete stop.
Building a Safe Home Workout Routine
Integrating a gyro ball into your home fitness routine requires a gradual, structured approach to prevent overtraining. For beginners, start with short sessions of 30 to 60 seconds per arm, performing two to three sets. Limit your training to two or three days per week, allowing at least 48 hours of recovery between sessions to let your muscles and tendons adapt.
As your strength and endurance improve, you can gradually increase the duration of each set to two minutes, or increase the rotational speed. Avoid the temptation to use the device for extended, continuous periods.
Always perform a brief warm-up before starting your gyro ball workout. Gentle wrist circles, finger stretches, and forearm flexor stretches help prepare the joints and soft tissues for the dynamic forces of the exercise.
After your session, perform static stretches to promote recovery. Extend your arm forward with your palm facing up, and gently pull your fingers downward with your other hand to stretch the forearm flexors. Repeat with the palm facing down to stretch the extensors.
Alternate arms between sets to maintain muscular balance. If you are using the device for rehabilitation or general conditioning, ensure both sides receive equal training time, even if your non-dominant hand feels less coordinated initially.
Cleaning and Storing Your Gyro Ball
Proper maintenance ensures your gyro ball remains quiet, smooth, and functional for years. To clean the exterior, wipe the plastic shell and the rubber grip band with a dry or slightly damp microfiber cloth. This removes sweat, oils, and dust that can compromise your grip.
Never submerge the gyro ball in water or expose it to running tap water. Moisture entering the internal chamber can rust the metal axle, degrade the bearings, and ruin the device. Do not apply any lubricants, oils, or WD-40 to the internal rotor or track. Gyro balls rely on precise friction to function; adding lubricants will cause the rotor to slip along its track, rendering the device unusable.
Store the gyro ball in a clean, dry, and dust-free environment. Avoid leaving it in areas with high humidity, such as bathrooms, or in direct sunlight, which can degrade the plastic shell and rubber grip over time. Keep the device in a protective pouch or case when not in use to prevent dust and lint from settling inside the rotor track.
Frequently Asked Questions (FAQ)
Why does my gyro ball vibrate or make a rattling noise?
A low, consistent hum is normal during operation, but loud rattling or excessive vibration usually indicates an issue. This can happen if the device has been dropped, causing the internal axle to bend or the rotor to slip off its track. Dust, hair, or debris inside the housing can also disrupt the smooth movement of the bearings. Check the manufacturer’s warranty or replacement guidelines if the rattling persists after cleaning the exterior, as internal damage is often difficult to repair at home.
Can I use a gyro ball if I have a previous wrist injury?
If you have a history of wrist injuries, such as carpal tunnel syndrome, tendonitis, or sprains, consult a doctor or physiotherapist before using a gyro ball. While it can be used for low-resistance conditioning, the dynamic, multi-directional forces can aggravate healing tissues if introduced too early or with incorrect form. The exercise should never cause pain; if you feel discomfort, stop immediately. Do not use the device as a substitute for prescribed medical rehabilitation protocols.
Community discussion
Share your experience or ask a question. Comments are reviewed before publication.