
Using a balance ball—also known as a stability or Swiss ball—for post-run recovery and lower body mobility is one of the most effective ways to relieve muscle tightness and restore joint range of motion. Unlike rigid foam rollers or static floor stretching, the pliable, air-filled surface of a balance ball conforms to your body’s natural contours. This unique curvature allows you to decompress the spine, open up tight hip flexors, and gently mobilize fatigued muscles without placing harsh stress on your joints. By integrating targeted balance ball exercises into your post-run routine, you can actively accelerate muscle repair, improve flexibility, and transition your nervous system into a deeply restorative parasympathetic state.
Why a Balance Ball Works for Runners
Traditional static floor stretching often forces the body into rigid angles, where the hard floor provides zero give. This can lead to compensatory movements, particularly in the lower back or pelvis, as you try to reach a specific muscle group. In contrast, a balance ball acts as a dynamic support system. Its spherical shape allows for multi-planar movement, meaning you can stretch through three dimensions rather than being locked into a flat, two-dimensional plane.
When you drape your body over the ball, the curved surface distributes your body weight evenly. For runners who experience high-impact loading on concrete pavements or park connectors, this decompression is highly therapeutic. It allows the hip joints, lumbar spine, and pelvis to relax into a supported stretch, reducing the mechanical tension that typically accumulates during long-distance runs.
Products mentioned in this guide
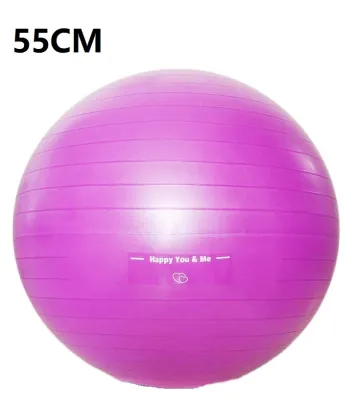
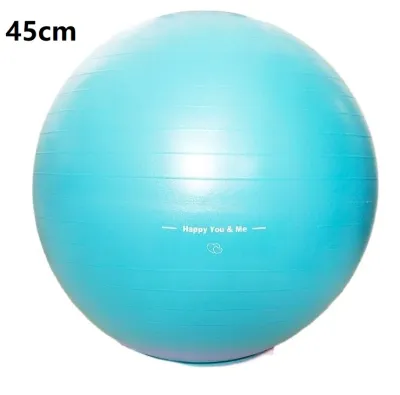
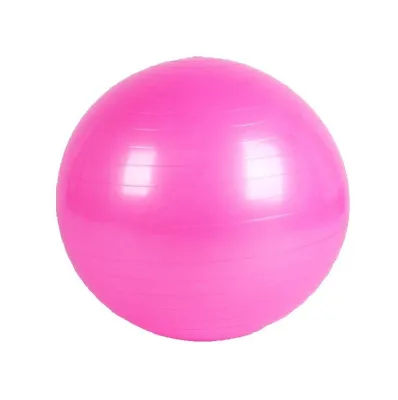
![3H Fitness [46CM/58CM] Upgrade Bosu Yoga Balance Ball Fitness Gym Workout Half Yoga Ball Exercises Balance Trainer Ball](https://img.lazcdn.com/g/p/aeaa9601b120e1f9f9cd61096fe6c306.jpg_400x400q80.jpg_.webp)
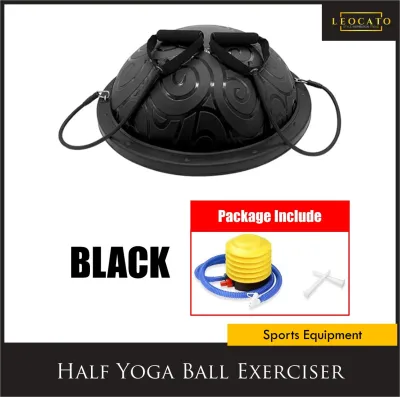
Prices are valid at publication and may change. Please refer to the product page for the latest price.
Because the ball is constantly making micro-movements, your body must make subtle, involuntary adjustments to maintain balance. This low-level activation fires up deep stabilizer muscles, such as the multifidus, transversus abdominis, and deep hip rotators, without overloading them. This gentle muscular engagement acts as a natural pump, stimulating local blood circulation to deliver fresh oxygen and nutrients to fatigued tissues while accelerating the clearance of metabolic waste after a run.
Choosing and Preparing Your Balance Ball
To ensure safe and effective recovery work, you must choose a balance ball that matches your height. This ensures that when you sit on the ball, your hips, knees, and ankles can maintain comfortable, biomechanically sound angles.

As a general sizing guide:
- If you are under 152 cm, look for a 45 cm ball.
- If you are between 152 cm and 165 cm, a 55 cm ball is typically ideal.
- If you are between 165 cm and 185 cm, select a 65 cm ball.
- If you are over 185 cm, a 75 cm ball will provide the necessary height.
Verify your choice by sitting upright on the ball with your feet flat on the floor; your knees should be bent at approximately a 90-degree angle, with your hips positioned level with or slightly higher than your knees.
For active recovery and mobility work, inflation plays a critical role in comfort and stability. While a rock-hard, fully inflated ball is excellent for intense core workouts, it can be too firm and unstable for passive stretching. For recovery, inflate the ball to about 85% to 90% of its maximum capacity. A slightly softer ball deforms slightly under your body weight, creating a wider, more stable contact area that reduces the risk of slipping and allows your muscles to relax more fully into each stretch.
Setting up a safe space is particularly important when using a balance ball indoors, especially in compact residential spaces like Singapore HDB flats or apartments. Clear a radius of at least two meters around you, ensuring there are no sharp furniture corners, tables, or stray objects nearby. Always perform your routine on a clean, non-slip yoga mat rather than bare tiles or polished wood floors. The texture of the mat prevents the ball from sliding out from under you, providing essential traction for both your feet and the ball. Additionally, in humid tropical climates, sweat can quickly make both your skin and the ball slippery, so keep a towel handy to wipe down the surface before starting.
Essential Balance Ball Stretches for Post-Run Recovery
Hamstring and Calf Release
To target the posterior chain, start by lying supine on your back on your non-slip mat. Place the balance ball under your lower legs, resting your calves and heels comfortably on top of the dome. Your arms should rest flat on the floor beside you, palms down, to provide lateral stability. Keep your neck relaxed and your shoulders anchored to the floor.
Slowly roll the ball toward your glutes by bending your knees, then gently push it back out to straighten your legs. As you glide the ball back and forth, move at a slow, deliberate pace. If you encounter a localized area of tension or a tight spot in your hamstrings or calves, pause the movement and allow your legs to melt over the ball, letting the pressure of the ball assist in releasing the myofascial tension.
Take deep, diaphragmatic breaths, inhaling through your nose and exhaling slowly through your mouth. To increase the stretch in your calves, actively flex your toes back toward your shins as you extend your legs. To deepen the hamstring stretch, you can perform a very gentle hip lift, raising your pelvis a few centimeters off the floor while keeping your weight supported by your upper back and shoulders. Avoid lifting too high, as the goal is a relaxed release rather than an intense hamstring bridge workout.
You should feel a gentle, broad, and sustained pulling sensation along the back of your thighs and calves. It should feel like a satisfying release rather than a sharp or pinching strain.
Hip Flexor and Quad Stretch
Running repeatedly shortens the hip flexors and quadriceps, making this stretch essential. Start in a low kneeling position on your mat, facing away from the balance ball. Carefully place the top of your left foot and lower shin on top of the balance ball behind you. Step your right foot forward, bending your right knee to a 90-degree angle so that your right foot is firmly planted on the floor directly beneath your knee. If you struggle with balance, place a sturdy chair or wall nearby for hand support.
To protect your lower back, avoid letting your pelvis tilt forward excessively, which causes a deep arch in your lumbar spine. Instead, gently engage your lower abdominals and tuck your tailbone slightly downward. This subtle pelvic alignment isolates the stretch directly in the front of your left hip and thigh. Keep your torso upright and your shoulders stacked directly over your hips.
Rather than watching a clock for a rigid time count, focus on your breathing. Hold this position for 5 to 8 deep, slow breath cycles. With every exhalation, consciously allow your hips to sink slightly forward and down, letting the ball support the weight of your rear leg. Slowly release the stretch, return to a neutral kneeling position, and repeat the sequence on the opposite leg.
Lower Body Mobility and Joint Articulation Drills
Pelvic Tilts and Spinal Mobilization
Sit comfortably on your balance ball with your feet flat on the floor, hip-width apart. Slowly walk your feet forward while sliding your hips off the ball, lowering your torso until your lower back and mid-back are fully supported by the curve of the ball. Your knees should be bent at a 90-degree angle, with your feet firmly gripping the mat. Place your hands lightly on your hips or behind your head for support.
Begin by performing slow, controlled pelvic tilts. Gently tuck your tailbone under, flattening your lower back against the ball, then slowly reverse the movement, arching your lower back slightly and letting your pelvis tilt forward. To progress this into a spinal bridge, press through your heels and slowly lift your hips until your thighs and torso form a straight line parallel to the floor, supported by the ball under your shoulders. Lower your hips back down with control, feeling each vertebra articulate against the pliable surface of the ball.
The primary objective here is fluid, rhythmic motion rather than holding a rigid position. This dynamic movement helps rehydrate the intervertebral discs of the lumbar spine and releases the deep pelvic tension that accumulates from the repetitive, linear impact of running. Keep your neck relaxed and avoid tensing your shoulders.
Leg Circles and Hip Openers
Lie flat on your back on your mat, bend your knees, and place both feet flat on top of the balance ball. This starting position provides a stable base while allowing your hip joints to remain relaxed.
Lift your right leg straight up toward the ceiling, keeping your left foot stabilized on the ball. Begin drawing slow, controlled circles in the air with your right foot, initiating the movement entirely from your hip joint. Perform 5 to 10 circles in a clockwise direction, then reverse to counter-clockwise. Keep your pelvis as stable as possible, using your core muscles to prevent the ball under your left foot from wobbling excessively.
If you have exceptionally tight hips or hamstrings, keeping your leg straight may feel uncomfortable or cause your lower back to arch. To modify this, simply bend your right knee at a 90-degree angle and draw circles with your knee instead of your foot. You can also reduce the diameter of the circles to a size that allows you to maintain perfect pelvic stability. Repeat the sequence with your left leg.
Safety Guidelines and When to Stop
When performing recovery work on a balance ball, it is vital to listen to your body’s feedback. A productive stretch should feel like a dull, broad, and warm pulling sensation within the muscle belly. This is normal tension releasing. In contrast, you should never feel sharp, stabbing, or localized pain in your joints, tendons, or ligaments.
Immediately stop any stretch or mobility drill if you experience sharp pain, a pinching sensation in your joints, dizziness, or any numbness, tingling, or pins-and-needles sensations traveling down your legs. These symptoms can indicate nerve compression or joint impingement, and pushing through them can lead to acute injury.
Always check the manufacturer’s safety instructions and weight limits for your specific balance ball model before use. If you are recovering from a recent lower body injury (such as a ligament sprain, muscle tear, or joint dislocation), suffer from severe inner ear or balance disorders, or are experiencing acute joint inflammation, do not use a balance ball for recovery without consulting a physiotherapist or sports medicine physician first. Equipment is a tool to assist recovery, but it cannot replace professional medical diagnosis or structured rehabilitation.
Frequently Asked Questions (FAQ)
How firm should my balance ball be for recovery?
For post-run recovery and stretching, your balance ball should be slightly soft, inflated to approximately 85% to 90% of its maximum capacity. A slightly under-inflated ball yields to your body weight, creating a broader contact surface that increases stability and comfort. A rock-hard, fully inflated ball is highly unstable and can cause your muscles to tense up to maintain balance, which defeats the purpose of a relaxing recovery session.
How long should a post-run balance ball routine take?
A typical post-run recovery routine on a balance ball should take between 10 to 15 minutes. Rather than rushing through a set number of repetitions, focus on the quality of each movement and the depth of your breathing. You can adjust the duration based on the intensity of your run; a long, exhausting road run may warrant a slower, more passive stretching session, while a short recovery run might only require a quick 10-minute mobility tune-up.
Community discussion
Share your experience or ask a question. Comments are reviewed before publication.