
A chest expander is a highly versatile, space-saving resistance tool that builds upper-body strength by utilizing progressive tension. To use it correctly, you must maintain a stable stance, engage your core, control both the expansion and contraction phases, and select a resistance level that allows you to complete movements without compromising your posture.
By focusing on controlled, deliberate movements rather than rapid pulling, you can effectively target your chest, shoulders, and back while minimizing the risk of joint strain. Matching the expander type to your fitness level, environment, and physical limits ensures a safe and productive workout.
Preparing Your Equipment and Workout Space
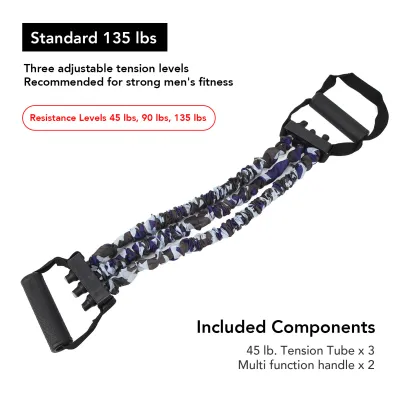
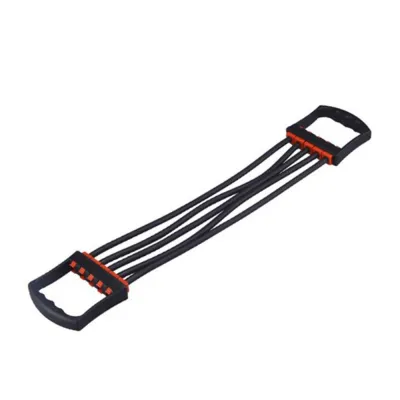
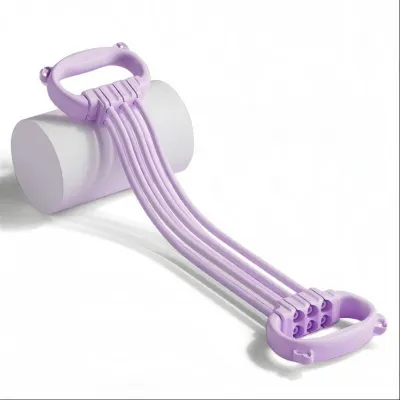
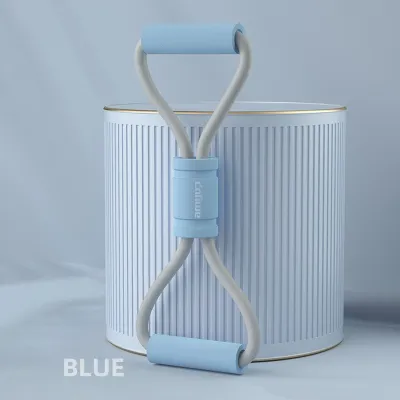
Before starting your workout, identify your expander type: metal spring, latex resistance band, or adjustable cable. Metal spring expanders offer high tension but require careful handling to avoid skin pinching. Latex or rubber resistance bands provide smooth, progressive resistance and are highly portable, making them ideal for travel, while adjustable cable systems allow for quick resistance modifications.
Products mentioned in this guide
Prices are valid at publication and may change. Please refer to the product page for the latest price.
Before every workout, perform a thorough physical inspection of your equipment. For metal springs, check for rust, bent coils, or loose connection hooks where the springs attach to the handles. For rubber bands or cables, inspect the entire length for micro-tears, cracks, discoloration, or dry rot. In warm, humid climates, rubber materials can degrade more rapidly, making regular checks essential to prevent sudden snaps during use.
Adjust the resistance level to match your current strength and the specific exercise you plan to perform. For spring expanders, this involves detaching or adding individual springs. For band systems, you can clip on additional tubes or adjust the length of the band. Always start with a lighter resistance than you think you need to verify your form before progressing to heavier settings.
Establish a safe workout environment by clearing a two-meter radius around you. Ensure there are no sharp objects, furniture, or low-hanging light fixtures within reach. Stand on a flat, non-slip surface, such as a rubber exercise mat. Position your feet shoulder-width apart, keep your knees slightly bent, and distribute your weight evenly to maintain a stable foundation throughout your movements.
Step-by-Step Exercises for Chest, Shoulders, and Back
Using a chest expander effectively requires a focus on control, tempo, and proper alignment. Rather than relying on momentum to pull the expander apart, focus on a slow, deliberate expansion followed by an equally controlled return to the starting position. This approach maximizes muscle activation and protects your joints from sudden, jarring forces.

Targeting the Chest and Shoulders
To perform a standard chest press, stand tall with your feet shoulder-width apart and hold the expander handles in front of your chest. Position your elbows at a 90-degree angle, pointing outward, with your palms facing down. Slowly push your hands outward and forward, extending your arms fully without locking your elbows, and feel the contraction in your chest muscles.
For the outward pull, hold the expander directly in front of your chest with your arms extended and a slight bend in your elbows. Slowly pull your hands apart, moving them out to your sides in a wide arc until the band or springs touch your chest. Pause for a second at the peak of the contraction, then slowly return to the starting position.
To perform the overhead variation, raise the expander directly above your head with your arms extended. Pull your hands outward and downward, bringing the expander down behind your head or in front of your collarbone, depending on your shoulder mobility. This variation targets the upper chest and the lateral deltoids of the shoulders.
Coordinate your breathing with each movement to maintain stability and control. Exhale slowly as you pull or push the expander outward, which is the phase of maximum effort. Inhale deeply as you control the tension and return the expander to its starting position. Keep your core muscles engaged throughout the exercise to support your spine.
Avoid common form mistakes that can lead to joint strain or injury. Do not lock your elbows at the end of any movement, as this transfers the resistance from your muscles to your elbow joints. Keep your shoulders relaxed and down; shrugging them toward your ears overworks your neck muscles and reduces chest engagement. Avoid arching your lower back excessively to force the expander open, as this can cause lower back strain.
Targeting the Back and Improving Posture
To perform a reverse pull, hold the expander at shoulder height directly in front of you with your arms extended. Keep your palms facing inward or downward. Slowly pull your hands outward and backward, focusing on squeezing your shoulder blades together as if trying to pinch a coin between them. This movement targets the rhomboids, middle trapezius, and rear deltoids.
For a rowing motion, secure the center of the expander under both feet or anchor it safely to a sturdy, low structure. Hold the handles, bend slightly at your hips while keeping your back straight, and pull the handles upward toward your lower ribs. Keep your elbows tucked close to your sides and focus on pulling with your back muscles rather than your biceps.
The behind-the-neck expansion is an advanced movement that targets the upper back and shoulders. Hold the expander behind your neck with your elbows bent, then slowly extend your arms outward. Only perform this exercise if you have excellent shoulder mobility; if you feel any pinching, clicking, or discomfort in your shoulder joints, stop immediately and stick to front-facing movements.
Focus on proper scapular retraction during all back exercises. Initiate each pull by drawing your shoulder blades down and back before moving your arms. Keep your chest open and your collarbones wide, and avoid flaring your ribs outward, which indicates that you are arching your spine rather than using your back muscles.
You can adjust your grip width and hand orientation to target different areas of your back. A wider grip on the expander reduces the range of motion but can help isolate the rear deltoids. A narrower grip increases the resistance and extends the range of motion, shifting the emphasis toward the larger muscles of the mid-back and lats.
Safety Rules and When to Stop Your Set
Safety must always be your primary focus when training with high-tension equipment. Pay close attention to your body’s feedback and the condition of your equipment during every set. If you experience sharp, sudden pain in your shoulders, elbows, or wrists, stop the exercise immediately, as this indicates joint strain rather than muscle fatigue.
Stop your set immediately if you feel the expander slipping from your grip, if a spring or band begins to deform, or if you lose your balance. Never attempt to force a repetition if your form breaks down, as uncontrolled movements can lead to muscle tears or equipment failure. Always maintain complete control over the return phase of the movement; never let the expander snap back quickly.
Before loading the expander, spend at least five minutes warming up your shoulder joints and rotator cuffs. Perform dynamic movements such as arm circles, shoulder rolls, and light band pull-aparts to increase blood flow and joint lubrication. A proper warm-up prepares the delicate muscles of the rotator cuff for the high-tension forces of the expander.
If you have pre-existing shoulder impingements, rotator cuff issues, or chronic back pain, consult a physical therapist or medical professional before using a chest expander. These exercises place significant demand on the shoulder complex, and professional guidance can help you modify movements to avoid aggravating existing injuries. Equipment and exercises cannot replace professional medical advice or structured rehabilitation.
Building a Balanced Workout Routine
To integrate the chest expander into your fitness routine effectively, you must plan your training volume, frequency, and progression carefully. For general muscular endurance and tone, aim for 3 sets of 15 to 20 repetitions using a lighter resistance setting. For strength development, focus on 3 sets of 8 to 12 repetitions with a higher resistance, ensuring the final reps are challenging but can be completed with perfect form.
Rest for 60 to 90 seconds between sets to allow your muscles to recover sufficiently for the next effort. As your baseline strength improves, progress gradually by adding a spring, switching to a thicker resistance band, or increasing the time under tension. For example, you can slow down the movement by taking three seconds to expand the tool and three seconds to return it to the starting position.
To ensure balanced muscle development and prevent postural imbalances, combine your chest expander workouts with other training modalities. Pair expander exercises with bodyweight movements like push-ups and planks, or traditional gym equipment like dumbbells and barbells. This balanced approach ensures that all major muscle groups are worked evenly, promoting overall strength and joint stability.
Frequently Asked Questions (FAQ)
Can I use a chest expander every day?
It is generally not recommended to use a chest expander every day for the same muscle groups. Muscles and connective tissues require adequate rest to repair and rebuild after resistance training. Training the same muscles daily without rest can lead to overtraining, joint strain, and decreased performance.
Look out for signs of insufficient recovery, such as persistent muscle soreness, joint stiffness, decreased grip strength, or an inability to complete your usual repetitions with proper form. To allow for proper recovery, schedule at least 48 hours of rest between intense chest expander sessions targeting the same muscle groups.
Do I need to wear gloves when using a spring chest expander?
While wearing gloves is not strictly mandatory, it is highly recommended when using a metal spring chest expander. Bare hands can easily develop blisters, calluses, or experience painful skin pinching between the tightly coiled metal springs during high-tension movements.
Using workout gloves, chalk, or padded grips provides a more secure hold, prevents slipping caused by sweat, and protects your skin from friction. This added grip control is especially beneficial in warm or humid environments, ensuring you maintain full control over the equipment throughout your workout.
Community discussion
Share your experience or ask a question. Comments are reviewed before publication.