
Using a foot arch trainer correctly is essential for building foot strength, improving balance, and preventing lower-limb strain. To achieve safe and effective results, you must prioritize precise foot alignment, maintain a slow and controlled movement tempo, and gradually increase training volume over time. Rather than rushing into high-resistance settings, success relies on developing a strong mind-muscle connection with the intrinsic muscles of your feet while training on a stable, non-slip surface.
Assessing Readiness and Setting Up Safely
Before placing your feet on any training device, evaluating your current physical baseline is a critical first step. Foot arch trainers are designed to condition the muscles that support your arches, but they are not universal remedies for acute injuries. If you are currently experiencing sharp heel pain, swelling, numbness, or have been diagnosed with conditions like severe plantar fasciitis, you must seek a professional medical or physiotherapy assessment before starting. Exercising on an already inflamed tendon or compromised joint can exacerbate injuries rather than heal them.
Once you have established that your feet are ready for conditioning, select the appropriate resistance level or setting on your device. Most foot arch trainers utilize adjustable tension bands, springs, or variable angles to alter the difficulty. Beginners should always start with the lowest possible resistance setting. This allows your nervous system and the small, intrinsic muscles of the foot—such as the abductor hallucis—to adapt to the unique movement patterns without being overloaded.
Products mentioned in this guide

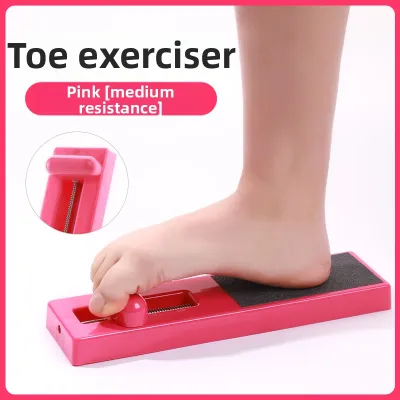
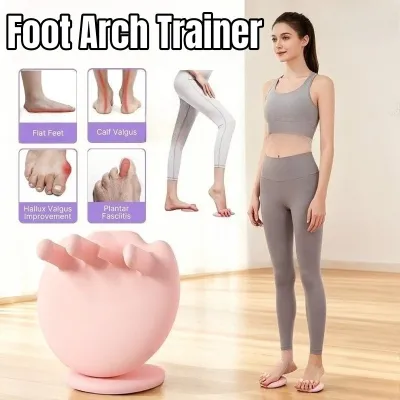
![[SG STOCK]1 pair Arch Trainer Foot Arch Strengthening Toes Stretch Silicone Slimming Calves Thigh Corrector/足弓矫正器](https://img.lazcdn.com/g/p/531f498d37faab1fdbd46e5fd0f9b8ed.png_400x400q80.png_.webp)
![[SG Ready Stock]Pair Arch Foot Trainer Home Fitness Equipment Leg Sculpting Let the legs exert force correctly TPR Material Muscle Portable Strength Training Unisex](https://img.lazcdn.com/g/p/6e1a2763a449bcdf0c6bdbda32c37dea.jpg_400x400q80.jpg_.webp)


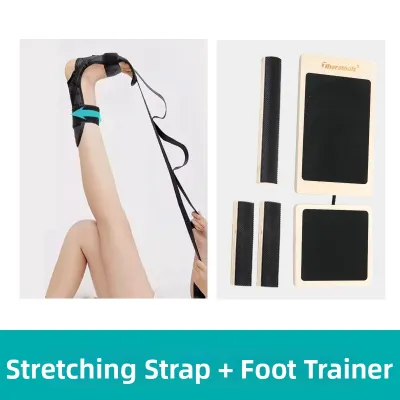
Prices are valid at publication and may change. Please refer to the product page for the latest price.
Your training environment plays an equally important role in safety. Prepare a dedicated space with a flat, level, and non-slip surface, such as a firm yoga mat. Ensure the area is well-lit so you can clearly observe your foot mechanics during each repetition. Because arch training is typically performed barefoot or in thin socks, removing any loose rugs or clutter from the immediate area is essential to maintain your balance and focus throughout the session.
Mastering the Correct Technique Step-by-Step
Achieving the desired results from a foot arch trainer depends entirely on executing each movement with precise form. Begin by positioning yourself in a stable posture. For most beginners, sitting upright in a firm chair with your knees bent at a 90-degree angle is the safest starting position, as it reduces the amount of body weight pressed through your feet. Place the arch trainer on the floor directly in front of you, and align your foot so that the ball of your foot and your heel are securely positioned on the designated contact points. Your toes should remain relaxed, flat, and spread wide, rather than clawing or curling tightly.

To execute the primary movement, focus on drawing the ball of your foot toward your heel, effectively shortening the foot to dome the arch upward. This action should be driven by the muscles under your foot, not by curling your toes or rolling your ankles outward. Perform the contraction at a slow, deliberate tempo: take two full seconds to lift and dome the arch, hold the peak contraction for one to two seconds to maximize muscle activation, and then take another two to three seconds to slowly release back to the starting position. This controlled eccentric phase is vital for building tissue resilience.
Throughout the exercise, maintain a steady breathing pattern and engage your core muscles to support your overall posture. Avoid holding your breath, which can increase systemic tension and disrupt your focus. Keep your hips level and ensure your knees do not cave inward or flare outward as you contract your foot muscles. By keeping your upper body stable and your core lightly engaged, you isolate the movement to the foot and ankle complex, ensuring that the targeted intrinsic muscles do the vast majority of the work.
Building a Progressive Arch Strengthening Routine
Conditioning the feet requires patience, as the tendons, ligaments, and small muscles of the lower extremities adapt more slowly to mechanical stress than larger muscle groups. For beginners, a conservative starting volume is highly recommended. Limit your training to two or three brief sessions per week, performing one to two sets of eight to ten controlled repetitions per foot. This low initial volume provides your tissues with ample time to recover and rebuild between sessions, minimizing the risk of overuse injuries.
As your feet adapt, you can safely progress your routine by following objective criteria rather than subjective timelines. Only increase the difficulty when you can complete your current sets and repetitions with perfect form, zero pain, and minimal muscle fatigue the following day. Progression can take several forms: you might increase the repetitions to twelve or fifteen per set, add a third set, or slightly increase the device’s resistance setting. Another highly effective progression is transitioning from a seated position to a standing position, which gradually introduces your full body weight to the exercise.
Integrating foot arch training into your broader fitness schedule requires careful planning to avoid fatigue overlap. Because fatigued foot muscles can compromise your balance and running mechanics, avoid performing intensive arch training immediately before heavy lower-body workouts, long runs, or high-impact sports. Instead, schedule your arch exercises at the end of your strength training sessions, during your active recovery days, or as a standalone evening routine. This ensures your feet remain fresh and supportive during your primary athletic activities.
Avoiding Common Mistakes to Prevent Injury
One of the most frequent errors in foot arch training is rushing through the movements or relying on momentum to complete repetitions. Rapid, bouncy movements bypass the intrinsic muscles entirely, shifting the load onto the larger calf muscles or placing excessive stress on the plantar fascia. To correct this, always adhere to a strict tempo and focus on the quality of each contraction. If you cannot hold the peak contraction for at least one second, the resistance is likely too high, and you should scale back to a lighter setting.
Another critical mistake is ignoring the early warning signs of overtraining. The tissues on the underside of the foot are highly sensitive to sudden increases in workload. If you begin to experience a dull ache in your heel, stiffness in the morning, or localized discomfort along the Achilles tendon, these are clear indicators that your training volume or intensity is too high. Continuing to push through this discomfort can lead to chronic conditions that require months of rest to resolve.
Improper foot positioning is also common and can quickly shift the mechanical load away from the targeted arch muscles. Many users tend to roll their ankles outward (supination) or inward (pronation) during the exercise, or they claw their toes into the device to force a contraction. To correct this, ensure that the base of your big toe, the base of your little toe, and your heel remain in constant, even contact with the trainer or the floor. Your toes should act as stabilizers, remaining long and flat while the arch itself does the lifting.
Tracking Progress and Recognizing When to Stop
Monitoring your progress over time involves looking for functional improvements in your daily life rather than expecting immediate structural changes to your feet. Within several weeks of consistent, correct training, you may notice enhanced balance during single-leg movements, reduced foot fatigue after standing for long periods, and greater stability when walking on uneven surfaces. You might also observe that your feet feel more grounded and responsive during your regular workouts.
It is vital to differentiate between normal muscle fatigue and pain that signals a potential injury. After a training session, you may experience mild, diffuse muscle soreness on the sole of your foot, similar to the delayed onset muscle soreness (DOMS) felt in other muscles after a workout. This soreness should be mild, non-restrictive, and resolve within 24 to 48 hours. In contrast, sharp, stabbing, burning, or highly localized pain—especially near the heel or the joints of the toes—is abnormal and indicates tissue strain.
You must establish clear stop conditions to protect your foot health. If you experience sharp pain during an exercise, immediate swelling, numbness, or a persistent limp that lasts into the next day, stop using the foot arch trainer immediately. Rest the foot, avoid high-impact activities, and consult a qualified healthcare professional, such as a physiotherapist or podiatrist, to receive a personalized assessment and recovery plan.
Frequently Asked Questions (FAQ)
Can I use a foot arch trainer if I have flat feet?
Yes, individuals with flat feet can often use a foot arch trainer, but the suitability depends on whether the flat feet are flexible or rigid. If you have flexible flat feet—where an arch is visible when your foot is off the ground but collapses when standing—strengthening the intrinsic muscles can help improve dynamic arch support and foot stability. However, if you have rigid flat feet, where the arch remains flat regardless of weight-bearing status due to bone structure, a foot arch trainer will not structurally alter your foot shape. It is highly recommended to seek a professional assessment from a podiatrist to understand the underlying cause of your flat feet. While these devices can condition the foot muscles, they should not be viewed as a structural cure.
How often should I train my foot arches?
For most individuals, training your foot arches two to three times per week is sufficient to stimulate muscle adaptation while allowing adequate time for tissue recovery. The small muscles of the feet are highly active during daily walking and standing, meaning they are easily prone to overuse if subjected to excessive targeted training. If you experience persistent soreness, morning stiffness, or a decline in balance, your training frequency or volume is likely too high, and you should reduce your sessions. Conversely, if you feel no fatigue and observe no functional improvements after several weeks, you might gradually increase your frequency to three times per week, provided your form remains perfect and you remain completely pain-free.
Should I wear shoes while using the trainer?
It is generally recommended to use a foot arch trainer barefoot to maximize sensory feedback and ensure direct muscle engagement. Training barefoot allows the skin and nerves on the sole of your foot to interact directly with the surface, enhancing proprioception—your body’s ability to sense its position and movement. However, if your device has a textured surface that causes skin discomfort, or if you are training in a shared gym facility where hygiene is a concern, wearing thin, non-slip socks is an excellent alternative. To prevent your foot from slipping during barefoot or socked training, ensure your training space is dry, clean, and situated on a high-traction surface like a rubber fitness mat. Avoid wearing thick, cushioned, or highly supportive shoes, as they restrict natural foot movement and prevent the intrinsic muscles from working effectively.
Community discussion
Share your experience or ask a question. Comments are reviewed before publication.