
Heavy weightlifting sessions like squats, deadlifts, and overhead presses place immense stress on your posterior chain, often leaving you with tight, aching muscles that can limit your mobility and delay your return to the gym. A peanut massage ball offers a highly targeted, self-directed way to relieve this post-lifting tension by mimicking the hands-on pressure of a professional sports sports massage. By positioning the tool strategically under key muscle groups and using your body weight to control the intensity, you can systematically release stubborn trigger points, restore tissue elasticity, and accelerate your overall recovery.
Why the Dual-Ball Design Works for Lifters
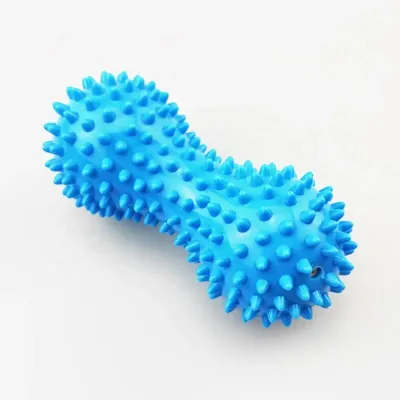
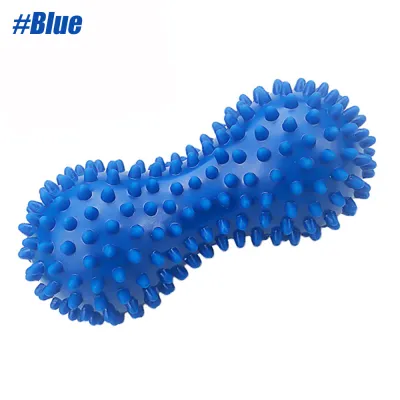
The unique shape of a peanut massage ball—essentially two small spheres joined by a narrow central bridge—is specifically engineered to address the anatomical challenges faced by strength athletes. When you roll your back with a standard single lacrosse ball or a flat foam roller, you often run into a common problem: direct, uncomfortable pressure on your spine. The central groove of the peanut ball solves this by creating a dedicated channel that arches over your spinous processes, the bony protrusions of your vertebrae. This ensures that the hard surface of the tool never presses directly against your bones, significantly reducing the risk of bruising or spinal irritation.
While the central gap protects your spine, the two outer spheres work simultaneously on the thick columns of muscle running parallel to it. These muscles, known as the erector spinae and surrounding paraspinal tissues, bear the brunt of the load during heavy compound lifts like deadlifts and barbell rows. By targeting both sides of the spine at once, the peanut ball provides a balanced, symmetrical release that helps restore alignment and relieve bilateral tension. This dual-action pressure is far more efficient and anatomically precise than trying to balance on a single ball or using a wide foam roller that cannot penetrate deeply into the grooves of the back.
Products mentioned in this guide
![[SG FREE ] Yoga Massage Ball Peanut Ball Shoulder Neck Back Foot Ball Fascia Ball Massage Relaxation](https://img.lazcdn.com/g/p/844f9fc332b8b49cfea2a5b1383f130b.jpg_400x400q80.jpg_.webp)
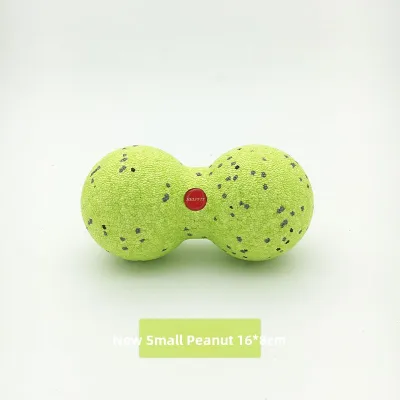
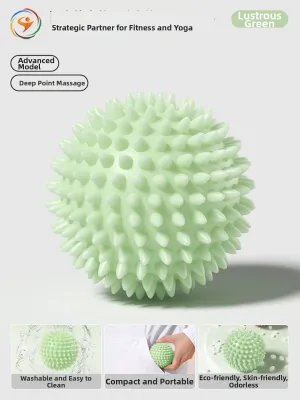
Prices are valid at publication and may change. Please refer to the product page for the latest price.
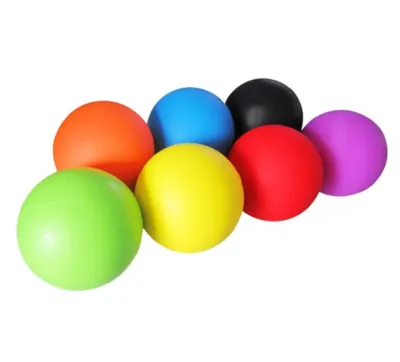
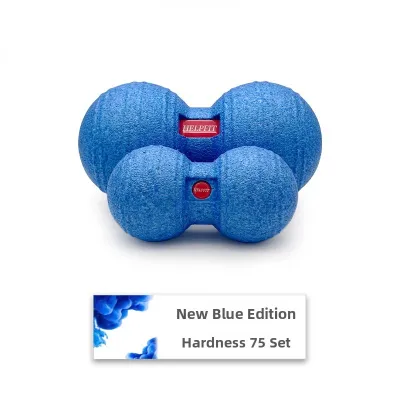
When choosing a peanut massage ball, you will generally encounter three primary materials: solid rubber, cork, and inflatable options. Solid rubber models are highly durable and offer maximum firmness, making them excellent for deep tissue work, though they can feel quite intense for beginners. Cork options provide a slightly textured grip and a more sustainable, lightweight design with a moderate amount of give that is gentler on sensitive areas. Inflatable or adjustable-pressure peanut balls allow you to customize the firmness by adding or releasing air, which is ideal if you want to vary the intensity across different muscle groups or need a highly portable option for your gym bag.
Setting Up for a Safe and Effective Session
Before you begin rolling, preparing your environment is essential for maintaining control and preventing accidental slips. Always choose a supportive, non-slip surface to perform your recovery work. A high-quality yoga mat, a firm exercise mat, or a low-pile carpeted floor provides the necessary traction to keep both your body and the massage ball from sliding out of position. Avoid highly polished wooden floors or slick tiles, as these surfaces can cause the ball to shoot out from under you unexpectedly, potentially leading to sudden joint strain or falls.

Timing and muscle state also play a critical role in how your body responds to myofascial release. For optimal results, ensure your muscles are warm before applying deep, localized pressure. Rolling immediately after a heavy lifting session is highly effective because your body temperature is already elevated and your circulation is active. If you are rolling on a rest day, perform a light general warm-up first, such as five to ten minutes of dynamic stretching, bodyweight squats, or a brisk walk. Attempting to roll cold, stiff muscles can trigger a protective tensing response, which defeats the purpose of the massage and increases the risk of minor tissue damage.
Finally, take a moment to inspect both your equipment and the floor space before you lie down. Small pieces of debris, grit, or gym chalk on the floor can cause uncomfortable skin abrasions when pressed under your body weight. Check your peanut massage ball for any signs of wear, cracks, or embedded dirt, especially if you frequently toss it into a shared gym bag. Ensuring a clean, clear workspace allows you to focus entirely on your breathing and movement patterns without unnecessary distractions or physical discomfort.
Step-by-Step Rolling Techniques for Key Muscle Groups
To get the most out of your peanut massage ball, you must approach each movement with deliberate control rather than rapid, repetitive scrubbing. The general rule for effective myofascial release is to move slowly, advancing only a few centimeters at a time. When you encounter a particularly tender spot or “trigger point,” pause your movement and hold the position for twenty to thirty seconds. During this hold, focus on taking deep, slow diaphragmatic breaths; holding your breath signals danger to your nervous system, causing your muscles to contract and resist the pressure of the ball.
Controlling the intensity of the massage relies entirely on how you position your body to leverage your weight. You should never dump your full, relaxed body weight onto the peanut ball immediately. Instead, use your arms, elbows, knees, and feet as support pillars to offload a portion of your weight. By pressing into the floor with your limbs, you can easily adjust the depth of the pressure, gradually transferring more weight onto the ball as the target muscle begins to relax and yield to the contact.
Upper Back, Shoulders, and Thoracic Spine
The upper back and thoracic spine frequently lock up after heavy squats, overhead presses, and bench presses. To target this area, lie on your back on your mat and place the peanut massage ball horizontally beneath your upper back, just below the base of your neck. Ensure the central groove is aligned precisely with your spine so that the two rubber spheres rest on the muscle tissue on either side. Bend your knees, place your feet flat on the floor, and cross your arms over your chest to pull your shoulder blades apart, exposing the deeper muscles underneath.
To begin the movement, press through your feet to lift your hips slightly off the floor, transferring your weight onto the ball. Slowly roll your body downward so the ball travels up your back, stopping just before you reach the base of your neck, and then roll back down to the mid-back region. If you find a highly sensitive spot, lower your hips back to the floor to reduce the pressure, and perform gentle arm sweeps. Extend your arms straight up toward the ceiling, then slowly lower them overhead and back down to your sides; this movement mobilizes the shoulder blades and coaxes the underlying muscles to release around the stationary ball.
Lower Back and Lumbar Region
The lower back requires a highly cautious approach because the lumbar spine lacks the structural support of the rib cage, leaving the area more vulnerable to hyperextension and excessive pressure. To safely target the lumbar extensors, lie on your back with your knees bent at a ninety-degree angle and your feet planted firmly on the floor. This position is crucial because it maintains a neutral pelvic tilt, flattening your lower back slightly against the floor and preventing your spine from arching excessively over the peanut ball.
Place the ball horizontally under your lower back, ensuring once again that the spine rests safely in the central groove. Instead of performing long, sweeping rolling motions up and down the lower back, restrict your movement to very small, localized shifts. Gently rock your pelvis from side to side, or lift one knee slightly toward your chest and lower it back down. Never apply direct, heavy pressure to the lowest vertebrae near the pelvis, and stop the session immediately if you experience any sharp, shooting, or radiating nerve pain down your legs, which indicates pressure on a nerve pathway rather than a muscle release.
Glutes, Hips, and Piriformis
Your glutes and deep hip rotators perform an immense amount of work during deadlifts, lunges, and deep squats, making them prime candidates for targeted release. To begin, sit on the floor with your knees bent and feet flat, then slide the peanut massage ball under one of your glutes. To expose the deeper piriformis and hip rotator muscles, cross the ankle of the working side over the opposite knee, creating a figure-four shape with your legs. This position stretches the gluteal fascia, allowing the ball to penetrate more effectively into the deeper muscle layers.
Support your upper body by placing your hands flat on the floor behind you. Using your hands and your supporting foot for balance, perform small, slow circular motions over the ball, allowing it to knead the thick muscle tissue of the glute. When you locate a tender spot, stop rolling and perform a static hold, letting your body weight sink gradually into the ball while maintaining steady, deep breathing. After spending one to two minutes on one side, systematically switch to the other side to ensure balanced recovery and maintain proper pelvic alignment.
Safety Boundaries: When to Stop and What to Avoid
While self-myofascial release is an excellent recovery tool, it is vital to recognize the physical boundaries where massage ceases to be beneficial and becomes potentially harmful. There are several anatomical areas you must strictly avoid with a peanut massage ball. Never use the tool directly on your cervical spine (the neck bones), as the delicate structures and nerves in this region are highly sensitive to intense pressure. Additionally, avoid rolling directly over joints, such as the back of the knees or the shoulders, and never apply pressure to areas with acute muscle tears, open wounds, or active inflammation.
Understanding the difference between productive discomfort and harmful pain is key to protecting your body. A productive release typically feels like a dull, aching sensation that gradually dissipates or melts as you hold the position and breathe. In contrast, harmful pain is sharp, stabbing, hot, or accompanied by numbness, tingling, or a “pins and needles” sensation. These symptoms indicate that you are compressing a nerve, a blood vessel, or an inflamed tendon rather than targeting muscle tissue.
If you experience any of these warning signs, or if you notice that your muscle soreness worsens or alters your natural movement patterns over the following days, stop using the ball immediately. Self-massage tools are designed to support recovery, not to diagnose or treat underlying injuries. If pain persists, consult a qualified healthcare professional or sports physiotherapist to receive a proper assessment and a tailored rehabilitation plan.
Building a Sustainable Post-Lifting Recovery Routine
To maximize the benefits of your peanut massage ball, integrate it into a comprehensive, multi-faceted recovery strategy rather than relying on it as a standalone solution. Myofascial release is highly effective at reducing localized tension, but it is most beneficial when paired with gentle static stretching and proper hydration. Drinking adequate water after a rolling session helps rehydrate the compressed fascial tissues, promoting better nutrient delivery and waste removal within the muscles.
You should also adjust the frequency and intensity of your rolling sessions based on your current training volume and individual recovery capacity. During periods of high-volume lifting or intense strength cycles, you may benefit from short, daily rolling sessions focusing on the most fatigued muscle groups. Conversely, during lighter training phases, two to three sessions per week may be entirely sufficient. Always listen to your body; if a muscle group still feels bruised or highly sensitive from a previous session, give it an extra day of rest rather than forcing another deep rolling session.
Finally, maintaining hygiene and caring for your equipment ensures its longevity and keeps your skin healthy. Because the peanut ball comes into direct contact with your skin and gym clothes, it can easily accumulate sweat, body oils, and floor dust. Clean the ball regularly using a damp cloth and mild soap, then allow it to air dry completely before storing it in a cool, dry place away from direct sunlight. Proper maintenance prevents the buildup of bacteria and ensures your recovery tool remains in excellent condition for years to come.
Frequently Asked Questions (FAQ)
How much pressure should I apply when rolling?
When using a peanut massage ball, aim for a level of pressure that creates a tolerable discomfort rather than intense pain. On a scale of one to ten, where ten is unbearable pain, your rolling intensity should hover between a five and a seven. The muscle you are targeting should feel like it is gradually releasing and softening under the pressure, rather than tensing up or guarding against the ball. If you find yourself holding your breath, grimacing, or tensing other parts of your body, the pressure is too high; immediately use your arms and legs to lift some of your weight off the ball until you can breathe comfortably.
Can I use a peanut massage ball on a bed or soft surface?
Using a peanut massage ball on a bed, couch, or other soft surface is highly inefficient and generally not recommended. Soft mattresses and cushions absorb the pressure of the ball, causing it to sink into the surface rather than pressing into your muscle tissue, which significantly reduces the effectiveness of the massage. For optimal results, always use the ball on a firm floor with a thin yoga mat. This setup provides the necessary resistance and physical feedback, allowing you to control your movements precisely and maintain proper joint alignment throughout your recovery session.
Community discussion
Share your experience or ask a question. Comments are reviewed before publication.