
A spine corrector pilates routine is one of the most effective ways to restore natural movement to your back, open up a tight chest, and build deep abdominal strength. For beginners, this specialized curved equipment can look intimidating, but its primary design is highly supportive, cradling the natural curves of your body to make spinal extension and flexion accessible. Rather than forcing extreme flexibility, using this tool is about developing controlled mobility, improving postural awareness, and building a balanced, resilient core. By focusing on precise form and slow, deliberate movements, you can safely unlock the full physical benefits of this classic Pilates apparatus in your home or studio.
Understanding the Spine Corrector Pilates Apparatus and Its Benefits
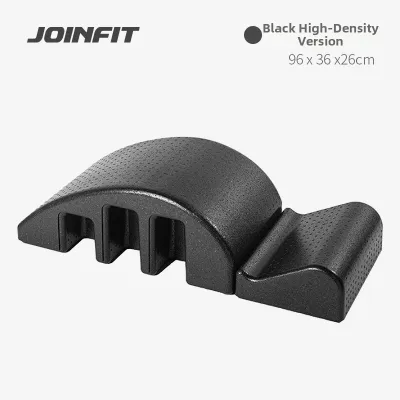
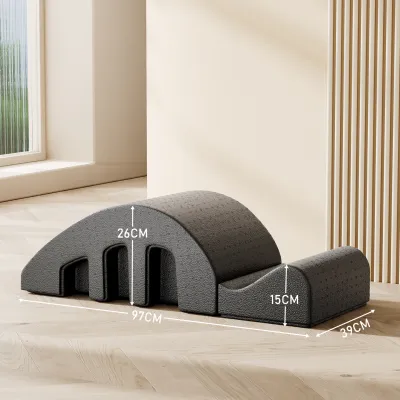
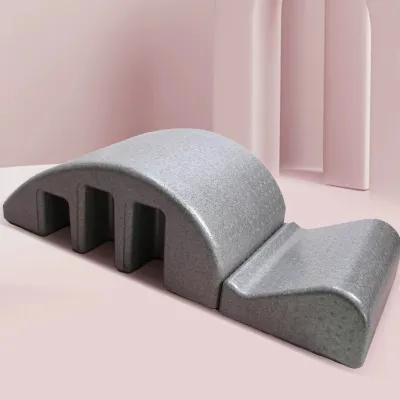
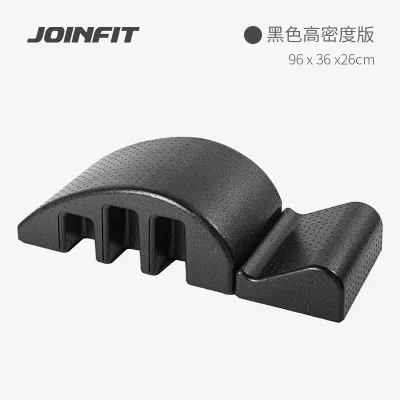
The spine corrector is a classic piece of Pilates equipment featuring a rounded barrel arc paired with a stepped seat or crevice. This unique ergonomic shape is specifically engineered to support the natural curves of your spine as you move through various planes of motion. Unlike flat floor exercises, which can sometimes place undue stress on the lower back or neck, the curved surface of the barrel distributes pressure evenly. This structural support allows for safe, incremental spinal articulation—the ability to move your spine segment by segment, vertebra by vertebra.
Incorporating this tool into your routine focuses heavily on controlled mobility, postural alignment, and gentle strengthening. It helps counteract the rounded-shoulder posture often caused by prolonged sitting, driving, or working at a desk. By gently opening the chest and extending the upper back, it relieves tension in the thoracic spine while simultaneously challenging the deep stabilizing muscles of your core.
Products mentioned in this guide
![[Made in Korea] Pilates S-Curve Spine Pelvis Corrector ● Pilates Lumbar Soothing Device ● Back Cervical Spine Relaxation Scoliosis Corrector](https://img.lazcdn.com/g/p/3547a49913a17f8e6393d2ba2a955583.png_400x400q80.png_.webp)
Prices are valid at publication and may change. Please refer to the product page for the latest price.
While the apparatus is highly supportive, safety must remain your primary focus. If you have a history of acute spinal injuries, herniated or bulging discs, severe osteoporosis, or any undiagnosed back pain, it is essential to consult a qualified healthcare professional or physiotherapist before starting. The spine corrector is designed to facilitate healthy, pain-free movement, and it should never be used to force your body into extreme or uncomfortable ranges of flexibility.
Preparing Your Space and Equipment for Safe Practice
Before beginning any exercises, establishing a safe physical setup is crucial to prevent slips, slides, or sudden shifts in alignment. Always place your spine corrector on a high-quality, non-slip Pilates mat. This is particularly important if you are practicing on smooth surfaces common in modern Singapore homes, such as polished tiles, marble, or engineered timber. The mat provides the necessary friction to keep the heavy base of the corrector firmly anchored to the ground during dynamic movements.

Next, perform a quick stability check on your equipment. Ensure the base is level and does not wobble when you apply weight. Clear the surrounding area of any obstacles, furniture, or sharp corners, leaving at least one to two meters of open space on all sides so you can extend your arms and legs fully without restriction.
Proper initial body alignment on the barrel is the foundation of every exercise. When sitting on the apparatus, position yourself on the highest point of the step or seat, ensuring your sit bones are evenly grounded. Plant your feet flat on the floor, keeping them hip-width apart and parallel to align your ankles, knees, and hips. Rest your hands lightly on the wooden handles or the sides of the barrel to assist with balance, keeping your shoulders relaxed and your collarbones wide.
3 Foundational Spine Corrector Exercises for Beginners
To help you get started safely, these three foundational exercises target key areas of spinal movement: flexion, extension, and pelvic stabilization. Each movement utilizes the barrel’s curve to provide feedback, helping you feel exactly where your spine is in space while keeping your core actively engaged.
Exercise 1: Seated Spinal Articulation (The 'C' Curve)
This exercise focuses on the fundamental Pilates concept of rounding the spine to stretch the deep muscles of the back while deeply engaging the abdominal wall.
- Setup: Sit tall on the highest point of the step, with your feet firmly grounded flat on the floor, hip-width apart. Place your hands lightly on the front of your thighs or the sides of the barrel for initial support. Lengthen your spine upward, imagining a straight line from your tailbone to the crown of your head.
- Execution: Inhale deeply to prepare. As you exhale, tuck your pelvis slightly, scooping your lower abdominals inward and upward. Begin to roll your spine down, vertebra by vertebra, following the curve of the barrel. Only go as far as you can maintain control, keeping your feet firmly planted on the floor and your inner thighs active.
- Breathing Cues: Exhale as you roll down into the curve, feeling the abdominal muscles hollow out. Inhale to pause at the bottom of your movement, feeling the stretch across your back. Exhale again, pulling your navel deeper toward your spine, and roll back up to your starting tall seated position, stacking your spine one vertebra at a time.
- Safety Tip: Keep the movement slow, controlled, and fluid. Avoid the common mistake of dropping your head completely backward or letting your neck go limp at the bottom of the movement. Your neck should remain a natural, supported continuation of the curve of your spine.
Exercise 2: The Swan (Gentle Back Extension)
The Swan is an excellent movement for opening up the chest, stretching the abdominal muscles, and strengthening the often-underactive muscles of the upper and mid-back.
- Setup: Lie prone (face down) with your lower ribs and upper abdomen resting over the highest part of the barrel arc. Extend your legs straight out behind you, hip-width apart, with your toes lightly touching the mat. Your hands can rest lightly on the floor in front of you or touch the sides of the barrel to help you balance.
- Execution: Engage your glutes and press your pubic bone gently into the barrel to protect your lower back. Reach the crown of your head forward to lengthen your neck. On an inhale, gently lift your chest, extending your upper back over the curve of the barrel while keeping your gaze sliding forward along the floor.
- Form Check: It is vital to avoid crunching or compressing your lumbar (lower) spine. The extension should originate entirely from your mid-to-upper thoracic spine. Keep your lower abdominal muscles pulled in tightly away from the barrel to provide internal support for your lower back.
- Stop Condition: If you feel any pinching, sharp pain, or localized pressure in your lower back or neck, stop the exercise immediately. Lower your chest back down to the barrel and rest.
Exercise 3: Supported Pelvic Bridges
This exercise uses the barrel to support the pelvis, allowing you to focus on stabilizing your core while strengthening your hamstrings and glutes.
- Setup: Lie supine (face up) on your mat, positioning the base of your spine and upper sacrum securely against the lip or edge of the corrector. Your head, shoulders, and upper back should rest flat and relaxed on the mat behind the equipment. Plant your feet flat on the floor, hip-width apart, close to the base of the barrel.
- Execution: Press firmly down through your heels and engage your glutes. On an exhale, lift your hips upward, peeling your spine off the edge of the barrel until your body forms a straight, diagonal line from your shoulders to your knees. Avoid pushing up so high that your weight shifts onto your neck; keep the support on your shoulders.
- Breathing and Control: Exhale to lift your hips, focusing on knitting your ribs down toward your hip bones to prevent your back from arching. Inhale as you lower your hips back down to the starting position with absolute control, feeling each segment of your spine make contact with the barrel.
- Modification: If you feel unstable or struggle with balance, widen your feet slightly past hip-width on the floor to create a broader base of support. You can also reduce the height of your lift, keeping the range of motion small and manageable.
Common Form Mistakes and Safety Boundaries
When learning to use a spine corrector, maintaining proper form is far more important than achieving a deep stretch. Avoiding common pitfalls ensures your practice remains safe and effective.
- Mistake 1: Forcing the stretch or moving too fast. Many beginners try to force their backs to match the exact curve of the barrel immediately, or they use momentum to swing back and forth. This bypasses muscle engagement and places dangerous strain on the spinal ligaments. Always prioritize slow, vertebra-by-vertebra control. The barrel is there to support you; allow your body to open up gradually over time.
- Mistake 2: Holding the breath. Under the physical challenge of core engagement or back extension, beginners often hold their breath. This creates unnecessary tension in the neck and shoulders and prevents the deep abdominal muscles from contracting correctly. Focus on maintaining a continuous, rhythmic breathing pattern, matching your breath to the phases of each movement.
- Mistake 3: Unsupported neck positions. Letting the head drop backward heavily during back extensions or chin-tucking too aggressively during flexion can strain the delicate cervical spine. Your head and neck should always follow the natural line of the rest of your spine.
Clear Stop Conditions: While mild muscular fatigue or a gentle stretch is normal, certain sensations indicate that you must stop immediately. If you experience sharp joint pain, numbness, tingling in your limbs, or sudden dizziness, safely exit the position. Do not attempt to push through these symptoms. Reassess your alignment, ensure you are using the equipment correctly, and seek professional guidance from a certified Pilates instructor or physiotherapist if the discomfort persists.
Verifying Your Form and Progressing Safely
Because you cannot always see your own back while performing Pilates exercises, developing methods for self-verification is key to ensuring proper technique. Setting up a large mirror to your side or using your phone to record a short video of your practice can provide invaluable visual feedback. When reviewing your form, check that your hips are not shifting or tilting side-to-side during movements, and verify that your shoulders remain relaxed and drawn down away from your ears.
Pay close attention to your internal physical cues. During flexion and extension, you should feel a manageable, comfortable stretch along the muscles of your back, accompanied by active, deep engagement in your core, glutes, and hamstrings. You should never feel sharp, localized pressure in any single joint.
Once you can perform the three foundational exercises with complete control, stability, and ease, you can begin to progress your practice safely. Start by introducing simple arm movements, such as reaching your arms overhead during the Swan to increase the lever length, or incorporating light resistance bands to gently challenge your core stability. Always master the basic alignment and movement mechanics before adding any complexity or external resistance to your routine.
Frequently Asked Questions (FAQ)
Can I use a spine corrector if I have lower back pain?
It depends entirely on the nature of your discomfort. If you are experiencing general muscular stiffness from sitting, gentle and supported mobilization on the spine corrector can often help relieve tension. However, if you have acute, sharp, or radiating pain, you must strictly avoid using the equipment. The spine corrector should never cause or aggravate pain. Always consult a physiotherapist or doctor to get personalized clearance before starting any new routine if you have a history of chronic or acute back issues.
How often should a beginner use the spine corrector?
As a beginner, it is best to start with one to two short sessions of 10 to 15 minutes per week. This conservative frequency allows your body’s connective tissues, joints, and deep stabilizing muscles to adapt gradually to the new ranges of motion and support. Always listen to your body; if your back muscles feel overly fatigued, sensitive, or sore the following day, allow yourself ample time to rest and recover before your next session.
Community discussion
Share your experience or ask a question. Comments are reviewed before publication.