
Using a sabiki rig effectively requires a blend of delicate tackle management, precise depth control, and gentle rod movements. This multi-hook setup mimics a small school of zooplankton or tiny shrimp, making it highly attractive to baitfish like herring, scad, and sardine. To get the most out of your fishing session, you must select the correct hook size for your target species, keep your line vertical to prevent tangles, and learn to read the subtle vibrations of a hooked fish. Because these rigs feature multiple sharp, exposed hooks on light line, safety and systematic handling are just as important as your jigging technique.
Gear Setup and Tackle Matching
To fish a sabiki fishing hook rig successfully, your rod, reel, and line must support the delicate dropper loops without snapping them. A light to medium-light action spinning rod measuring 6 to 8 feet is ideal. The rod should have a highly sensitive tip section to detect the faint, rapid taps of small baitfish while providing enough flex to absorb the shock of multiple fish pulling in different directions. Pair this rod with a 1000 to 2500 size spinning reel, which offers a smooth drag and quick line recovery.
Your mainline choice plays a significant role in how the rig behaves. A monofilament mainline rated between 6lb and 12lb test is highly recommended for beginners. Monofilament possesses natural elasticity, which acts as a shock absorber when soft-mouthed baitfish thrash on the hooks. If you prefer using braided line for its superior sensitivity, always tie a leader of fluorocarbon or monofilament between the braid and the rig. Fluorocarbon is virtually invisible underwater, making it an excellent choice for the leader material, especially in clear water where baitfish can easily spot highly visible lines.
Products mentioned in this guide
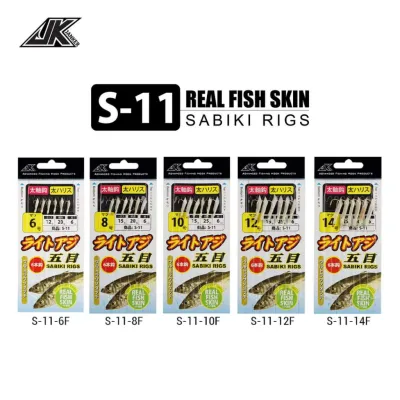
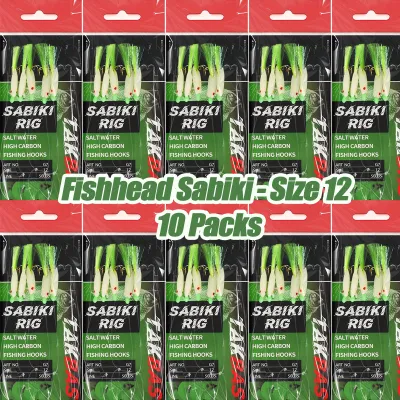
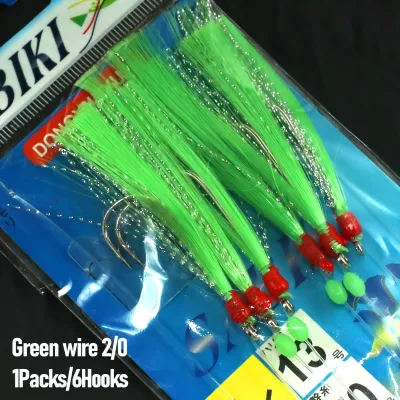
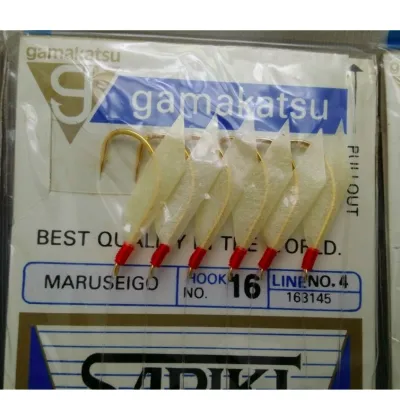
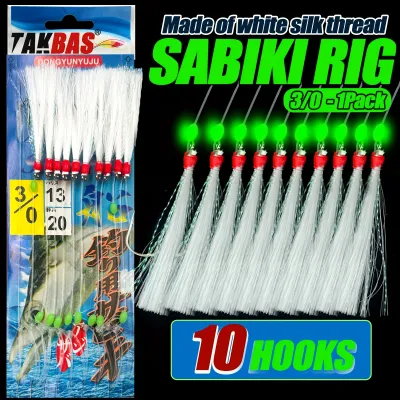
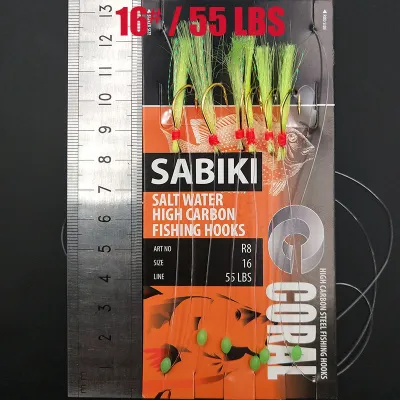
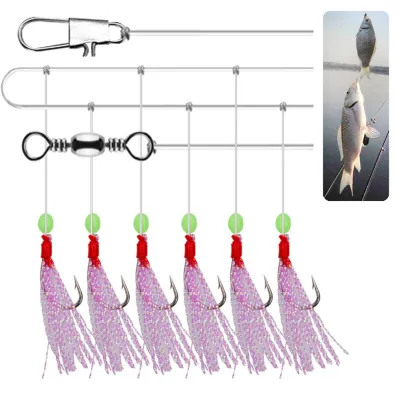
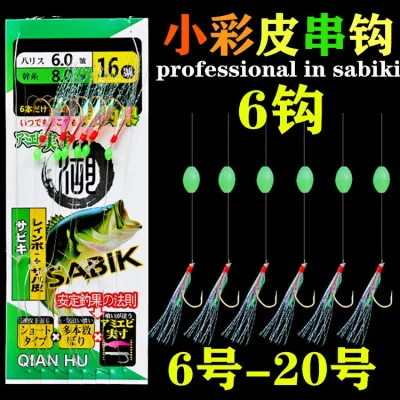
Prices are valid at publication and may change. Please refer to the product page for the latest price.
Sinker weight selection is a critical variable that directly affects your presentation. The primary goal of the sinker is to keep the entire multi-hook rig perfectly vertical in the water column. If the sinker is too light, the current will push the rig horizontally, causing the dropper loops to wrap around the main leader and create a tangled mess. In calm, shallow waters, a teardrop or bell sinker weighing 1/2 ounce to 1 ounce is usually sufficient. In deeper waters or areas with stronger tidal currents, you may need to increase the weight to 2 ounces or more to maintain a straight line. Always check your rod’s recommended casting weight to ensure you do not overload the blank.
Before heading out, verify that your rig’s hook size and flasher materials match the specific baitfish present in your local waters. Sabiki rigs are categorized by hook sizes, typically ranging from size 4 (larger) to size 14 (smaller) under standard Japanese sizing systems. For smaller baitfish like tamban or small herring, a size 4 to 8 hook is generally suitable, whereas larger scad or mackerel may require a size 10 or 12 hook. The flashers—which can be made of real fish skin, iridescent mylar, or colored feathers—should mimic the local forage. Translucent fish skin works exceptionally well in bright, clear conditions, while highly reflective mylar or bright pink feathers are more effective in overcast weather or turbid water.
Casting and Dropping Techniques
Deploying a multi-hook rig requires a different approach than casting a single lure. Because a sabiki fishing hook rig consists of five to eight sharp hooks dangling along a long leader, a standard overhead cast is highly dangerous. The hooks can easily catch on your clothing, snag nearby gear, or cause severe injury to yourself or others on a crowded pier or boat deck. The safest and most effective way to deploy the rig is to drop it vertically straight down along the side of the boat, pier, or jetty. If you must cast from the shore, use a gentle underhand lob rather than a forceful whip, keeping the rig well away from your body throughout the motion.

For setups that incorporate a chumming element, attaching a sabiki cage or bait dispenser can significantly increase your catch rate. These small plastic or wire cages are typically attached to the bottom of the rig in place of a standard sinker, or positioned just above the top hook. Fill the cage with a mixture of minced fish, shrimp paste, or commercial chum. As the rig descends, the water washes through the cage, releasing a continuous scent trail that draws schools of baitfish directly toward your artificial flashers. Ensure the cage is securely closed before dropping to prevent the bait from washing out too quickly.
When lowering the rig into the water, do not let the reel spool spin completely unchecked. Allowing the sinker to plummet at maximum speed often causes the rig to tumble, leading to severe tangles before it even reaches the fish. Instead, practice feathering the spool. Lightly press your index finger against the edge of the spinning reel spool (or your thumb against the spool of a baitcasting reel) to control the descent speed. This slight, consistent tension keeps the main line taut, ensuring the dropper loops remain extended outward and away from the main leader.
Identifying the correct target depth is the final step in a successful deployment. Baitfish rarely sit directly on the seabed; they typically school at specific depths in the mid-water column. If you are fishing from a boat equipped with sonar, monitor the screen to locate the exact depth of the bait schools. On a pier or jetty, look for visual cues such as dimples on the water surface, diving seabirds, or other anglers catching fish. If no indicators are present, drop your rig to the bottom, engage the reel, and retrieve it slowly in five-foot increments, pausing at each depth to locate the active feeding zone.
Jigging and Retrieval for Maximum Catches
Once your rig is positioned at the correct depth, you must animate the artificial flashers to trigger strikes. The key to effective jigging is subtlety. Avoid aggressive, sweeping rod jerks, which can tear the hooks out of delicate mouths or cause the rig to spin and tangle. Instead, use short, rhythmic lifts of the rod tip—about 10 to 30 centimeters—followed by a controlled, slow drop. This motion mimics the natural upward darting and downward drifting of small marine organisms. The pause at the end of the downward drop is highly critical, as baitfish almost always strike when the flashers are fluttering stationary or slowly sinking.
You should adjust your retrieval and jigging speed based on the environmental conditions you observe. In highly turbid or murky water, baitfish rely heavily on lateral line vibration and close-range visibility to find food. Slow down your jigging cadence and prolong the pauses to give the fish ample time to locate the hooks. Conversely, in crystal-clear water, baitfish can inspect the rig closely. A slightly faster, more erratic jigging motion can prevent them from realizing the flashers are artificial, triggering instinctive reaction strikes before they swim away.
Recognizing a bite on a multi-hook rig requires a sensitive touch. Unlike predatory fish that strike with a heavy, sudden thud, baitfish produce a series of rapid, light vibrations or a distinct “tick” on the rod tip. When you feel this initial contact, resist the urge to set the hook with a hard upward swing. Doing so will likely tear the hook from the fish’s mouth. Instead, keep the rod steady and maintain light tension. The frantic movements of the first hooked fish will naturally shake the remaining flashers, simulating a feeding frenzy that quickly attracts other nearby baitfish to the empty hooks.
When you decide to retrieve the rig, maintain a steady, continuous winding motion. Do not pump the rod up and down during the retrieve, as this introduces slack line. Because baitfish have thin, fragile mouth membranes, any slack in the line allows the barbless or small barbed hooks to slip out easily. Keep your reel handle turning at a moderate, uniform speed until the rig reaches the surface. This consistent pressure keeps the hooks firmly seated and ensures you bring your entire catch safely out of the water.
Preventing Tangles and Safe Unhooking
Managing a loaded sabiki rig once it clears the water is one of the most challenging aspects of this fishing style. The moment the rig surfaces, the combination of thrashing fish and multiple free hooks creates a high risk of severe tangles. To prevent this, lift the rig vertically out of the water, keeping your rod tip high. Never let the sinker or the bottom of the rig touch the deck or ground, as this immediately slackens the line and allows the hooks to twist around each other. Hold the rod steady with one hand and use your other hand to grasp the sinker or the bottom swivel, keeping the entire rig under light tension.
For your personal safety and the well-being of the fish, always use a dedicated dehooking tool or a pair of long-nose pliers to remove the catch. Never attempt to grab a thrashing baitfish with your bare hands while multiple sharp hooks are dangling nearby; a sudden jerk can easily drive a hook deep into your finger. Hold the leader gently above the hooked fish, place the curve of the dehooker into the bend of the hook, and lift upward while gently shaking. The fish will slide off the hook easily and fall directly into your bait bucket or livewell without you ever having to touch the hook or the fish’s delicate skin.
Proper storage is essential if you plan to reuse your sabiki fishing hook rig. Because these rigs are made of thin, memory-prone line, storing them carelessly will result in an unusable knot of plastic and steel. After your fishing session, rinse the rig thoroughly with fresh water and allow it to dry completely. Once dry, wrap the rig around a dedicated foam rig winder, a piece of cardboard, or a section of a foam pool noodle. Secure the top swivel first, then wind the line tightly, embedding each hook into the foam in sequence as you go. This keeps the dropper loops straight and ready for your next trip.
Despite your best efforts, there will be times when a dropper loop becomes severely kinked, knotted, or frayed. This often happens when a larger predatory fish strikes the rig or when multiple baitfish twist the line during a chaotic retrieve. Inspect your rig regularly between drops. If you notice any structural damage, do not risk fishing with it. A weakened line can easily snap, costing you both your sinker and your catch. Use line clippers to cut off the damaged hook section entirely, or discard the rig and tie on a fresh one to maintain safety and efficiency on the water.
Common Beginner Mistakes to Avoid
One of the most common errors beginners make is over-jigging the rig. Moving the rod with excessive force or retrieving the line too quickly causes the delicate flashers to spin violently in the water. This unnatural movement looks highly suspicious to baitfish and often scares them away. It also increases the likelihood of the dropper loops wrapping tightly around the main leader, rendering the rig completely ineffective. Keep your movements controlled, smooth, and deliberate.
Another frequent mistake is using an inappropriately heavy sinker. While it is important to keep the rig vertical, using a weight that exceeds the rod’s rating or the rig’s line strength can cause the line to snap during deployment. A heavy sinker also dampens the sensitivity of your setup, making it nearly impossible to feel the delicate taps of smaller baitfish. Conversely, using a sinker that is too light allows the current to sweep the rig horizontally, leading to immediate tangles with underwater obstructions or other anglers’ lines.
Ignoring line twist management is another pitfall that quickly ruins a fishing session. The constant dropping, jigging, and retrieving of a multi-hook rig naturally introduces a massive amount of twist to your fishing line. If this twist is not managed, the rig will quickly wrap around itself. Always ensure you tie a high-quality barrel swivel or crane swivel between your mainline and the top of the sabiki rig. This allows the rig to spin freely in the water without transferring the twist up into your main fishing line.
Finally, many beginners make the mistake of pulling their sabiki rigs through heavy underwater structure. Because these rigs feature multiple exposed hooks, they are highly prone to snagging on rocks, coral reefs, sunken timber, or thick seaweed. A single snag can easily result in the loss of the entire rig, sinker, and any fish currently hooked. Always fish your sabiki rig in the open water column, or keep it suspended well above any known bottom structure to avoid costly and frustrating snags.
Frequently Asked Questions (FAQ)
Can I use a sabiki rig from the shore or is it only for boat fishing?
Yes, you can use a sabiki rig from the shore, but it requires specific adjustments to prevent tangles and snags. When fishing from piers, jetties, or steep shorelines, you can drop the rig vertically just like you would from a boat. However, if you are casting from a beach or shallow shoreline, casting a long, multi-hook rig is highly challenging and prone to snagging on the bottom. To adapt, consider cutting the rig in half to use only two or three hooks, which makes casting much safer and easier to manage. Always check local fishing regulations, as some areas restrict the maximum number of hooks allowed on a single line, especially when fishing from public shorelines.
How do I clean and maintain the artificial flashers after saltwater use?
To extend the lifespan of your sabiki fishing hook rig, thorough maintenance after saltwater exposure is essential. Saltwater quickly corrodes the small, delicate hooks and degrades the synthetic flasher materials. As soon as you return home, rinse the entire rig under a gentle stream of cool, fresh water to wash away salt deposits and organic debris. Do not use hot water, as it can warp the plastic flashers or weaken the line knots. Hang the rig in a shaded, well-ventilated area to dry completely before storing it. Inspect the flashers regularly for UV damage, fraying, or rust; if the hooks lose their sharpness or the flashers become dull and stiff, it is time to replace the rig.
What is the best time of day to target baitfish with a sabiki rig?
The most productive times to target baitfish with a sabiki rig are during the low-light hours of dawn and dusk. During these periods, baitfish school tightly and move closer to the surface or near structures like piers and bridge pilings to feed on plankton. The low light also makes the artificial flashers highly effective, as the fish cannot easily distinguish them from real prey. Tidal movements also play a significant role; fishing during a moving tide—either incoming or outgoing—is generally much more productive than during slack water. The current concentrates the baitfish in specific areas, allowing you to present your rig directly in their path. Adjust your sinker weight as the current strength changes to keep your line vertical.
Community discussion
Share your experience or ask a question. Comments are reviewed before publication.