
A sabiki rig is one of the most efficient tools in an angler’s arsenal for catching schooling baitfish and small pelagic species. This multi-hook terminal tackle system is designed to mimic a small school of zooplankton, shrimp, or tiny baitfish, making it irresistible to predatory bait species. To use it successfully, you simply attach a weight to the bottom of the rig, lower or cast it into a school of fish, and work it with a rhythmic vertical jigging motion.
Whether you are gathering fresh live bait for a day of big-game fishing or introducing a beginner to the fast-paced action of coastal angling, mastering this rig is a fundamental skill. By understanding the correct setup, casting motion, and retrieval techniques, you can maximize your catch rate while keeping your gear free of frustrating tangles.
What Is a Sabiki Rig and When to Use It
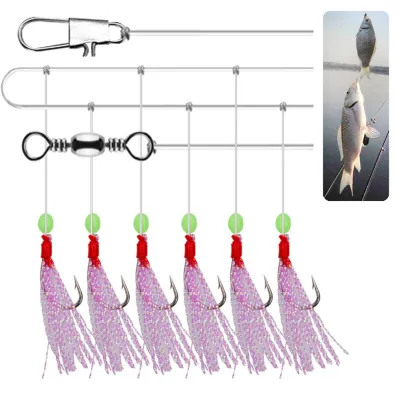
To fish effectively with a sabiki, you must first understand its unique anatomy. A standard rig consists of a single main leader line (the trunk) from which several short branch lines (droppers) extend. Each branch line terminates in a small, highly decorated hook. These hooks are typically dressed with reflective materials such as real fish skin (often referred to as hage skin), synthetic feathers, or iridescent flashabou tinsel. When submerged, these materials shimmer and flutter in the water column, perfectly replicating the movement of tiny marine organisms.
Products mentioned in this guide
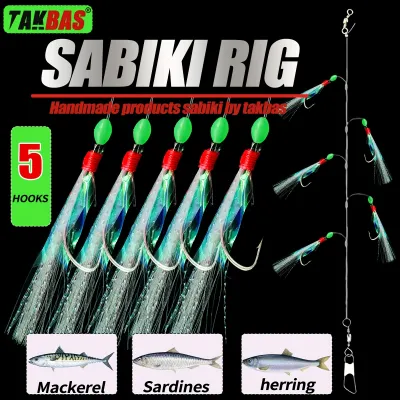
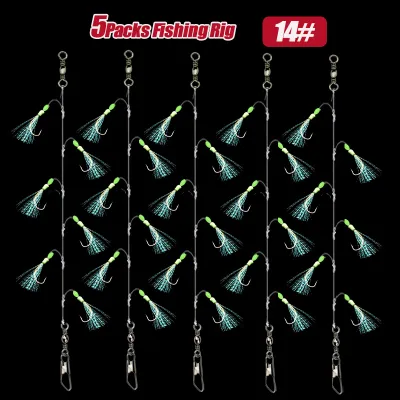
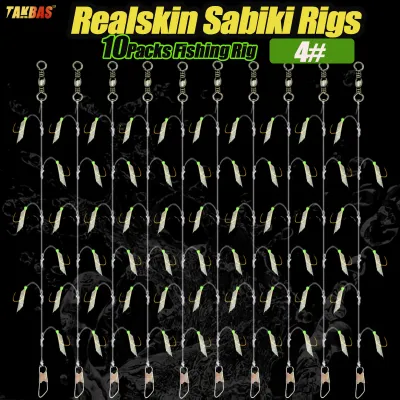
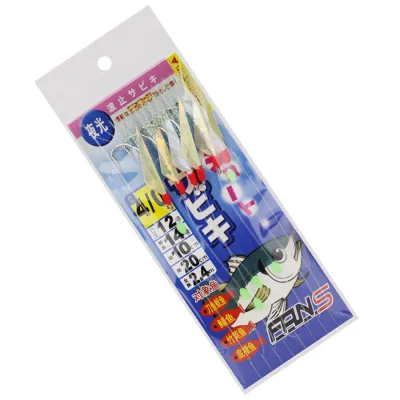
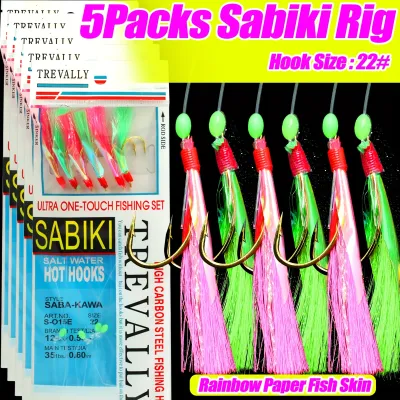
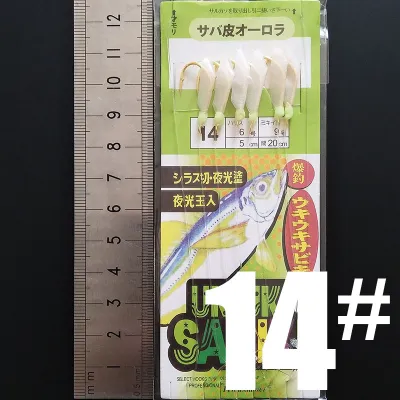
Prices are valid at publication and may change. Please refer to the product page for the latest price.
In coastal waters, particularly around Singapore, the primary targets for this setup are schooling baitfish. These include fringe-scale sardines (locally known as tamban), yellowstripe scad (selar), small mackerels, and various sardine species. Because these fish travel in dense, fast-moving schools, a single drop of a multi-hook rig can easily result in catching multiple fish simultaneously.
The ideal environments for sabiki fishing are areas where baitfish naturally congregate for shelter or feeding. Deep-water structures such as pier pilings, concrete jetties, bridge supports, and steep underwater drop-offs are prime locations. If you are fishing from a stationary or slowly drifting boat, targeting depth transitions or visible surface ripples where baitfish are schooling will yield the best results. Conversely, this rig is highly ineffective in shallow, sandy surf zones, muddy water with zero visibility, or areas heavily choked with seaweed, where the exposed hooks will snag bottom debris almost instantly.
Gear and Tackle Setup for Sabiki Fishing
Setting up your tackle correctly is the most effective way to prevent tangles and ensure your gear can handle the weight of multiple fish pulling in different directions. Because a sabiki rig features five to eight highly exposed hooks, choosing the right rod, reel, and line configuration is essential for maintaining control.

Rod and Reel Selection
A light to medium-light spinning rod measuring between 7 and 8 feet in length is highly recommended. The extra length is crucial because a standard sabiki rig can be quite long; a longer rod allows you to lift the entire rig clear of the water or pier deck without awkward high-sticking. Look for a rod with a sensitive tip to help you feel the delicate taps of small baitfish, paired with a moderate backbone to support the weight of a full load of fish. Pair this rod with a 2000 to 3000 size spinning reel featuring a smooth drag system.
Line and Leader Choice
Your reel should be spooled with either a 10 to 15-pound monofilament mainline or a similar strength braided line. If you choose to use braid, always tie on a 3 to 4-foot leader of 10 to 12-pound fluorocarbon. Fluorocarbon provides excellent abrasion resistance against rough structures like pier pilings and remains virtually invisible to sharp-eyed baitfish. Avoid excessively heavy mainlines, as they restrict the natural fluttering action of the tiny hooks.
Sabiki Rig Selection
When purchasing rigs at your local tackle shop, pay close attention to hook sizes. For typical baitfish like tamban or small scad, Japanese hook sizes ranging from size 4 to size 8 are the most versatile. Larger hooks (sizes 10 to 12) are better suited for larger pelagics like mackerel, while smaller hooks (sizes 1 to 3) are ideal when the baitfish are feeding on micro-plankton. Ensure the branch line test weight matches your target; lighter branch lines (around 4 to 8-pound test) offer more natural movement but are easier to snap.
Terminal Tackle
At the very bottom of the sabiki rig, you will find a snap swivel designed for attaching your weight. A bell sinker or teardrop sinker weighing between 15 and 40 grams (approximately 0.5 to 1.5 ounces) is standard. The exact weight depends on the water depth and the strength of the current; you need enough weight to keep the line vertical but not so much that it dampens the rod’s sensitivity. In some scenarios, you can replace the sinker with a small, hookless metal jig to add extra flash and attract curious predators from deeper water.
Safety and Handling Gear
Before making your first cast, ensure you have essential safety tools within arm’s reach. Always carry a pair of long-nose pliers for quick hook removal, a set of line cutters, and a clean rag or towel to grip slippery fish. Because you are dealing with multiple sharp hooks swinging in close proximity, wearing protective eyewear is highly recommended, especially when fishing on crowded public piers.
Step-by-Step Guide to Casting and Retrieving
Using a multi-hook rig requires a deliberate approach to avoid tangling the line around your rod tip or, worse, snagging your clothing or nearby anglers. Follow these structured steps to deploy and work your rig safely.
Casting and Dropping the Rig
Before you attempt to cast, perform a quick pre-cast inspection. Hold your rod vertically and ensure the main trunk line is completely straight. Check that none of the small branch hooks have looped around the rod guides, caught on the reel handle, or snagged onto each other.
If you are fishing from a high pier or a boat, casting is often unnecessary. Simply open the bail arm of your spinning reel and let the sinker pull the rig straight down alongside the structure. Keep your thumb or index finger lightly feathered against the spool to control the descent speed and prevent professional-grade line overruns.
If you do need to cast to reach a distant school, use a smooth, sweeping underhand lob rather than a sharp, snapping overhead cast. A violent overhead cast causes the heavy sinker to fly forward while the light branch lines lag behind, almost always resulting in a massive mid-air tangle. Once the rig hits the water, let it sink to the desired depth. You can count the seconds as it falls to estimate its position in the water column, stopping when you reach the depth where you observe fish activity.
Jigging and Retrieving Techniques
Once your rig reaches the target depth, close the bail arm and wind up any excess slack line. To trigger strikes, employ a gentle, rhythmic vertical jigging motion.
- The Lift: Smoothly raise your rod tip upward by about 30 to 50 centimeters. This motion pulls the decorated hooks upward, mimicking escaping prey.
- The Pause: Slowly lower the rod tip back down to its starting position, keeping just enough tension on the line to feel a bite. Let the hooks flutter downward naturally on a semi-slack line, as most strikes occur during this falling phase.
- The Rhythm: Repeat this lifting and pausing sequence every few seconds. Avoid aggressive, violent jerks, which can tear the fragile mouths of baitfish or scare the school away.
When a fish strikes, you will feel a rapid, distinct vibrating sensation or a series of sharp, quick taps traveling up the rod blank. If the school is dense, resist the urge to reel in immediately after the first strike. Leave the rig in place for an extra five to ten seconds; the frantic movement of the first hooked fish will often excite the surrounding school, triggering a chain reaction that fills the remaining hooks.
When you are ready to retrieve, reel in with a steady, continuous motion. Do not pump the rod up and down as you would when fighting a large game fish. Pumping creates temporary slack in the line, allowing the small, barbless or lightly barbed hooks to slip out of the fish’s mouth.
How to Safely Handle and Unhook Your Catch
Landing a rig loaded with multiple thrashing fish and exposed hooks can quickly turn chaotic. Prioritizing safety and efficiency during this step prevents injury to yourself and minimizes stress on the fish.
As the rig nears the surface, lift your rod smoothly to bring the fish over the railing or deck. Do not let the rig swing wildly in the wind. Grab the top swivel of the rig with one hand to stabilize it, keeping the sinker weighted at the bottom to maintain tension and keep the hooks aligned vertically.
To unhook the fish safely, use your long-nose pliers or a dedicated metal dehooker tool. Hold the fish gently but firmly with a wet rag to protect its delicate slime coat, then use the pliers to grasp the hook shank and twist it free. If you plan to release the baitfish or want to speed up this process significantly, use your pliers to crush the hook barbs flat before you begin fishing. Barbless hooks slip out effortlessly, often allowing you to drop the fish directly into your bucket without even touching them.
If you are keeping the catch for live bait, immediately transfer the fish into a bucket or livewell equipped with a battery-powered aerator. Keep the water cool and change it frequently to maintain high oxygen levels.
Always be prepared for unexpected stopping conditions. If a hook is swallowed deeply and cannot be removed easily, cut the short branch line immediately rather than ripping the hook out, which will kill the fish. Furthermore, if a large, non-target predator like a queenfish or barracuda strikes your sabiki rig, do not attempt to horse it in. Immediately loosen your reel’s drag system to let the fish run, or cut the line if you feel your safety or gear is compromised by the unexpected struggle.
Common Sabiki Fishing Mistakes to Avoid
Even experienced anglers can run into trouble with sabiki rigs if they overlook basic handling rules. Avoiding these common pitfalls will save you time, money, and frustration on the water.
- Allowing Excess Slack Line: The single most common cause of tangles is letting the line go completely slack. Whether dropping, jigging, or landing fish, always maintain slight tension. Slack line allows the highly flexible branch droppers to wrap around the main trunk, creating tight knots that are nearly impossible to untangle.
- Using an Incorrect Sinker Weight: If your sinker is too light, the underwater current will sweep your rig horizontally, causing it to tangle with other anglers' lines or snag on nearby structure. If it is too heavy, you will lose all sensitivity in your rod tip and ruin the delicate, natural fluttering action of the hooks.
- Over-Jigging the Rig: Many beginners sweep their rods violently up and down. This aggressive motion looks unnatural and generally scares away schooling baitfish. Keep your movements subtle, smooth, and rhythmic.
- Ignoring Structure and Surface Activity: Do not simply cast into empty, open water. Take the time to observe your surroundings. Look for physical structures like pier legs, shadow lines cast by bridges, or visible surface ripples and diving birds that indicate active baitfish schools.
Frequently Asked Questions (FAQ)
Can I use a sabiki rig from the shore?
Yes, you can use a sabiki rig from the shore, but you must target areas with immediate depth, such as concrete jetties, rock walls, or deep-water public piers. Avoid shallow, sandy beaches, as the multiple low-hanging hooks will drag along the bottom, collecting debris or snagging rocks and ruining your rig.
Do I need to add bait to a sabiki rig?
Generally, no. The synthetic feathers, fish skin, and reflective tinsel dressed on the hooks are highly effective on their own when jigged correctly. However, on slow days when the fish are hesitant, adding a tiny sliver of market prawn, squid, or fish paste to the tip of each hook can dramatically increase your bite rate.
How do I store a sabiki rig to prevent tangles?
Because of their multi-hook design, storing a used sabiki rig can be challenging. To reuse a rig, carefully wrap the main trunk around a circular foam pool noodle or a dedicated plastic rig winder, securing each hook firmly into the foam as you go. Alternatively, you can pull the entire rig inside a hollow, specialized sabiki rod designed specifically to shield the hooks during transport.
Community discussion
Share your experience or ask a question. Comments are reviewed before publication.