
Using a vibrating massage ball for post-workout muscle recovery is an effective way to target localized tension, improve tissue mobility, and ease the physical strain of intense training. By combining localized pressure with rapid mechanical oscillations, this tool helps desensitize overactive muscle fibers and promote relaxation in tight areas. Unlike standard foam rollers, the compact, spherical shape allows you to pinpoint specific trigger points, while the vibration element helps mask the discomfort of deep tissue compression.
To get the most out of this recovery tool, you must understand how to control the pressure, select the appropriate vibration frequency, and position your body correctly. Using the device improperly can lead to bruising, nerve irritation, or worsened muscle soreness. By adopting a systematic approach to your recovery sessions, you can safely integrate this technology into your fitness routine to support your long-term physical performance.
Preparing for Your Vibrating Massage Session
Before you begin your recovery session, take a moment to assess your physical state and inspect your equipment. Check that your vibrating massage ball is fully charged, as low battery levels can cause inconsistent vibration speeds or sudden shut-offs during use. Inspect the outer surface of the ball for any dirt, sweat residue, or damage to the textured casing, ensuring a clean and hygienic contact surface with your skin or clothing.
Products mentioned in this guide
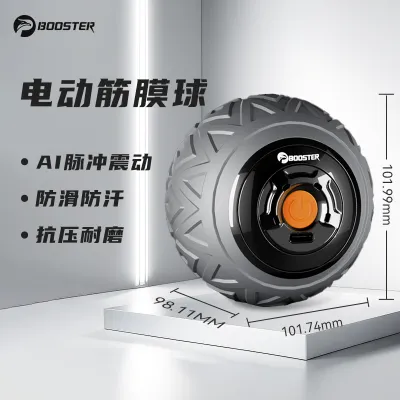
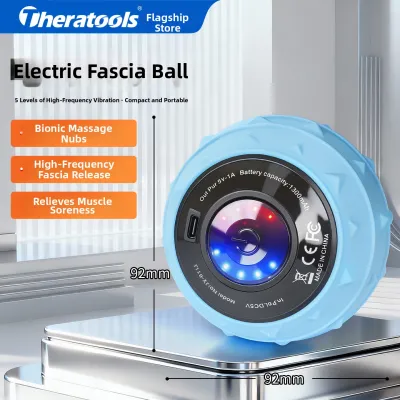
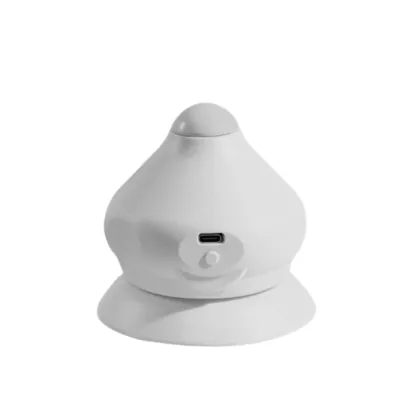
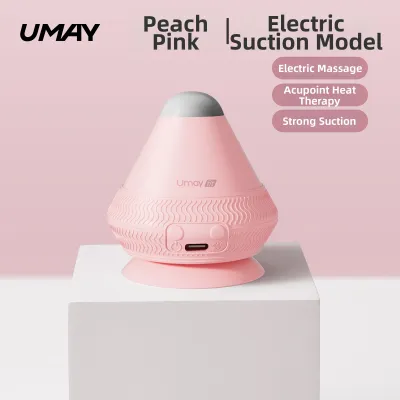
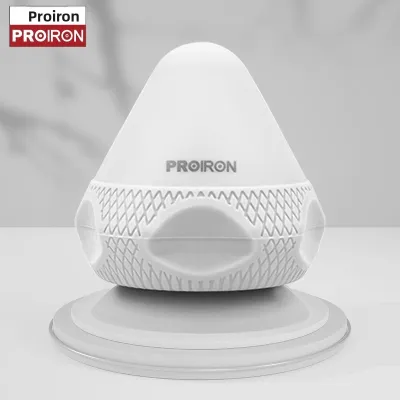
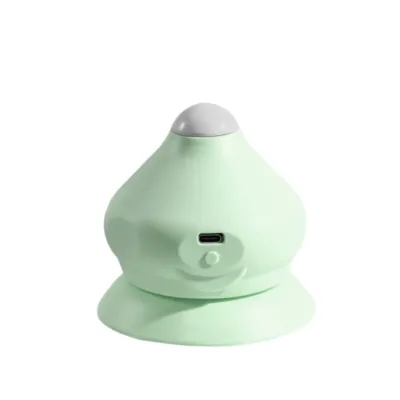
Prices are valid at publication and may change. Please refer to the product page for the latest price.
It is crucial to distinguish between normal delayed onset muscle soreness (DOMS) and acute, sharp pain before applying any pressure. DOMS typically presents as a dull, aching tightness that peaks 24 to 72 hours after an intense workout, which responds well to gentle vibration and pressure. If you experience sharp, stabbing pain, localized swelling, or joint instability, stop immediately and consult a healthcare professional, as applying vibration to an acute muscle tear or joint sprain can worsen the injury.
Setting up your environment properly is also essential for a safe and effective session. Always perform your massage on a comfortable, non-slip surface such as a high-grip yoga mat, a firm carpet, or an exercise rug. Hardwood or tiled floors can cause the vibrating ball to bounce, slip, or roll away unexpectedly, which disrupts your focus and can lead to sudden, awkward body movements that strain your muscles.
Step-by-Step Techniques for Targeting Major Muscle Groups
The core principle of using a vibrating massage ball is to let your body weight apply the pressure while you move slowly and deliberately over the target area. Avoid tensing your muscles to resist the pressure; instead, focus on deep, controlled breathing to help your nervous system relax into the sensation. When you locate a particularly tender spot or trigger point, pause and hold the position, allowing the vibration to work on the tissue rather than rolling back and forth rapidly.

For lower body recovery, focusing on the calves, quadriceps, and glutes requires careful positioning to manage your weight distribution. To target the glutes, sit on a non-slip mat, place the ball under one hip, and cross the ankle of that leg over the opposite knee to open up the deep hip rotators. Slowly shift your weight until you find a tight spot, then let the vibration penetrate the tissue for several seconds. For the calves, sit with your legs extended, place the ball under the thickest part of your calf muscle, and use your hands behind you to lift your hips slightly, adjusting the downward pressure based on your comfort level. To target the quadriceps, lie face down on the mat, place the ball under the front of your thigh, and support your upper body on your forearms, slowly sliding forward and backward to locate areas of tension.
When addressing upper body and back recovery, such as the pectorals, latissimus dorsi, and the scapular region, using a wall is often much safer and easier to control than lying on the floor. To target the muscles around the shoulder blades, stand with your back to a wall, place the ball between your upper back and the wall, and gently bend your knees to roll the ball up and down. Be extremely careful to keep the ball positioned on the muscular tissue between your spine and shoulder blade, strictly avoiding direct pressure on the spinal column or the bony edges of the scapula. For the pectorals, stand facing the wall, place the ball just below your collarbone on the chest muscle, and lean your body weight forward to apply targeted pressure.
Managing the vibration settings is key to a comfortable and productive session. Always start on the lowest vibration setting to allow your nervous system to adapt to the sensation and to assess your initial pain tolerance. If the low setting feels comfortable and you require a deeper release, you can gradually increase the vibration frequency according to the manufacturer’s instructions. Avoid jumping straight to the highest setting, as excessive vibration on cold or highly sensitive tissues can cause defensive muscle guarding, where the muscle tenses up to protect itself, defeating the purpose of the recovery session.
Managing Pressure, Duration, and Frequency
Controlling the duration of your massage session is vital to prevent tissue irritation, bruising, or temporary nerve numbness. Limit your time on any single trigger point to no more than 30 to 60 seconds before moving the ball to an adjacent area. Spending too much time compressing a single spot can restrict local blood flow for too long or irritate the underlying nerves, leading to a lingering tingling sensation or localized soreness the following day. Keep the total recovery session for your entire body under 15 to 20 minutes to avoid overstimulating your nervous system.
Learning to distinguish between “good pain” and “bad pain” is a fundamental skill for safe self-myofascial release. “Good pain” is often described as a deep, satisfying pressure or a dull ache that gradually dissipates as the muscle relaxes under the vibration. In contrast, “bad pain” is characterized by sharp, shooting sensations, electric-like tingling, or pain that radiates down your limbs or directly into a joint. If you experience any of these warning signs, immediately reduce the pressure, turn off the vibration, or stop the session entirely to protect your nerves and connective tissues.
Your recovery frequency should align with your training volume, fitness level, and overall recovery cycle. For immediate post-workout recovery, a brief, low-intensity session can help calm down overactive muscles and kickstart the relaxation process. On dedicated rest days, you can perform a slightly longer, more thorough session to address persistent tightness and maintain tissue mobility. However, avoid using the vibrating massage ball on the same muscle group multiple times a day; your tissues need adequate time to rest, adapt, and rebuild between sessions.
Common Mistakes and Safety Boundaries
One of the most common mistakes when using a vibrating massage ball is applying pressure to anatomical danger zones. Never place the vibrating ball directly on the front or sides of your neck, as this area contains major blood vessels and sensitive nerve pathways that can be compressed or irritated. Additionally, avoid placing the ball directly over bony prominences like the kneecaps, elbows, hip bones, or the spine, as the hard surface offers no cushioning and the vibration can cause painful bone bruising. Do not use the device over varicose veins, open wounds, skin rashes, or areas with acute inflammation.
It is also important to recognize that while a vibrating massage ball is an excellent recovery aid, it cannot replace the foundational pillars of athletic recovery. Over-relying on massage tools to fix chronic tightness without addressing your sleep quality, hydration, daily nutrition, and active mobility work will limit your long-term progress. Use the massage ball as a complementary tool within a holistic recovery strategy rather than a standalone solution for poor training habits or chronic overuse.
Proper device care is essential to maintain the hygiene and longevity of your vibrating massage ball. After a sweaty workout, always turn off the device and wipe down the exterior casing with a clean, slightly damp cloth to remove sweat, oils, and dirt. Never submerge the ball in water or spray cleaning liquids directly onto it, as moisture can seep into the charging port or internal motor housing, causing permanent electrical damage. Store the device in a cool, dry place away from direct sunlight, and follow the manufacturer’s guidelines for battery charging to preserve the lifespan of the internal lithium-ion battery.
Frequently Asked Questions (FAQ)
Can I use a vibrating massage ball on bare skin?
Using a vibrating massage ball on bare skin is acceptable if the device has a smooth, medical-grade silicone or hypoallergenic plastic casing, but it may not be comfortable for everyone. Direct skin contact increases friction, which can cause skin irritation, chafing, or pinching, especially when the ball is vibrating at high speeds. If you have sensitive skin, body hair, or are prone to bruising, it is highly recommended to wear thin, breathable athletic clothing during your session. This layer of fabric acts as a protective barrier, reducing surface friction while still allowing the mechanical vibrations and pressure to penetrate deep into the muscle tissue.
How do I clean the massage ball after a sweaty workout?
To clean your vibrating massage ball safely, always ensure the device is powered off and unplugged from any charging cables before you begin. Wipe the surface thoroughly using a soft microfiber cloth that has been slightly dampened with water and a tiny drop of mild, non-abrasive soap. Avoid using harsh chemical solvents, alcohol-based wipes, or bleach, as these substances can degrade the rubberized or silicone grip coating over time. Pay extra attention to the areas around the power button and charging port, ensuring no moisture or liquid droplets enter these openings, and allow the ball to air dry completely before turning it back on or plugging it in to charge.
Community discussion
Share your experience or ask a question. Comments are reviewed before publication.