
Using a yoga ball for core exercises is an exceptionally effective way for beginners to build functional strength, improve balance, and support overall spinal health. Unlike flat-ground exercises that offer a stable, predictable surface, a yoga ball introduces continuous, low-grade instability. This instability forces the deep stabilizing muscles of your midsection—including the transverse abdominis, obliques, and multifidus—to work in unison to keep you balanced. By learning how to control this unstable environment, you can transform basic movements into highly efficient core-strengthening exercises.
To get the most out of your training, you must approach the yoga ball with a clear understanding of proper form, safety protocols, and progressive movement patterns. For beginners, the goal is not to perform complex acrobatics, but rather to master foundational control. This guide will walk you through selecting the correct ball size, setting up a safe workout space, executing three essential beginner exercises with perfect technique, and tracking your progress over time.
Choosing the Right Yoga Ball Size and Setup
Selecting the correct yoga ball size is the first and most critical step in ensuring your workouts are both safe and effective. Yoga balls, also known as stability or Swiss balls, are categorized by their diameter, typically ranging from 55 to 75 centimeters. A quality anti-burst yoga ball is a highly accessible investment, usually ranging from S$15 to S$45 at local sporting goods stores or online fitness retailers. To find the right fit, perform a physical sizing check: when you sit upright on the fully inflated ball with your feet flat on the floor, your thighs should rest parallel to the ground, and your knees should bend at a clean 90-degree angle. If your hips sit lower than your knees, the ball is too small; if your feet cannot rest flat, the ball is too large.
Products mentioned in this guide
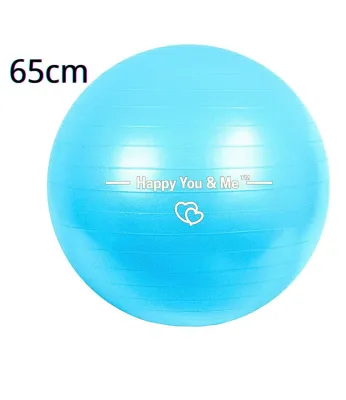
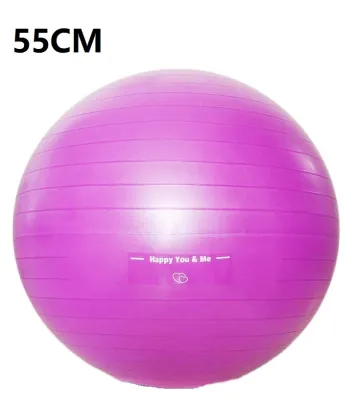

![⭐[Sg Seller] 45cm55CM 65CM 75CM 85CM Burst Resistance Yoga Ball Gym Fitness Iron Shake Weight](https://img.lazcdn.com/g/p/e23e6d3db4b1f7e42ef3d0a86e2e6e3f.jpg_400x400q80.jpg_.webp)

Prices are valid at publication and may change. Please refer to the product page for the latest price.
Proper inflation is equally vital for stability and joint alignment. When inflating your ball, refer to the manufacturer’s specified diameter rather than guessing by feel. A properly inflated ball should have a slight, visible give when you press your hand into it, compressing by about two to five centimeters. If the ball is rock-hard, it will roll unpredictably and make balancing exceptionally difficult for a beginner. Conversely, if the ball is too soft, it will bottom out under your weight, sinking to the floor and stripping away the instability benefits while placing unnecessary strain on your lower back and hips.
Your training environment must also be prepared to prevent slips and falls. Always use the yoga ball on a clean, non-slip surface, such as a high-grip rubber or TPE yoga mat, rather than polished marble, slick tiles, or loose rugs. In typical compact apartment spaces, clear a dedicated workout radius of at least two meters. Ensure this zone is entirely free of sharp furniture corners, coffee tables, sliding door tracks, or children’s toys. This open space guarantees that if you do lose your balance and roll off the ball, you can land safely without colliding with hard objects.
Essential Safety Rules and Warm-Up
Before attempting dynamic movements on an unstable surface, you must establish a strong, safe foundation. The core of all yoga ball exercises is the foundational balancing posture. Sit tall on the center of the ball with your feet hip-width apart. Engage your deep core by gently drawing your belly button toward your spine and activating your pelvic floor, as if trying to stop the flow of urine. To maintain your balance, fix your gaze on a stationary point on the wall directly in front of you. Looking down at your feet or around the room shifts your center of gravity and immediately compromises your stability.

As a beginner, you must remain highly aware of common form errors that can lead to strain. Avoid overextending your neck or tucking your chin aggressively toward your chest; your cervical spine should remain in a neutral line with your upper back. Watch out for rib flaring, which indicates that you have lost core engagement and are arching your lower back. Similarly, do not allow your lower back to sag or collapse into the ball. If you experience any stop conditions—such as sharp joint pain, pinching in the lower back, a sudden loss of controlled breathing, or severe dizziness—halt the exercise immediately and return to a stable floor position.
To prepare your nervous system and muscles for the instability of the ball, always perform a brief pre-activation routine on stable ground. Begin with floor-based pelvic tilts: lie on your back with your knees bent, feet flat, and gently press your lower back flat into the floor by contracting your abdominals, holding for five seconds. Follow this with a wall-supported plank, placing your forearms against a wall and stepping your feet back to practice holding a straight, rigid line from head to heels. These simple movements wake up your deep stabilizers, ensuring they are ready to fire the moment you transition to the yoga ball.
Step-by-Step Beginner Core Exercises
Once you are warmed up and your space is secure, you can begin your core routine. Perform these three beginner-friendly exercises with slow, deliberate control, focusing on the quality of each repetition rather than speed.
Basic Ball Crunches
The basic ball crunch targets the rectus abdominis (the front of your core) while utilizing the curve of the ball to support your spine through a full range of motion. To set up, sit on top of the ball, then slowly walk your feet forward while rolling your torso down until your lower and mid-back are fully supported by the curve of the ball. Your thighs should be parallel to the floor, knees bent at 90 degrees, and feet placed hip-width apart for stability. Place your hands lightly behind your ears or cross them over your chest; never pull on your neck.
To execute the movement, exhale deeply as you contract your abdominal muscles, pulling your ribcage down toward your pelvis. Lift your head, shoulders, and upper back off the ball in a smooth, controlled arc. Focus on lifting your chest toward the ceiling rather than folding your body forward. At the peak of the contraction, hold for one second while squeezing your core. Inhale as you slowly lower your upper body back down over the curve of the ball, feeling a gentle stretch in your abdominals. Perform 2 to 3 sets of 10 to 12 controlled repetitions, maintaining a steady tempo of two seconds up and two seconds down.
Ball-Assisted Plank
The ball-assisted plank is an exceptional isometric exercise that challenges your entire core to maintain stability against gravity. Kneel on the floor behind your yoga ball. Place your forearms on the center of the ball, clasping your hands together to form a stable triangle. Keep your elbows directly under your shoulders. Engage your core, press your forearms firmly into the ball, and slowly step your feet back one at a time until your legs are fully extended and your weight is supported by your forearms and the balls of your feet.
Your body must form a straight, unbroken line from your head to your heels. Keep your neck neutral by looking at the space between your wrists. Focus on maintaining pelvic neutrality; do not allow your hips to sag toward the floor, which strains the lower back, and do not hike your hips up into the air. If you feel unstable, widen your foot stance to create a broader base of support. Hold this position for 15 to 30 seconds while maintaining deep, diaphragmatic breathing. Exhale fully on any moments of increased instability to help re-engage your deep abdominal wall. Perform 3 sets, resting for 45 seconds between each attempt.
Supine Ball Squeezes and Marching
This exercise targets the lower abdominals, deep transverse abdominis, and hip flexors while keeping your spine fully supported by the floor. Lie flat on your back on your yoga mat. Place the yoga ball between your knees or calves, bending your knees to a 90-degree angle so your shins are parallel to the floor. Press your lower back firmly into the mat, eliminating any space between your spine and the floor. Place your arms flat by your sides, palms facing down for support.
Gently squeeze the ball with your legs to activate your inner thighs and lower core. Keeping your knees bent at 90 degrees, slowly lower your right foot toward the floor, tapping your heel lightly on the mat. The movement should occur entirely at the hip joint, while the left leg keeps the ball securely in place. Exhale as you contract your lower abdominals to pull your right leg back up to the starting position. Repeat the movement on the left side. Perform 2 sets of 8 to 10 controlled taps per side, ensuring your lower back remains glued to the floor throughout the entire exercise.
How to Progress and Track Your Improvement
As your core strength and balance improve, the exercises that once felt highly unstable will begin to feel secure. To continue making progress, you must systematically increase the challenge of your routine. One of the simplest variables to adjust is time under tension. Instead of rushing through repetitions, slow down the eccentric (lowering) phase of your movements. For example, during a ball crunch, take four full seconds to lower your torso back down to the starting position. This prolonged resistance forces your muscle fibers to work harder without requiring extra weight.
Another highly effective progression method is reducing your base of support. During a ball-assisted plank, you can transition from a wide foot stance to bringing your feet completely together. As you gain confidence, you can practice lifting one foot slightly off the floor for a few seconds at a time, forcing your core to work dynamically to prevent the ball from rolling sideways. You can also introduce small, controlled movements, such as gently rolling the ball forward and backward an inch during a plank, known as “stirring the pot.”
To track your improvement, perform regular self-assessments. Note how much your body wobbles during transitions, and track how many seconds you can maintain a perfect, neutral-spine plank on the ball. When you can easily complete 3 sets of 30-second planks and 15 slow crunches with minimal wobbling and zero lower back discomfort, you have successfully built a strong foundational core. At this stage, you can confidently transition to advanced equipment, such as incorporating light dumbbells, resistance bands, or moving to single-leg stability ball exercises.
Frequently Asked Questions (FAQ)
Can I use a yoga ball as a desk chair to improve my core? (FAQ)
While sitting on a yoga ball is often promoted as an easy way to engage your core during the workday, it should not replace dedicated core training. Sitting on an unstable surface forces your muscles to make micro-adjustments, but over several hours, your stabilizer muscles will inevitably fatigue. Once these muscles tire, you are highly likely to compensate by slouching, rounding your shoulders, and arching your lower back, which can lead to significant spinal strain and muscle stiffness. If you wish to use a yoga ball at your desk, limit your active sitting time to short intervals of 20 to 30 minutes per day, and prioritize structured, focused core exercises to build lasting strength.
How often should a beginner train core with a yoga ball? (FAQ)
For beginners, consistency and recovery are far more important than daily intensity. Your deep core stabilizers require adequate rest to repair and grow stronger, just like any other muscle group. A highly effective schedule is to integrate yoga ball exercises into your routine two to three times per week, ensuring at least 48 hours of recovery between sessions. You can easily perform these exercises at the end of a cardiovascular workout or alongside your standard strength training routine. Balancing your instability training with floor-based exercises and full-body movements ensures balanced muscular development and prevents overtraining your central nervous system.
Community discussion
Share your experience or ask a question. Comments are reviewed before publication.