
Using an ankle balance board is one of the most effective ways to rebuild joint stability, improve proprioception, and prevent recurrent injuries. Whether you are recovering from a lateral ankle sprain or looking to enhance your athletic balance, these simple wooden or plastic platforms challenge your neuromuscular system by introducing controlled instability. However, using this tool incorrectly can easily lead to acute re-injury or chronic joint strain.
To use an ankle balance board safely, you must establish a secure physical setup, master a supported bilateral stance, and progress systematically to unsupported or single-leg movements. Retraining your ankles is not about testing how long you can wobble violently; it is about teaching your brain and stabilizer muscles to make micro-adjustments on an unstable surface. By following a structured, progressive approach, you can safely restore your joint’s range of motion and functional strength.
Before You Start: Safety Checks and Setup
Before placing a foot on your balance board, you must establish a safe environment and verify that your body and equipment are ready for the physical demands of instability training.
Products mentioned in this guide
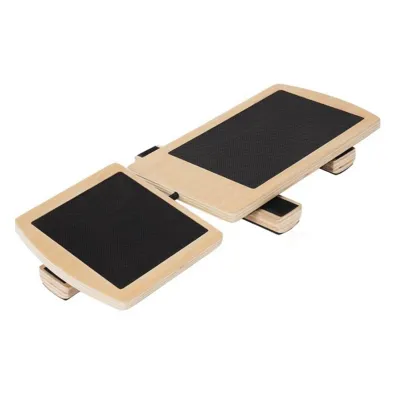
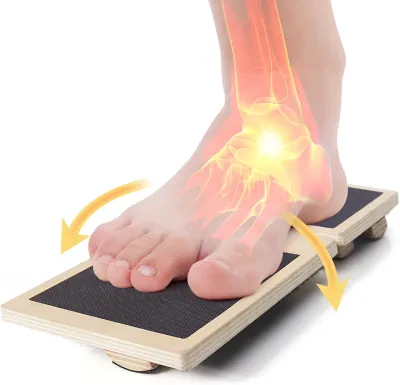
![[ende]Ankle Foot Strengthener Stretcher Wood Wobble Board Single Leg Balance Boards for Physical Therapy Ankle Stability Pad](https://img.lazcdn.com/g/p/e956458e09639ac1995fc8ca76a3f505.jpg_400x400q80.jpg_.webp)
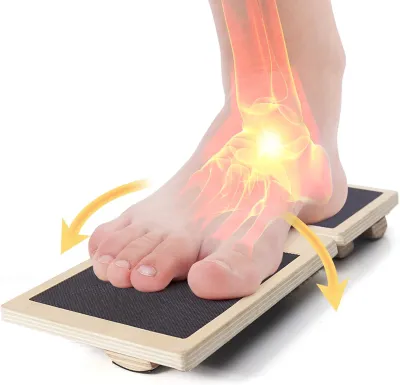
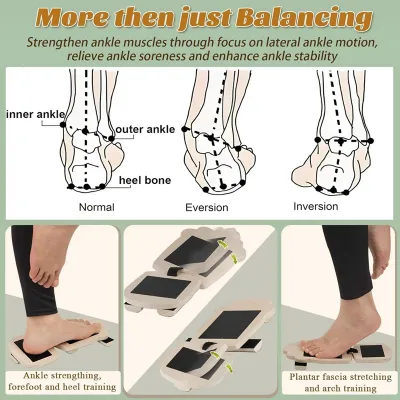
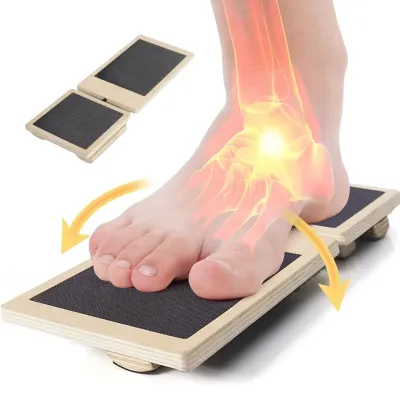
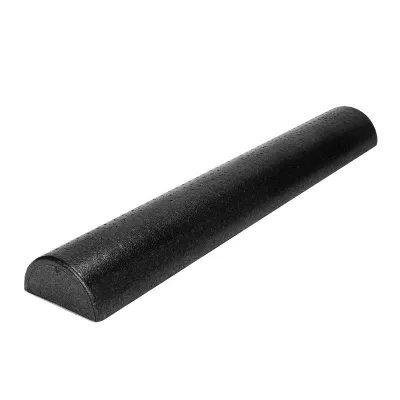
Prices are valid at publication and may change. Please refer to the product page for the latest price.
Medical Clearance and Joint Readiness
If you are using a balance board for rehabilitation after an injury, such as a sprain or surgery, you must obtain explicit clearance from your physiotherapist or orthopedic specialist first. Instability training is designed for the mid-to-late stages of recovery. Stepping onto a wobble board before your ligaments have sufficiently healed or before you can tolerate full, pain-free weight-bearing loads can disrupt the healing process, stretch recovering tissues, and cause a major setback.
Preparing a Safe Training Environment
Set up your balance board on a flat, level, and non-slip floor. In home environments with smooth tiled or polished timber flooring, place a thin, high-grip rubber exercise mat under the board to prevent the base from sliding out from under you during use. Ensure there is a clear safety zone of at least two meters around the board, free of toys, furniture, or sharp corners.
Always position the board within arm’s reach of a highly stable support structure. A sturdy countertop, a heavy dining table, or a solid wall are ideal options. Avoid using lightweight chairs, rolling stools, or unstable objects that could tip over if you suddenly lose your balance and apply your full body weight to them.
Equipment Inspection
Inspect your balance board thoroughly before every session. For wooden boards, check for structural cracks, splinters, or delamination of the wood layers. For plastic models, look closely for stress fractures, particularly around the central dome or fulcrum where pressure is concentrated. Check that the grip tape or textured non-slip surface on top is clean, dry, and firmly adhered to the board. Additionally, verify the manufacturer’s maximum weight capacity to ensure the board can safely support your body weight under dynamic loads.
Footwear Considerations
Deciding whether to train barefoot or in shoes depends on your training goals, but safety must remain the priority:
- Barefoot Training: Exercising barefoot maximizes the sensory feedback from the soles of your feet (proprioception) and actively strengthens the intrinsic muscles of the arch. This is highly beneficial for balance rehabilitation, provided the board's surface is clean and non-abrasive.
- Athletic Shoes: Wearing flat, supportive athletic shoes with a wide toe box and excellent grip provides additional outer foot stability and protects your skin. This is recommended if you have sensitive feet, require orthotic support, or are using a highly textured grip-tape board.
- Socks: Never use a balance board while wearing socks on a smooth board surface. This combination eliminates friction, creating an immediate slip hazard that can lead to falls.
Step-by-Step Guide to Basic Balance Exercises
Once your environment is prepared, you can begin with foundational movements designed to introduce your ankles to controlled instability.

The Supported Stance
To begin, stand directly behind or next to your stable support structure. Place both hands firmly on the support. Step onto the balance board, positioning your feet symmetrically on the outer edges, roughly shoulder-width apart.
Align your posture by keeping your feet parallel and pointing straight forward. Keep a slight, soft bend in your knees; never lock your joints, as locked knees prevent your lower legs from absorbing movement and force your hips to overcompensate. Engage your core muscles to stabilize your pelvis, keep your chest up, and fix your gaze on a stationary point at eye level directly in front of you. Looking down at your feet disrupts your vestibular system and makes maintaining balance significantly harder.
Basic Weight Shifts
With your hands resting securely on your support, practice controlled weight-shifting exercises to explore the board’s range of motion:
- Front-to-Back Tilts (Dorsiflexion and Plantarflexion): Slowly shift your weight forward to tilt the front edge of the board down toward the floor, then slowly shift your weight backward to tilt the rear edge down. Perform these movements smoothly, aiming to prevent the edges of the board from slamming hard against the floor.
- Side-to-Side Tilts (Inversion and Eversion): Gently shift your weight to the left to tilt the left edge down, then slowly transition your weight to the right. Focus on driving this movement entirely from your ankles, keeping your hips as quiet and still as possible.
Finding the Neutral Zone
After mastering controlled tilts, attempt to find the horizontal “neutral zone.” This is the sweet spot where the board is perfectly level and parallel to the floor, with no part of the outer rim touching the ground. Use light hand support to help stabilize yourself, and try to hold this level position for 10 to 15 seconds. This exercise trains the co-contraction of the muscles surrounding your ankle joint.
Identifying Expected Sensations
As you perform these basic exercises, you should expect to feel a mild burning or fatiguing sensation in your calves, shins, and the arches of your feet. This indicates that the small stabilizer muscles are working hard to maintain balance. However, you should never feel sharp, pinching, or stabbing pain inside the ankle joint or along the ligaments. If you experience any sharp pain, stop the exercise immediately.
Progressing to Advanced Training and Rehab Movements
Only progress to more challenging exercises once you can comfortably hold a neutral, level stance on two legs for 60 seconds with minimal hand support.
Removing Hand Support
To safely transition away from your physical support, use a gradual reduction method. Start by reducing your grip from two hands to one hand, then to just a few fingertips resting lightly on the surface. Next, hover your hands a few centimeters above the support, keeping them ready to grasp it instantly if you wobble. Once you can maintain a level board for 30 seconds with hovering hands, progress to placing your hands on your hips or crossing your arms over your chest.
Dynamic Additions
Once you can balance unsupported on two legs, you can introduce dynamic challenges to further stimulate your neuromuscular system:
- Mini-Squats: While maintaining a level board, slowly bend your knees to perform a shallow squat (approximately 30 degrees of flexion), then return to the starting position. Keep your knees aligned over your second toes to avoid inward buckling.
- Head Turns: To challenge your vestibular system, maintain your balance while slowly turning your head from left to right, and then up and down.
- Single-Leg Balance: If cleared by your physical therapist, place one foot directly over the center of the board's fulcrum. Lift your opposite foot slightly off the board, keeping your hands close to your physical support. Focus on keeping the board level using only your standing ankle.
- Cognitive Challenges: Have a partner gently toss a light tennis ball or reaction ball to you while you maintain a level stance, forcing your ankles to make rapid, automatic adjustments.
Adjusting Board Difficulty
If your balance board has an adjustable fulcrum, interchangeable domes, or inflatable bases, always start at the lowest, most stable setting. Only increase the height of the fulcrum or switch to a more challenging base when you can easily perform your current routine without losing your balance. Higher fulcrums increase both the tilt angle and the speed of instability, which significantly raises the demand on your ligaments.
Rehab-Specific Progression Timelines
If you are recovering from a major injury, your progression must strictly follow the structured timeline provided by your healthcare provider. Do not rush into advanced fitness moves or single-leg balances just because your ankles feel stable during basic exercises. Ligament remodeling takes months, and premature exposure to high-velocity rotational forces can cause micro-tears that lead to chronic ankle laxity.
Common Mistakes and When to Stop
Identifying technique errors early and knowing when to halt your training session are critical steps to preventing injury.
Posture and Technique Errors
- Locking the Knees: This stiffens your lower body, preventing the micro-adjustments needed at the ankle joint and transferring the balance workload to your lower back and hips.
- Looking Down at Your Feet: This removes your visual horizon, forcing your brain to rely solely on your damaged proprioceptive system and making balance highly erratic.
- The Hip Strategy: Avoid flailing your hips, bending excessively at the waist, or waving your arms to stay upright. If you cannot maintain balance using subtle ankle movements, the exercise is too difficult and you should return to using hand support.
Rushing Your Progression
Stepping onto a single-leg stance or attempting dynamic squats before you can consistently hold a quiet, level bilateral stance is a recipe for a fall. Your nervous system requires consistent, low-intensity exposure to build the neural pathways necessary for automatic balance corrections.
Clear Stop Conditions
Stop your session immediately if you experience any of the following warning signs:
- Sharp, stabbing, or throbbing pain in the ankle joint or foot.
- Sudden swelling or localized heat around the joint.
- A feeling of the joint "giving way" or severe instability.
- Dizziness, lightheadedness, or a complete loss of physical coordination.
- Extreme muscle fatigue where you can no longer prevent the board from crashing into the floor.
Fatigue vs. Pain
Learn to distinguish between normal muscle fatigue and joint strain. Muscle fatigue presents as a dull, warm, bilateral ache in the muscle bellies of your calves and shins. Joint or ligament strain presents as a sharp, localized, cold, or pinching sensation directly on the ankle bones or deep within the joint space. Never attempt to push through joint or ligament pain.
Tracking Progress and Board Maintenance
To ensure your training remains effective and your equipment remains safe over the long term, implement simple tracking and maintenance habits.
Verification Methods
Track your progress objectively by recording your performance metrics once a week:
- Timed Static Hold: Use a stopwatch to measure how long you can hold a perfectly level, unsupported bilateral stance. Aim to reach a consistent 30-to-60-second hold.
- Controlled Tilt Count: Count how many slow, controlled front-to-back tilts you can perform in 60 seconds without letting the board edges crash violently or losing your balance.
- Single-Leg Duration: If cleared for single-leg training, time your hold on each leg separately to identify and address any strength imbalances between your left and right ankles.
Surface Care and Cleaning
Sweat, dust, and environmental humidity can quickly degrade the grip on your board, making it slippery. After each training session, wipe down the top surface with a slightly damp, lint-free microfiber cloth to remove sweat residue. Avoid using harsh chemical solvents, bleach, or abrasive scrubbers, which can degrade wooden finishes, damage plastic components, or dissolve the adhesives holding the grip tape in place.
Storage and Wear Checks
Store your balance board in a cool, dry indoor environment away from direct sunlight and moisture. High humidity can warp wooden boards, while prolonged UV exposure can make plastic models brittle. Perform a weekly wear check by inspecting the central pivot point, dome, or roller for any signs of flattening, cracking, or loose mounting screws. Replace the board immediately if you detect any structural compromises.
Frequently Asked Questions (FAQ)
Can I use an ankle balance board if I have a fresh sprain?
No, you should not use a balance board during the acute phase of a fresh ankle sprain. An acute sprain involves active inflammation and stretched or torn ligaments that require protection, rest, and swelling management. Introducing instability training during this phase can worsen the tissue tear and lead to chronic joint instability. You should focus on the RICE (Rest, Ice, Compression, Elevation) protocol and obtain professional medical clearance before starting balance board exercises.
How long should I practice on a balance board each day?
Beginners and rehabilitation patients should start with very short sessions of 2 to 5 minutes per day, broken up into 1-minute intervals with plenty of rest in between. This prevents localized muscle fatigue, which degrades joint control and increases your risk of rolling the ankle. As your strength and endurance improve, you can gradually extend your sessions to 10 or 15 minutes daily. For general athletic conditioning, the board can be used as a 5-minute neuromuscular warm-up tool before your main workouts.
Community discussion
Share your experience or ask a question. Comments are reviewed before publication.