
Using elastic rubber bands for strength training is an exceptionally versatile, space-efficient, and highly effective way to build muscle, improve joint stability, and enhance overall functional fitness. Whether you are working out in a compact apartment in Singapore or supplementing your routine at a local gym, these portable tools offer unique resistance profiles that challenge your muscles differently than traditional free weights. To get the most out of your workouts while protecting your joints, you must master proper setup, tension control, and movement mechanics.
Unlike dumbbells or barbells, which rely on gravity to provide a constant downward force, elastic rubber bands provide progressive resistance. This means the tension increases as the band stretches, matching the natural strength curve of many human movements. By understanding how to safely anchor, stretch, and control these bands, you can perform a full-body strength routine almost anywhere.
Preparing Your Equipment and Workspace
Before beginning any exercise session, a thorough inspection of your equipment is essential to prevent sudden snaps or loss of control. Over time, exposure to air, sweat, and stretching can degrade rubber. Hold your band up to a bright light and stretch it gently in sections to check for micro-tears, discoloration, small punctures, or fraying along the edges. If you detect any structural imperfections, discard the band immediately, as even tiny tears can fail under high tension.
Products mentioned in this guide
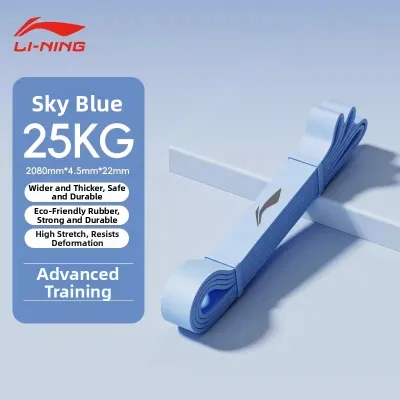

Prices are valid at publication and may change. Please refer to the product page for the latest price.
Your training environment must also be prepared to ensure safety. If you are anchoring your band to a fixed object, verify that the anchor point is completely stable, immobile, and free of sharp edges or abrasive textures that could cut into the rubber. When using a door anchor, always place it on the side of the door that closes away from you. This ensures that the pulling force pulls the door firmly into the frame rather than pulling it open toward you. Keep the floor space clear of any objects that could cause you to trip or lose your footing.
Finally, check the manufacturer labels or color-coding systems to confirm the resistance level matches your current strength baseline for each specific movement. Different exercises require vastly different levels of resistance. For example, a band suitable for a lower-body squat will likely be far too heavy for an upper-body shoulder press. Always start with a lighter band to warm up and verify your range of motion before moving to higher resistance levels.
Core Techniques for Proper Form and Tension Control
To maximize muscle engagement and protect your joints, you must maintain continuous tension throughout the entire range of motion. This means the band should never go slack, even at the very beginning or end of an exercise. During the concentric phase—when you are actively pulling or pushing against the resistance—focus on a smooth, controlled acceleration. During the eccentric phase—when the band pulls back to the starting position—resist the tension slowly rather than letting the band snap your limbs back into place.

Maintaining a braced core and a neutral spine is critical for stability, especially during standing or anchored movements. To brace your core, imagine tightening your midsection as if preparing to absorb a light impact, keeping your pelvis aligned directly under your ribcage. Avoid arching your lower back or leaning excessively forward or backward to cheat the movement. If you find yourself leaning to complete a repetition, the resistance is likely too high.
Managing the stretch limit of the rubber band is another key factor in preventing material failure and joint strain. Most high-quality rubber bands are designed to stretch up to a specific limit, typically two to three times their resting length. Overextending the band beyond this point dramatically increases the risk of snapping. You can easily adjust the starting tension by widening your stance or changing your grip width, allowing you to find a comfortable range of motion that challenges your muscles without overstretching the material.
For enhanced comfort and safety, consider using fitness gloves during your workouts. Gloves improve your grip on the rubber surface, preventing the band from slipping out of sweaty hands. They also distribute pressure more evenly across your palms, preventing the rubber from pinching or digging into your skin during heavy pulling or pushing exercises.
Fundamental Strength Exercises Using Elastic Rubber Bands
A well-rounded strength routine targets all major muscle groups using controlled, functional patterns. Below are foundational exercises designed to build balanced strength using elastic rubber bands.
Lower Body
Banded Squats: Place a looped band just above your knees, or stand on the middle of a long flat band with your feet shoulder-width apart while holding the ends at shoulder height. Lower your hips back and down as if sitting in a chair, keeping your chest upright and your weight distributed evenly across your feet. As you descend, actively push your knees outward against the band to keep them aligned with your toes, preventing them from collapsing inward. Return to the starting position by driving through your heels and squeezing your glutes.
Lateral Band Walks: Place a loop band around your ankles or just above your knees. Step your feet out until you feel moderate tension in the band, and sink into a shallow half-squat position. Take a controlled step to the side with your lead foot, followed slowly by your trailing foot. Keep your feet pointing straight forward and maintain constant tension on the band throughout the movement. Complete a set number of steps in one direction before reversing the movement.
Upper Body Pull
Bent-Over Rows: Stand on the center of the band with your feet hip-width apart. Hinge forward at your hips while keeping your back flat, knees slightly bent, and core engaged. Grasp the ends of the band, ensuring there is tension even at the bottom of the movement. Pull your elbows up and back toward your lower ribs, squeezing your shoulder blades together at the top of the movement. Slowly lower your hands back to the starting position under full control.
Pull-Aparts: Stand tall with your feet shoulder-width apart, holding a flat band horizontally in front of you at shoulder height with your arms straight. Your hands should be spaced so that there is light tension in the band. Keeping your elbows locked or slightly soft, pull your hands out to the sides, stretching the band across your chest. Focus on squeezing your shoulder blades together in the back, then slowly return to the starting position.
Upper Body Push
Banded Chest Presses: Secure the band to a stable anchor point at chest height behind you. Step forward with one foot to create a stable, staggered stance, and hold the handles or ends of the band at the sides of your chest with your elbows bent. Press your hands straight forward in front of your chest, extending your arms fully without locking your elbows. Slowly return to the starting position, keeping your shoulders down and away from your ears.
Overhead Presses: Stand on the center of the band with one or both feet, depending on the desired tension. Bring your hands up to shoulder height with your palms facing forward and elbows bent. Press your hands straight up toward the ceiling, keeping your core tight and avoiding any arching in your lower back. Once your arms are fully extended, slowly lower your hands back to shoulder height.
Core
Pallof Presses: Anchor your band at chest height to a stable post or door frame. Stand perpendicular to the anchor point, holding the band with both hands close to the center of your chest. Step away from the anchor until you feel lateral tension pulling you toward the post. Keeping your hips and shoulders square, press the band straight out in front of your chest. Hold this extended position for a brief second, resisting the urge to rotate toward the anchor, then slowly bring your hands back to your chest.
Banded Woodchoppers: Secure the band to a high anchor point. Stand sideways to the anchor with your feet wider than shoulder-width apart. Grasp the band with both hands, arms extended. Pull the band diagonally down and across your body toward your opposite hip, rotating your torso and pivoting your back foot. Control the return movement back to the starting position, keeping your core tightly engaged throughout the rotation.
Adjusting Resistance and Progressing Your Workouts
To continue building strength over time, you must progressively increase the challenge to your muscles. With elastic rubber bands, you do not always need to purchase a new set to increase the resistance. You can easily modify the leverage of an exercise by adjusting your physical setup. For instance, widening your stance during a squat or bicep curl shortens the active portion of the band, which increases the starting tension and makes the movement more challenging.
When you can complete all your repetitions with perfect form and no longer feel challenged, it is time to transition to a thicker band. Rather than guessing the load, refer to the manufacturer’s resistance charts, which often list the approximate weight equivalent at specific stretch percentages. This allows you to make structured, measurable progressions in your training.
Another effective progression method is combining multiple bands. If you need an intermediate step between two resistance levels, you can stack two lighter bands together. When doing this, ensure both bands are of similar length and material condition. Combining a brand-new band with an old, worn band can cause uneven tension distribution, which may lead to premature wear or sudden snapping of the weaker band.
Safety Boundaries and Stopping Conditions
Your safety during strength training depends on recognizing when to stop an exercise immediately. You must halt your workout if you experience any immediate stop conditions. These include noticing sudden physical changes in the band, such as a visible fraying thread, hearing an audible cracking or snapping sound from the rubber, or experiencing a sudden, unexpected loss of tension during a repetition. Continuing to use a compromised band poses a high risk of injury.
It is also vital to distinguish between normal muscle fatigue and joint pain. Normal fatigue feels like a dull, warm burn in the target muscle group that gradually builds as you perform repetitions. Sharp, sudden, or shooting pain in your joints, tendons, or ligaments is a clear signal to stop the exercise immediately. Pushing through joint pain can lead to acute injuries or chronic inflammation.
To preserve the integrity of your bands, respect environmental limits. Avoid exposing rubber bands to direct sunlight, extreme heat, or harsh chemicals, as these factors accelerate the breakdown of latex and synthetic rubber. If you experience persistent joint discomfort during or after your workouts, or if you find it difficult to maintain proper form, consult a certified fitness professional or a physical therapist to evaluate your movement mechanics.
Frequently Asked Questions (FAQ)
Can I combine elastic rubber bands with free weights?
Yes, combining elastic rubber bands with free weights is a highly effective training method known as accommodating resistance. When attaching bands to a barbell or dumbbell, you must ensure the bands are anchored symmetrically so they do not pull the weight unevenly to one side. Verify that the anchor points on the floor or rack are completely stable and cannot shift during the lift. This setup increases the resistance at the top of the movement, challenging your muscles through their strongest range of motion.
How should I clean and store my resistance bands to prolong their lifespan?
To maximize the lifespan of your elastic rubber bands, wipe them down with a clean, damp cloth after every workout to remove sweat, body oils, and dust. Avoid using harsh chemical cleaners, detergents, or alcohol-based sanitizers, as these will dry out the rubber and cause it to crack. Allow the bands to air dry completely in a shaded area. Store them in a cool, dry place away from direct sunlight, radiators, or moisture to prevent premature degradation of the material.
Community discussion
Share your experience or ask a question. Comments are reviewed before publication.