
Using a flat rubber band for post-run recovery provides a gentle, highly adjustable way to ease muscle tightness, improve joint mobility, and support overall flexibility. Unlike heavy weights or rigid straps, these elastic bands allow you to control the tension dynamically, matching the exact state of your fatigued muscles after a demanding run. By integrating targeted band stretches into your post-workout routine, you can safely guide your body through a full range of motion, promoting blood flow to tired tissues and accelerating the transition from high-intensity exertion to a restful state. This step-by-step guide covers how to select the right band, perform essential safety checks, and execute targeted stretches for the hips, glutes, calves, and quadriceps.
Why Flat Resistance Bands Aid Runner's Recovery
Post-run recovery requires a delicate balance between active movement and gentle tension. A flat rubber band serves as an excellent tool for this purpose because it allows you to apply progressive resistance that you can modify instantly by adjusting your grip. Fatigued muscles are highly susceptible to strain if forced into deep, static stretches too quickly; the elastic nature of a flat band provides a yielding support system that accommodates your current level of flexibility without overloading cold or tired tissues.
Additionally, these bands are exceptionally lightweight and compact, making them easy to pack into a running vest or gym bag for immediate use. Unlike looped bands or thick resistance tubes, which are designed primarily for strength training and can pinch or roll against the skin, flat bands distribute pressure evenly across a wider surface area. This flat profile makes them highly comfortable for direct skin contact, allowing you to perform deep, targeted stretches across your calves, thighs, and hips without the discomfort of a narrow band digging into your muscles.
Products mentioned in this guide
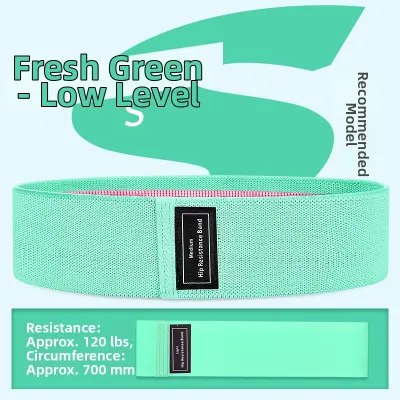
Prices are valid at publication and may change. Please refer to the product page for the latest price.
Choosing the Right Flat Rubber Band for Your Needs
Selecting the appropriate flat rubber band requires evaluating thickness, length, and material composition to match your physical needs and flexibility level. Most manufacturers use color-coding systems to represent different tension levels, ranging from extra-light to extra-heavy. Because there is no universal industry standard for these colors, you must check the specific manufacturer’s packaging or product label to verify the actual resistance rating.

The length of the band is equally critical for ensuring a safe and comfortable grip during your recovery routine. A band that is too short will force you to wrap it tightly around your hands or feet, which can restrict local circulation or cause discomfort during extended holds. Look for a band that provides ample length—typically around 1.5 to 2 meters—allowing you to maintain a secure, relaxed grip with your hands while keeping your shoulders and neck completely relaxed on the floor.
Finally, consider the material quality and your personal skin sensitivity. While natural rubber latex offers excellent elasticity and progressive tension, those with latex allergies should opt for synthetic elastomer or thermoplastic elastomer (TPE) alternatives. Inspect the surface texture of the band before purchasing; a high-quality flat band should feel smooth and uniform, without any powdery residue, uneven thickness, or sticky patches that could compromise its durability.
Pre-Recovery Safety Checks and Setup
Before beginning any stretching routine, performing a quick safety inspection of your equipment is essential to prevent sudden snaps or slips. Unroll your flat rubber band completely and check for micro-tears, thinning edges, white stress marks, or signs of dry rot. Over time, exposure to sweat, body oils, and UV light can degrade the rubber, making it prone to tearing under tension. If you notice any structural imperfections, discard the band immediately and replace it.
The environment where you perform your recovery stretches also plays a vital role in your safety. Ensure you are working on a clean, dry, and non-slip surface, such as a high-grip yoga mat or a carpeted floor, to prevent your feet or body from sliding during floor-based movements. Additionally, never perform deep recovery stretches when your muscles are completely cold. The ideal time to use your flat rubber band is within thirty minutes of completing your run, while your core body temperature is still elevated and your muscles remain pliable.
Step-by-Step Recovery Exercises for Runners
To maximize the benefits of your post-run recovery session, you must approach each exercise with control, patience, and proper alignment. Hold each stretch for twenty to thirty seconds while maintaining slow, deep breathing to help your nervous system relax. Avoid bouncing or pulsing movements, which can trigger muscle contraction. Always stop stretching at the point of mild, comfortable tension rather than pain.
Calves and Achilles Relief
To target the lower legs, sit on a comfortable floor surface with your legs extended straight. Loop the center of the flat rubber band securely around the ball of your right foot, spreading it wide to prevent rolling. Hold one end of the band in each hand, keeping your spine tall and your shoulders relaxed.
Gently pull the band toward your torso to flex your ankle, drawing your toes back toward your shin until you feel a mild stretch in your upper calf. To shift the focus to the deeper soleus muscle and the Achilles tendon, slightly bend your knee while maintaining the same ankle flexion. Hold this position while breathing deeply, then slowly release the tension and repeat on your left leg. Stop immediately if you experience sharp pain in the heel or behind the knee.
Hamstrings and Glutes Release
Begin by lying flat on your back on a supportive mat, keeping your spine in a neutral position and your lower back pressed gently into the floor. Bend your left knee and place your left foot flat on the ground to stabilize your pelvis. Loop the flat rubber band around the arch of your right foot, holding the ends securely with both hands.
Slowly raise your right leg toward the ceiling, keeping your knee straight but not locked, using the band to support your leg’s weight. Pull gently to guide your leg upward until you feel a comfortable stretch along the back of your thigh. To transition into a glute stretch, cross your right ankle over your left knee in a figure-four position, loop the band behind your left thigh, and gently pull both legs toward your chest. Keep your lower back anchored flat against the floor throughout.
Hips and IT Band Mobility
To address tightness in the lateral hip and the iliotibial (IT) band complex, lie flat on your back with both legs extended straight. Loop the flat rubber band around the bottom of your right foot, holding both ends of the band in your left hand while keeping your right arm extended outward on the floor for stability.
Slowly raise your right leg toward the ceiling, then gently guide it across the midline of your body toward the left side, keeping your right hip anchored as close to the floor as possible. You should feel a distinct stretch along the outside of your right thigh and hip. To stretch the inner hip and adductors, switch the band to your right hand and slowly lower your right leg outward to the right side, keeping your left hip firmly pressed to the mat. Avoid any sudden drops or excessive force.
Quads and Hip Flexors Stretch
To stretch the front of your thighs, lie face down on your stomach on a comfortable mat, keeping your legs extended. Loop the flat rubber band around the front of your right ankle, and drape the ends of the band over your right shoulder so you can hold them securely with your hands.
Gently pull the band forward over your shoulder to bend your right knee, drawing your heel toward your glutes until you feel a mild stretch along the front of your thigh. To perform a kneeling variation, step your left foot forward into a low lunge, loop the band around your right ankle behind you, and hold the band over your shoulder while gently pressing your hips forward. Keep your pelvis tucked slightly forward and your abdominal muscles engaged to protect your lower back from arching.
Common Mistakes and When to Stop
One of the most common errors runners make during post-run recovery is overstretching, operating under the false assumption that more pain equals a faster recovery. Stretching should never produce sharp, shooting, burning, or localized joint pain; if you feel any of these sensations, it is a clear sign that you are pulling too hard or that the muscle tissue is already compromised. Your body responds to pain by contracting the muscle to protect it, which completely counteracts the goal of your recovery session.
Another frequent mistake is holding your breath or using rapid, bouncing movements to force a joint into a deeper range of motion. Shallow breathing keeps your sympathetic nervous system in a state of high alert, preventing your muscles from fully relaxing. Similarly, wrapping the flat rubber band too tightly around your hands, wrists, or feet can restrict blood flow or compress superficial nerves, leading to tingling or numbness. If you experience persistent swelling, visible bruising, or pain that does not subside, stop the routine immediately and consult a sports medicine professional.
Post-Session Care and Band Maintenance
Proper maintenance of your flat rubber band is essential for preserving its elasticity, ensuring your safety during future sessions, and extending its overall lifespan. After every recovery routine, wipe down the entire surface of the band with a clean, damp cloth to remove accumulated sweat, body oils, and dirt. Avoid using harsh chemical detergents, alcohol-based sanitizers, or abrasive scrubs, as these substances can rapidly break down the rubber compounds and cause the material to become brittle.
Once the band is completely dry, store it flat or loosely rolled in a cool, dry place away from direct sunlight, radiators, or extreme temperature fluctuations. Keep the band away from sharp objects, keys, or rough surfaces in your gym bag that could create small nicks or punctures. Regularly inspect your band for signs of material degradation, such as a sticky texture, visible cracks, uneven thinning, or a significant loss of elasticity, and replace it immediately if any are found.
Frequently Asked Questions (FAQ)
Can I use a flat rubber band if I have a recent muscle strain?
No, you should avoid using a flat rubber band to stretch a recently strained muscle during the acute phase of injury. It is important to distinguish between normal delayed onset muscle soreness (DOMS), which feels like a dull, diffuse ache, and an acute strain, which often presents with sharp pain, swelling, bruising, or a limited range of motion. Stretching an actively torn muscle fiber can worsen the injury and delay healing; instead, prioritize rest and seek a professional medical evaluation.
How often should I perform these band-assisted recovery stretches?
You can safely perform these band-assisted stretches after every running session, or three to four times a week, depending on your training volume and individual recovery needs. Rather than following a rigid, universal schedule, pay close attention to your body’s feedback and adjust the frequency accordingly. If your muscles feel exceptionally fatigued or tender, focus on very light, passive holds rather than deep, active stretching to allow your tissues adequate time to rebuild.
Community discussion
Share your experience or ask a question. Comments are reviewed before publication.