
To build strength at home using resistance bands (ยางยืดออกกำลังกาย), you must focus on controlling tension throughout the entire range of motion, securing reliable anchor points, and systematically applying progressive overload. Unlike free weights that rely solely on gravity, elastic resistance bands provide continuous, variable tension that increases as the band stretches. By mastering proper anchoring, choosing the right band style for each movement, and maintaining strict form, you can replicate almost any gym-based exercise within a compact home environment.
Preparing Your Setup: Resistance Bands, Anchors, and Grip Accessories
Selecting the right equipment is the foundation of a versatile and safe home gym, especially when space is at a premium in compact urban apartments. Resistance bands come in several distinct styles, each optimized for specific movement patterns. Understanding these differences allows you to target different muscle groups effectively without cluttering your living space.
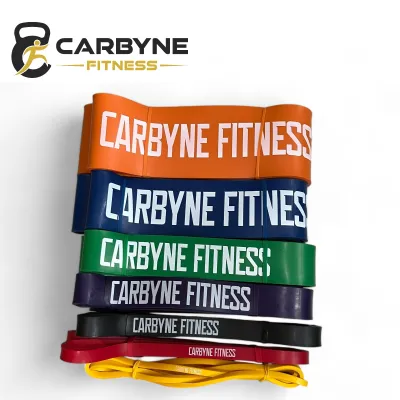
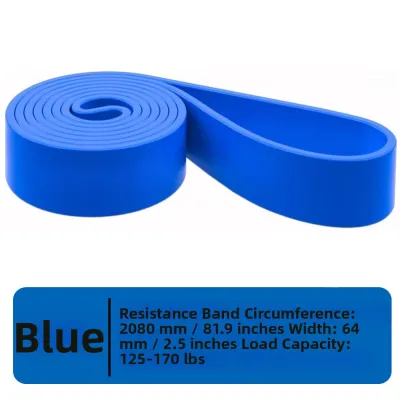
- Loop Bands (Power Bands): These are long, continuous flat loops. They are highly versatile, making them excellent for heavy compound movements like assisted pull-ups, deadlifts, and squat variations.
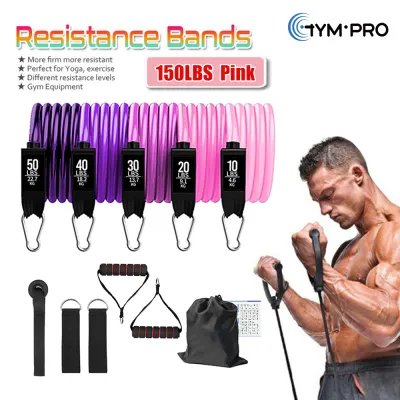
- Tube Bands with Handles: These bands feature plastic handles at each end and often come with carabiners to swap bands. They are ideal for upper-body pulling and pressing exercises, closely mimicking the feel of cable machines.
- Mini-Bands: Short, thin loops designed to be placed around the thighs or ankles. They are primarily used for lower-body lateral movements, hip activation, and glute-focused exercises.
To perform pulling movements like rows or chest presses, you need secure anchor points. Door anchors are the most practical, non-invasive solution for home use. They consist of a heavy-duty strap with a dense foam stop that slips through the hinge side of a door frame, wedging securely when the door is closed. For a more permanent setup, heavy-duty wall mounts can be drilled into concrete studs, though you must verify your wall material and landlord permissions beforehand.
Products mentioned in this guide
Prices are valid at publication and may change. Please refer to the product page for the latest price.
Do not overlook the importance of grip accessories when training with high-tension bands. Because latex can cause friction burns or slip when your hands sweat in warm, humid climates, wearing padded workout gloves or using lifting straps is highly recommended. These accessories reduce hand fatigue, protect your skin, and allow you to focus entirely on targeting the working muscle rather than struggling to hold onto a thin piece of rubber.
Essential Safety Checks Before Every Workout
Because resistance bands store significant kinetic energy under tension, safety must be your top priority. A snapping band or a slipping anchor can cause painful welts, bruising, or serious facial injuries. Developing a quick, non-negotiable pre-workout inspection routine is essential for injury prevention.

Begin with a thorough visual and tactile inspection of your bands. Stretch each band slightly and run your fingers along its entire length, looking for micro-tears, small nicks, discoloration, or dry rot. Pay close attention to the connection points where the tubing meets the handles or carabiners. Latex naturally degrades over time, a process accelerated by humidity and ambient heat. If you detect any cracking, stickiness, or permanent stretching, discard the band immediately.
When securing your bands, follow strict anchoring rules. Never loop a band around sharp metal edges, rough wooden posts, or unstable furniture like light tables or chairs. If you are using a door anchor, always place it on the hinge side of a solid wooden door, ensuring the door closes away from you so that the pull pulls the door shut against the frame rather than open. Alternatively, secure the anchor at the very top or bottom of a fully closed, locked door. Always warn others in your household before you begin training so no one opens the door mid-set.
Establish clear stop conditions during your movements. If you feel the band slipping from under your foot, notice the door anchor shifting, or hear a faint tearing sound, immediately halt the exercise. Never stretch a band beyond its recommended limit—typically two and a half to three times its resting length—as this drastically increases the risk of sudden structural failure.
Step-by-Step Full-Body Resistance Band Routine
This structured routine targets all major muscle groups using controlled tension. For each exercise, focus on a slow, deliberate tempo to maximize muscle fiber recruitment.
Lower Body: Building Leg and Glute Strength
Banded Squats
- Setup: Stand on the middle of a large loop band with your feet shoulder-width apart. Pull the top of the loop up and rest it across the front of your shoulders (front-rack position), holding it in place with your hands.
- Execution: Keep your chest upright and initiate the squat by sitting your hips back and down. Actively push your knees outward against the band's natural inward pull to track them over your toes. Drive through your heels to return to the starting position, squeezing your glutes at the top.
Glute Bridges with Mini-Bands
- Setup: Place a mini-band around both legs, positioned roughly two inches above your knees. Lie flat on your back with your knees bent and feet flat on the floor, spaced hip-width apart.
- Execution: Drive your hips upward by pushing through your heels, keeping your core braced. Throughout the movement, actively press your knees outward against the band to engage the gluteus medius and prevent knee cave. Hold the peak contraction for one second before lowering slowly.
Lateral Band Walks
- Setup: Place a mini-band around your ankles or just above your knees. Step your feet out until you feel moderate tension on the band, and sink into a shallow athletic squat.
- Execution: Take a controlled step to the side with your lead foot, followed slowly by your trailing foot. Maintain constant tension on the band; never let your feet come completely together or your knees collapse inward. Keep your torso upright and avoid swaying.
Upper Body: Mimicking Gym Presses and Pulls
Seated or Standing Banded Rows
- Setup: Secure a tube or loop band to a door anchor placed at chest height. Face the door, grip the handles or band ends, and step back until you feel baseline tension with your arms fully extended.
- Execution: Pull your elbows back toward your hips, focusing on pulling from your back rather than your biceps. Squeeze your shoulder blades together at the end of the movement (scapular retraction) and keep your elbows close to your sides. Slowly return to the starting position over a three-second count.
Banded Chest Presses
- Setup: Position the door anchor at chest height and face away from the door. Grip the handles, step forward into a staggered stance for stability, and bring your hands to chest level with your elbows bent.
- Execution: Press the handles straight out in front of you, squeezing your chest muscles at full extension. Control the return phase, allowing your elbows to travel back until you feel a comfortable stretch across your chest before pressing again.
Overhead Presses
- Setup: Stand on the center of a loop or tube band with your feet hip-width apart. Bring the handles or the top of the loop to shoulder height, palms facing forward and elbows pointing slightly down.
- Execution: Brace your core, squeeze your glutes, and press upward until your arms are fully locked out overhead. Avoid arching your lower back by maintaining a tight midsection throughout the entire press.
Core: Rotational Tension and Stability
Pallof Presses
- Setup: Anchor your band at chest height. Stand perpendicular to the anchor point, hold the band with both hands at the center of your chest, and step away until you feel a sideways pull.
- Execution: Press the band straight out in front of your chest. Your core must work intensely to resist the band's rotational pull. Hold the extended position for two seconds, then slowly bring your hands back to your chest. Complete your reps, then turn around to work the opposite side.
Banded Woodchoppers
- Setup: Secure your band to the top of a door frame using the door anchor. Stand sideways to the anchor, grab the band with both hands, and step away to create tension.
- Execution: Pull the band diagonally down and across your body toward your opposite hip, rotating your torso and pivoting your back foot. Slowly control the return to the starting position, engaging your obliques and deep core stabilizers.
How to Apply Progressive Overload Without Adding Weight
To continue building strength and muscle at home, you must progressively challenge your muscles over time. While you cannot simply slide another iron plate onto a barbell, you can manipulate several variables to increase the difficulty of resistance band training.
- Adjusting Stance and Band Length: You can instantly increase baseline tension by shortening the active segment of the band. For example, during a bicep curl or squat, stepping your feet wider apart shortens the length of the band between your feet and hands, making the resistance significantly heavier from the start of the movement.
- Stacking Multiple Bands: Most high-quality tube band sets feature heavy-duty metal carabiners that allow you to clip multiple bands onto a single handle. Combining a 10kg band and a 15kg band provides a custom 25kg load, allowing you to scale up your resistance as your strength improves.
- Manipulating Tempo and Time Under Tension (TUT): Instead of rushing through repetitions, slow down the eccentric (lowering) phase of each exercise. Taking three to four seconds to return to the starting position forces your muscles to work harder to control the elastic pull, triggering greater muscle fiber recruitment.
- Tracking Intensity via RPE and RIR: Because elastic resistance is dynamic, counting exact weight metrics is difficult. Instead, track your workouts using Rate of Perceived Exertion (RPE) or Reps in Reserve (RIR). Aim to complete your sets with only 1 to 3 "reps in reserve" (meaning you could only perform 1 to 3 more clean repetitions before muscle failure) to ensure you are training with sufficient intensity.
Frequently Asked Questions (FAQ)
Can resistance bands build muscle as effectively as free weights?
Yes, resistance bands can build muscle effectively. Your muscles do not recognize the difference between a metal dumbbell and an elastic band; they only respond to mechanical tension, metabolic stress, and muscle damage. However, because bands have an ascending resistance curve—meaning they get heavier as they stretch—they are easiest at the beginning of a movement and hardest at the end. To maximize muscle growth, focus on maintaining constant tension, pausing at peak contraction, and using controlled tempos to challenge the muscle throughout the entire range of motion.
How do I know when it is time to replace my bands?
It is time to replace your bands when they show clear physical signs of wear, such as micro-tears, deep nicks, permanent stretching (where the band remains loose and does not return to its original length), white stress marks, or a sticky, brittle texture. In humid tropical climates, latex degrades faster due to moisture and ambient heat. With regular use (three to four times a week), expect to replace your bands every 12 to 18 months. To extend their lifespan, always store them in a cool, dry drawer away from direct sunlight.
Community discussion
Share your experience or ask a question. Comments are reviewed before publication.