
Pounding the pavement along East Coast Park or navigating the concrete paths of the Rail Corridor delivers a high-impact workout that leaves your lower body tight and fatigued. While traditional static stretching is a common post-run habit, it often falls short of addressing deep joint compression and localized muscle tension. Integrating a resistant band into your cool-down routine provides targeted assistance that deepens your stretches, improves joint mechanics, and accelerates your physical recovery.
Using a resistant band allows you to perform self-assisted traction and precise mobility work right on your living room floor or gym mat. By providing continuous, adjustable tension, these bands help you target the specific muscle groups that endure the most stress during a run, such as your calves, hamstrings, hip flexors, and glutes. This method ensures you recover efficiently, maintaining your running consistency without lingering stiffness.
Why Use Resistance Bands for Running Recovery?
Repetitive running strides subject your joints to forces multiple times your body weight, especially on hard urban surfaces. This constant impact leads to micro-trauma in muscle fibres and temporary joint compression. A resistant band serves as an extension of your limbs, allowing you to execute assisted stretching and proprioceptive neuromuscular facilitation (PNF) techniques safely without needing a partner.
Products mentioned in this guide


![[RECEIVE IN 3 DAYS] Looped Resistance Exercise Yoga Bands](https://img.lazcdn.com/g/p/478c71011ff76f1dc2636e7c42012a8d.jpg_400x400q80.jpg_.webp)
![🇸🇬 [READY STOCK] Pull Up Assist Resistance Elastic Band Natural Rubber Workout Loop Band for Workout icon](https://img.lazcdn.com/g/p/168ff2ad3ba2fb365fffd4d2fd22e6c4.jpg_400x400q80.jpg_.webp)

Prices are valid at publication and may change. Please refer to the product page for the latest price.
During PNF stretching, you contract the target muscle against the band’s resistance for a few seconds before relaxing into a deeper stretch. This process tricks the nervous system into releasing muscle tension, yielding immediate improvements in flexibility. This technique is far more effective than unassisted static stretching, where your muscles might subconsciously fight the stretch to protect themselves from over-extension.
Furthermore, bands facilitate gentle joint traction. By wrapping a band near a joint line and creating light tension, you can encourage a tiny amount of space within the joint capsule. This subtle decompression helps restore normal fluid dynamics and improves your overall range of motion after repetitive cardio impact.
Using a band also promotes proper skeletal alignment during your recovery session. When reaching for your toes unassisted, it is common to round your lower back or tilt your pelvis to compensate for tight hamstrings. A band allows you to remain flat on your back with a neutral spine, ensuring the stretch targets the intended muscle group rather than straining your spine.
Choosing the Right Resistant Band for Stretching
Selecting the appropriate band is crucial for safe and effective recovery, as different designs serve distinct purposes. The three primary options you will encounter in sports shops across Singapore are flat therapy bands, continuous loop bands, and tube bands with handles.

- Flat Therapy Bands: These wide, thin latex or TPE bands are the gold standard for stretching. They distribute pressure evenly across your foot or ankle, making them exceptionally comfortable for long holds.
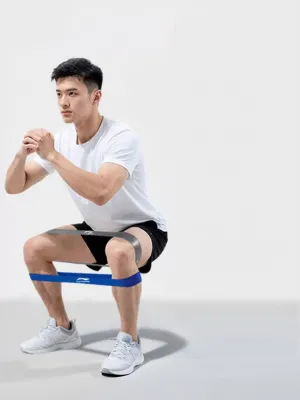
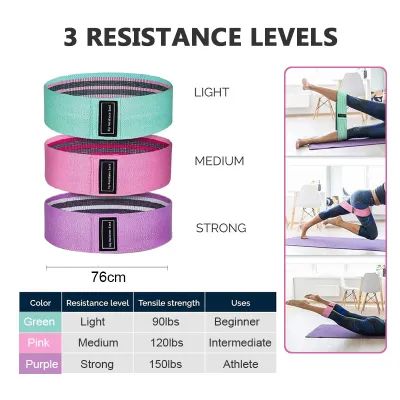
- Continuous Loop Bands: Also known as pull-up assistance bands, these are highly versatile. A thin, light-resistance loop band works well for stretching, though they can dig into the skin slightly more than flat bands.
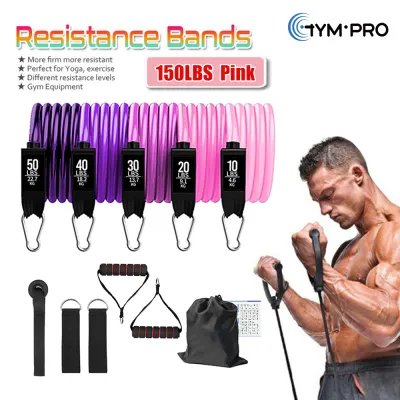
- Tube Bands with Handles: These are primarily designed for strength training. The plastic handles and metal clips make them bulky and difficult to wrap securely around your feet during a stretching routine.
For post-run mobility, always opt for light to medium tension levels. A common mistake is using a heavy strength-training band for stretching. Excessive resistance triggers “muscle guarding,” a protective reflex where your muscles contract to prevent tearing, completely defeating the purpose of a recovery session. A light band should feel supportive, allowing you to relax into the position.
Before every session, perform a quick safety check. Inspect your band for micro-tears, discoloration, thinning, or brittleness. Singapore’s humid climate can accelerate the degradation of natural latex, especially if bands are stored in hot gym bags or balcony cupboards. If you spot any damage, discard the band immediately to prevent it from snapping mid-stretch.
Step-by-Step Resistance Band Stretches for Runners
To get the most out of your post-run mobility routine, perform each movement slowly and deliberately. Avoid rushing through the steps; instead, focus on deep, steady breathing to help shift your nervous system from a high-alert running state into a restful recovery state.
Calves and Achilles
Your lower legs absorb the initial impact of every single stride, making the calves and Achilles tendons prone to extreme tightness and overuse injuries like plantar fasciitis.
- Seated Straight-Leg Calf Stretch: Sit on your exercise mat with your legs extended straight in front of you. Loop the center of your flat band around the ball of your right foot, holding one end of the band in each hand.
- Execution: Keep your spine tall and shoulders relaxed. Gently pull the ends of the band toward your torso, drawing your toes back toward your shin until you feel a deep stretch in your upper calf (gastrocnemius). Hold this position while breathing deeply.
- Soleus Modification: To target the deeper soleus muscle and the Achilles tendon, slightly bend your right knee while keeping the band looped around the ball of your foot. Pull the band again; you will feel the stretch shift lower down your calf and closer to your heel.
Hamstrings and Glutes
Tight hamstrings can pull on your pelvis, leading to lower back discomfort and altered running gait mechanics during long training sessions.
- Supine Hamstring Stretch: Lie flat on your back on your mat. Loop the band around the arch of your right foot. Extend your left leg straight along the floor, keeping your left heel grounded.
- Execution: Slowly raise your right leg toward the ceiling, keeping your knee straight but not locked. Use the band to gently guide your leg upward until you feel a moderate stretch along the back of your thigh. Ensure your lower back remains flat on the floor; do not let your pelvis lift or tilt.
- Band-Assisted Figure-Four Stretch: Lie on your back with both knees bent and feet flat on the floor. Cross your right ankle over your left knee. Loop the band behind your left thigh. Use the band to pull your left thigh toward your chest, which will gently push your right knee outward, stretching your outer glute and piriformis.
Hip Flexors and Quads
Running requires repetitive hip flexion, which can leave your hip flexors and quadriceps shortened and tight, especially if you spend long hours sitting at a desk during the workday.
- Prone Quad Stretch: Lie face down on your mat. Loop the band securely around your right ankle, letting the ends of the band run over your right shoulder.
- Execution: Grasp the ends of the band over your shoulder with both hands. Gently pull the band forward, drawing your right heel toward your glutes. Keep your pelvis pressed firmly into the mat and engage your core slightly to prevent your lower back from arching.
- Kneeling Hip Flexor Stretch: Kneel on your left knee with your right foot flat on the floor in front of you in a half-kneeling position. Anchor your band to a sturdy object behind you (such as a heavy table leg or door anchor) and loop it around your upper left thigh.
- Execution: Step forward slightly until you feel a gentle forward pull from the band. Squeeze your left glute and shift your weight forward slightly. The band's traction assists in opening up the deep psoas muscle at the front of your hip.
IT Band and Outer Hips
While the Iliotibial (IT) band itself is a thick, fibrous band of connective tissue that cannot be lengthened by stretching, mobilizing the surrounding muscles can alleviate lateral knee and hip pain.
- Supine Leg-Lower Crossover: Lie flat on your back. Loop your band around your right foot and extend your leg straight up toward the ceiling.
- Execution: Hold both ends of the band in your left hand. Keeping your right leg straight and your right shoulder pressed firmly into the floor, slowly guide your right leg across your body toward the left side. Stop when you feel a stretch along your outer hip and thigh.
- Anatomical Focus: Remember that you are targeting the tensor fasciae latae (TFL) and gluteus medius muscles at the hip, which control the tension on the IT band. Do not force the leg all the way to the floor if your shoulder starts to lift.
Common Mistakes and Safety Guidelines
Using a resistant band incorrectly can lead to muscle strains or joint irritation. To ensure your recovery sessions are safe and productive, adhere to these essential guidelines:
- Avoid Ballistic Movements: Never bounce or use jerky movements to force a joint into a deeper position. Ballistic stretching triggers the stretch reflex, causing the muscle to contract violently, which can lead to micro-tears.
- Distinguish Tension from Pain: You should feel a deep, warm sensation of tension within the muscle belly. If you experience sharp, localized, or pinching sensations in any joint, or if you feel nerve tingling down your leg, stop the stretch immediately.
- Protect Your Joints: Do not hyperextend your knees during hamstring or calf stretches. Keep a micro-bend in the joint to ensure the tension remains on the muscle tissue rather than the ligaments.
- Consult the Instructions: Always check the manufacturer's care and usage instructions for your specific band. Never stretch a band beyond its recommended maximum length, as this can cause it to snap.
If you experience persistent pain that does not improve with rest and gentle stretching, do not try to push through it. Recovery tools are designed for general maintenance, not medical rehabilitation. Consult a qualified physiotherapist or sports medicine specialist to address chronic running injuries.
Building a Consistent Post-Run Mobility Routine
To lock in the benefits of your recovery work, consistency is far more valuable than duration. A focused 10-minute session immediately after your run will yield better long-term results than a random 45-minute stretch once a week.
- Optimal Timing: Perform these stretches while your muscles are still warm, ideally within 30 minutes of finishing your run. Stretching cold muscles can increase the risk of strain.
- Hold Times and Breathing: Hold each stretch for 30 to 60 seconds. Focus on slow, nasal breathing, aiming for an exhalation that is twice as long as your inhalation. This breathing pattern signals your brain to lower your heart rate and relax your muscles.
- Track Your Progress: Keep a log of how your hips and hamstrings feel during your training cycles. As your flexibility improves, you can gradually increase the depth of your stretches or transition to slightly firmer bands to maintain gentle traction.
Frequently Asked Questions (FAQ)
How long should I hold each resistance band stretch?
For post-run recovery, hold each stretch for 30 to 60 seconds per side. This duration allows the muscle spindles to relax and adapt to the lengthened state. Avoid holding static stretches for longer than 60 seconds immediately after a workout, as excessively long holds are better suited for dedicated flexibility training sessions rather than a standard post-run cool-down.
Is it better to stretch with bands before or after running?
Deep, static stretching with bands is highly recommended after your run when your muscles are warm and pliable. Pre-run routines should focus on dynamic movements, such as leg swings and high knees, to prepare your nervous system and joints for impact. Using a light band before a run should be limited to brief muscle activation exercises rather than deep, prolonged stretching.
Community discussion
Share your experience or ask a question. Comments are reviewed before publication.