
Running regularly on concrete park connectors or nature trails puts significant physical stress on your lower body. To maintain your stride, protect your joints, and prevent long-term tightness, a structured recovery routine is essential. Incorporating a resistance band into your post-run stretching allows you to target tight muscle groups with controlled, adjustable tension, facilitating a deeper and safer release than standard static stretching.
Using a band acts as a mechanical aid to anchor your limbs, control your range of motion, and apply continuous tension to tired muscles. This guide outlines how to select the right band, execute essential post-run stretches, and implement safety practices to optimize your athletic recovery.
Why Add Resistance Bands to Your Post-Run Routine?
Traditional static stretching often relies on your body weight or gravity to pull muscles into a lengthened state. This can sometimes lead to awkward positioning, poor alignment, or overcompensation in adjacent joints. A resistance band acts as an extension of your limbs, providing a continuous, gentle pull that you can modulate in real-time to match your body’s feedback.
Products mentioned in this guide

![🇸🇬 [READY STOCK] Elastic Yoga Pilates Rubber Stretch Resistance Exercise Fitness Band Belt](https://img.lazcdn.com/g/p/20dbe94b58bb8a94f4538aee88b0b8a2.jpg_400x400q80.jpg_.webp)
![[RECEIVE IN 3 DAYS] Looped Resistance Exercise Yoga Bands](https://img.lazcdn.com/g/p/478c71011ff76f1dc2636e7c42012a8d.jpg_400x400q80.jpg_.webp)


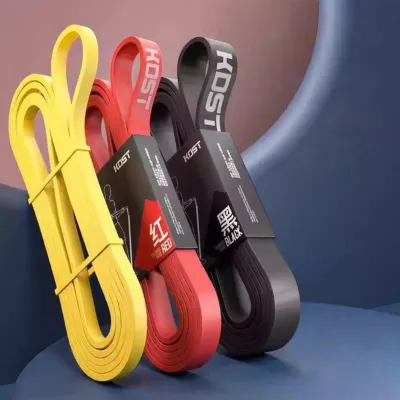
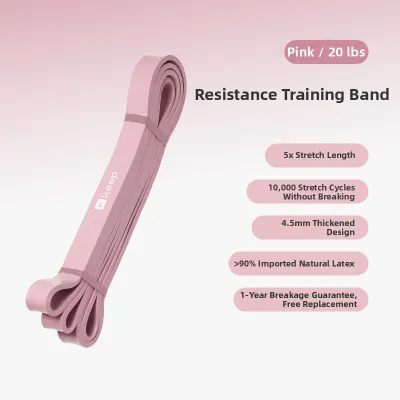
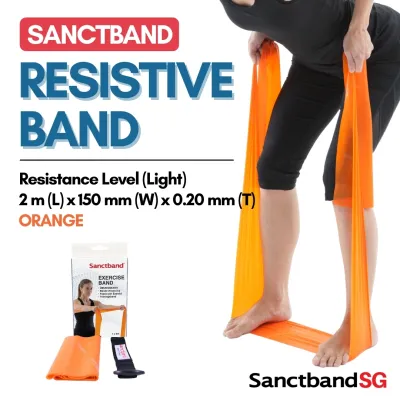
Prices are valid at publication and may change. Please refer to the product page for the latest price.
In warm, humid climates, running can lead to rapid fluid loss, which increases muscle fatigue and the risk of cramping. The controlled tension of a band helps relax hyperactive muscles, enhances local blood circulation to clear metabolic waste, and reduces the severity of delayed onset muscle soreness (DOMS). By facilitating a more relaxed stretch, you help your nervous system transition from a high-alert state to a restorative parasympathetic state.
It is important to clarify that this specific routine is designed for recovery, tissue lengthening, and joint mobility. It is not intended for building muscle mass, strength training, or high-resistance conditioning. Using the band in this context is strictly about restoring your muscles to their optimal resting length after repetitive impact.
How to Choose the Right Resistance Band for Stretching
Selecting the correct equipment is crucial for a productive and comfortable stretching session. Resistance bands generally come in three styles: small loop bands (mini bands), long flat therapy bands, and resistance tubes with plastic handles. For full-body post-run stretching, long, flat latex or latex-free fabric loop bands (typically 1.5 to 2 meters in length) are highly recommended.

Flat therapy bands distribute pressure evenly across your feet and hands, unlike thin rubber tubes which can pinch the skin or slip out of place during deep stretches. The wide surface area of a flat band provides a secure anchor point around the sole of your running shoe or the arch of your foot, preventing sudden slips that could snap the band back toward you.
When choosing a band for stretching, always opt for light-to-medium resistance levels. Post-run stretching requires gentle assistance to coax tight muscles into relaxation, not heavy resistance that forces your muscles to contract defensively. If the band feels too stiff, you will end up straining to hold the position, defeating the purpose of the recovery session.
Before you begin, prepare your environment to ensure safety. Lay down a non-slip yoga mat on a flat, dry surface. Inspect your band thoroughly for micro-tears, discolouration, or brittle spots that could lead to snapping under tension. Wear comfortable, form-fitting athletic clothing to prevent the rubber material from catching on loose fabric or sliding out of position during movement.
Essential Resistance Band Stretches for Runners
An effective post-run routine should follow a logical sequence, starting from the lower legs and moving upward through the posterior chain to the hips and core. This systematic approach ensures that you address every major muscle group involved in your running gait, helping to restore overall structural balance.
Before applying any resistance bands, ensure your body has transitioned out of high-exertion mode. Spend five to ten minutes performing a light cool-down, such as a slow walk, to allow your heart rate to settle while keeping your muscles warm and pliable. Stretching cold, stiff muscles can lead to micro-tears, so timing is critical.
Calves and Lower Legs
Your calves absorb several times your body weight with every stride, making them highly susceptible to tightness, Achilles tendinopathy, and nocturnal cramps. To stretch these muscles, sit on your mat with your legs extended straight in front of you. Loop the center of a long flat resistance band around the ball of your right foot, holding one end of the band in each hand.
To target the gastrocnemius—the larger, outer calf muscle—keep your right leg completely straight. Gently pull the ends of the band toward your torso, drawing your toes back toward your shin until you feel a moderate stretch along the back of your lower leg. Hold this position while breathing deeply.
To target the soleus—the deeper calf muscle that lies beneath the gastrocnemius—slightly bend your right knee while keeping the band secured around the ball of your foot. Pull the band gently once more. This subtle bend shifts the tension lower down the leg, closer to the Achilles tendon. Avoid pulling too aggressively; your ankle should never be forced into a painful range of motion. Repeat the process on your left leg.
Hamstrings and Glutes
Tight hamstrings can restrict your hip extension and alter your pelvic tilt, which often manifests as lower back discomfort after long runs. To release this posterior chain tension, lie flat on your back on your mat. Loop the resistance band around the arch of your right foot. Keep your left leg either flat on the floor or, if you experience lower back tightness, bend your left knee and place your foot flat on the mat for stability.
Slowly raise your right leg toward the ceiling, keeping your knee as straight as comfortably possible. Use the band to support the weight of your leg, allowing your hamstring to relax into the stretch. Ensure your lower back remains firmly pressed against the floor; do not allow your pelvis to tilt or your back to arch to force a higher leg angle.
To engage your glutes and the outer portion of your hamstring, gently guide your raised right leg across the midline of your body by just a few inches. You should feel the stretch shift toward the outer thigh and hip. Keep both shoulders anchored flat on the mat throughout this movement. Lower the leg slowly and switch sides.
Hip Flexors and Quadriceps
The repetitive forward stride of running keeps your hip flexors in a shortened state, while your quadriceps work constantly to absorb impact. Over time, tightness here can pull your pelvis forward and place excessive stress on your patellar tendons. To address this, lie face down on your stomach. Loop the resistance band around your right ankle, letting the long ends drape over your right shoulder.
Grasp the ends of the band with both hands over your shoulder. Slowly pull the band forward to draw your right heel toward your glutes. To protect your lumbar spine, actively squeeze your glutes and press your pubic bone down into the mat. This action stabilizes your pelvis and prevents your lower back from arching excessively.
If lying on your stomach is uncomfortable, you can perform this stretch in a kneeling lunge position. Place a soft pad under your back knee, loop the band around your back ankle, and pull the band over your shoulder to bring your heel up. If you have limited knee flexibility or joint discomfort, reduce the pull of the band and focus on a mild, pain-free stretch. Repeat on the opposite side.
IT Band and Outer Hips
The iliotibial (IT) band is a thick band of connective tissue running down the outside of your thigh. While you cannot stretch the IT band itself because of its fibrous density, you can release the surrounding muscles—such as the tensor fasciae latae (TFL) and gluteus medius—to alleviate lateral hip tightness. Lie on your back with both legs extended. Loop the band around your right foot and raise the leg to about a 45-degree angle.
Holding both ends of the band in your left hand, slowly lower your right leg across your body toward the left side. Keep your right arm extended out to the side and your right shoulder pressed into the floor to stabilize your torso. Only lower the leg as far as you can while maintaining control.
Focus on slow, deliberate movements rather than forcing a deep cross-body pull. The goal is to release the lateral hip and outer thigh muscles gently. Jerking or pulling aggressively can strain the hip joint or irritate the lateral knee. Return to the center slowly before switching to the left leg.
Safety Guidelines and Mistakes to Avoid
While post-run stretching should feel deep and therapeutic, it should never cause sharp, shooting, or localized joint pain. If you experience any sudden discomfort, numbness, or a pinching sensation, release the tension immediately and stop the stretch. Differentiating between the healthy discomfort of a lengthening muscle and physical injury is key to long-term athletic health.
Avoid bouncing or pulsing while holding a stretch. This ballistic movement triggers the stretch reflex—a defensive muscle contraction designed to prevent tearing—which actually makes the muscle tighter and increases the risk of micro-tears. Instead, focus on static stretching, where you hold a stable position and use your breath to encourage the muscle fibers to relax.
Never stretch completely cold muscles. If you finished your run several hours ago and your body has completely cooled down, do not jump straight into a resistance band routine. Instead, take a warm shower or perform five minutes of light dynamic movements, such as gentle bodyweight squats and leg swings, to raise your tissue temperature before using the bands.
Always inspect your equipment before use. Check the manufacturer’s care instructions for your resistance bands to ensure proper maintenance and storage. A snapping resistance band can cause significant bruising or eye injuries. If you are recovering from an acute injury, such as a muscle strain or joint sprain, consult a physiotherapist or sports medicine professional before initiating a new stretching routine, as improper tension can worsen tissue damage.
How to Know If Your Recovery Routine Is Working
Evaluating your recovery routine requires paying close attention to how your body responds in the days following a strenuous run. One of the most reliable indicators of successful recovery is a noticeable reduction in next-day muscle stiffness. If you find yourself rolling out of bed with less soreness and a faster return to your resting heart rate, your post-run routine is likely facilitating effective muscular repair.
You can also track your progress by observing your flexibility and movement patterns. Over several weeks, you may notice that you can achieve a deeper range of motion comfortably, or that you require less band tension to hold a specific stretch. On your subsequent runs, this improved flexibility should translate into a smoother, more fluid stride and less resistance during hip extension.
Adjust your routine dynamically based on your training volume and physical feedback. If a light band no longer provides enough support to help you hold a stretch comfortably, you can transition to a slightly thicker band. However, only increase the band thickness to provide structural support, not to force a deeper stretch than your joints are ready to accommodate. Shift your focus to different muscle groups as your training cycles evolve, prioritizing hip flexor stretches during hill training phases or calf stretches during high-mileage blocks.
Frequently Asked Questions (FAQ)
Should I stretch with bands immediately after a run or wait until the next day?
Performing light resistance band stretching immediately after your run is highly recommended. At this point, your muscles are warm, highly pliable, and receptive to lengthening, which helps kickstart the recovery process by promoting circulation. If you must delay stretching until the next day, you must perform a brief warm-up first. Stretching cold muscles without a warm-up increases the risk of strain and reduces the effectiveness of the routine.
How long should I hold each resistance band stretch?
For effective post-run recovery, hold each static stretch for 30 to 60 seconds, and repeat the sequence 2 to 3 times per muscle group. Rather than rigidly counting seconds, focus on breathing deeply and slowly. With every exhalation, consciously visualize the targeted muscle relaxing and releasing its tension, allowing the resistance band to gently guide you slightly deeper into the stretch without forcing the movement.
Community discussion
Share your experience or ask a question. Comments are reviewed before publication.