
Using Zumba foot toning sticks—whether they are weighted ankle attachments, strap-on resistance bands, or specialized lower-body toning accessories—adds a challenging dimension to your dance workout. To use them correctly, you must focus on secure attachment, precise alignment, and controlled movements that match the rhythm of the music. By mastering these techniques, you can tone your calves, thighs, and glutes without compromising your balance or joint safety.
Integrating resistance into a high-energy dance routine requires a shift in mindset from pure speed to controlled power. Unlike traditional cardio-focused Zumba, a toning session with foot-anchored equipment demands deliberate foot placement and constant core activation. This guide breaks down the essential setup steps, postural adjustments, and safety checks needed to maximize your lower-body workout safely.
Understanding Your Equipment and Pre-Routine Setup
Before you begin your workout, identify the exact type of lower-body toning equipment you are using. True foot toning accessories typically consist of weighted ankle wraps, strap-on foot weights, or resistance bands that anchor under the shoe. These differ significantly from standard handheld toning sticks, which are designed primarily for upper-body movements and should never be loosely held or taped to the feet. Using the correct tool designed specifically for lower-body attachment ensures that the resistance remains stable during rapid lateral movements.
Products mentioned in this guide
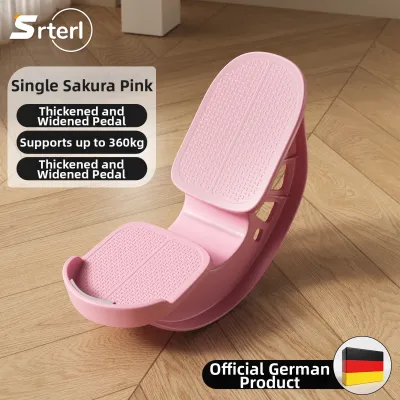
Prices are valid at publication and may change. Please refer to the product page for the latest price.
Prior to every session, perform a thorough physical inspection of your equipment to prevent mid-workout failures. Check all straps, buckles, hook-and-loop fasteners, and elastic bands for signs of wear, fraying, or cracking. If your equipment utilizes elastic resistance tubes, inspect them closely for any tiny tears or discoloration that could indicate material fatigue. Ensure that the gripping surfaces or under-shoe straps are clean and free of dust, which can reduce traction on your workout floor.
The environment in which you exercise plays a critical role in your safety when using foot-anchored resistance. Clear your workout space of any loose items, rugs, or cords, ensuring you have a flat, non-slip surface such as hardwood, laminate, or a specialized fitness mat. If you are exercising at home, ensure you have at least a two-meter radius of clear space. Verify the manufacturer’s guidelines regarding weight limits, maximum stretch lengths, and recommended flooring types to avoid unnecessary strain on the equipment and your joints.
Proper Posture and Core Engagement Techniques
Maintaining correct body alignment is the foundation of safe resistance training during dynamic dance movements. When you add weight or resistance to your feet, your center of gravity shifts, placing extra stress on your lower back and knees. Keep your spine in a neutral position, with your shoulders relaxed, chest lifted, and gaze forward. Avoid tilting your pelvis, as this can lead to lower back compression during sudden directional changes.

Your knees must always track in the same direction as your toes to prevent ligament strain. When performing squats, lunges, or lateral steps, ensure your knees do not cave inward or bow outward. Keep a slight, soft bend in your knees at all times rather than locking them out, which helps absorb the impact of dance steps and keeps your leg muscles actively engaged.
Deep core engagement is your primary defense against instability and pelvic tilting. Before you take your first step, draw your belly button toward your spine to activate your transverse abdominis, the deep muscle layer that stabilizes your trunk. This continuous core activation acts as a natural corset, keeping your hips level and preventing your lower back from arching excessively when lifting a weighted leg.
Proper weight distribution across your feet prevents localized strain and maintains balance. When stepping or landing, distribute your body weight evenly across the heel, the base of the big toe, and the base of the little toe. Avoid rolling your ankles outward or letting your arches collapse under the added resistance. Keeping your feet grounded ensures that the resistance is distributed evenly through your ankles, calves, and knees.
Integrating Toning Sticks into Core Zumba Footwork
To safely incorporate foot toning sticks into your routine, modify standard Zumba steps to accommodate the added resistance. For instance, during a basic Merengue march, focus on lifting your knees deliberately rather than marching rapidly. Emphasize the downward press and upward lift of each foot, feeling the resistance engage your hip flexors and thighs. This deliberate pace allows you to maintain control over the equipment throughout the movement.
Salsa side steps require careful modification to protect your outer hips and knees from sudden lateral strain. When stepping to the side against the resistance of a foot band or weight, reduce the width of your step by about one-third. Focus on pushing off with your trailing foot and landing softly on your leading foot, keeping your knees bent. Avoid snapping your legs back together quickly; instead, resist the pull of the band or weight as you return to the starting position.
Regulating your range of motion is essential for maintaining balance during fast-paced transitions. High-tempo tracks can tempt you to throw your legs outward or kick high, but doing so with foot-anchored resistance can easily pull you off balance. Keep your kicks low and controlled, focusing on muscle contraction rather than momentum. If a sequence feels too fast to execute with perfect form, simplify the footwork by marching in place until you regain your rhythm.
Always prioritize syncing your movements with the musical beat rather than forcing excessive speed. Zumba is known for its upbeat tempos, but when resistance is added, safety must take precedence. If the music is exceptionally fast, perform your steps at half-time—taking one step for every two beats. This adjustment gives your muscles adequate time to contract and release safely against the resistance, resulting in a more effective toning workout and a lower risk of injury.
Safety Signals and When to Stop Your Routine
Understanding the difference between healthy muscle fatigue and acute joint pain is vital when working out with added resistance. It is normal to feel a deep, warm burn in your calves, thighs, and glutes as your muscles work. However, sharp, sudden, or localized pain in your knees, ankles, hips, or lower back is a clear warning sign. If you experience any joint discomfort, stop the movement immediately, as continuing to exercise through joint pain can lead to overuse injuries.
Loss of balance, slipping, or equipment shifting are immediate stop conditions that require your attention. If you feel a strap slipping down your shoe, a fastener loosening, or a resistance band sliding out of place, do not attempt to adjust it while moving. Step out of the active workout area, find a stable spot to stand or sit, and secure the equipment properly. Exercising with loose or misaligned foot toning sticks can alter your gait, leading to uneven muscle loading.
Your form will naturally begin to degrade as your muscles tire toward the end of a session. If you notice your lower back arching, your knees caving inward, or your steps becoming heavy and clumsy, it is time to adjust or remove the tool. You do not have to wear the foot toning sticks for the entire duration of a Zumba class; removing them for high-intensity cardio tracks allows you to maintain high energy and clean form. Listen to your body and prioritize quality of movement.
Maximizing Toning Results and Post-Routine Recovery
To achieve the best results from your lower-body toning routine, progress your resistance levels gradually. Beginners should start with the lightest resistance or lowest weight option, using the toning sticks for only one or two tracks per session. As your strength, balance, and joint stability improve over several weeks, you can gradually increase the duration of use or transition to a slightly higher resistance level. This progressive overload stimulates muscle toning while giving your body ample time to adapt.
Post-routine recovery is essential for maintaining flexibility and preventing stiffness in your lower limbs. After removing your foot toning sticks, spend at least five to ten minutes performing targeted stretches for your calves, Achilles tendons, and hip flexors. To stretch your calves, step one foot back, press the heel firmly into the floor, and bend your front knee slightly. Hold each stretch for 20 to 30 seconds without bouncing, breathing deeply to help your muscles relax.
Proper maintenance of your equipment ensures its longevity and safety for future workouts. After each session, wipe down the straps, bands, and weights with a damp cloth and mild soap to remove sweat and body oils. Allow the equipment to air dry completely in a well-ventilated area away from direct sunlight, as extreme heat and UV rays can weaken elastic bands and plastics. Store your toning sticks in a cool, dry place where they will not be compressed or tangled.
Frequently Asked Questions (FAQ)
Can I use regular handheld Zumba toning sticks for foot and leg exercises?
Regular handheld Zumba toning sticks are designed specifically for upper-body movements and should not be attached to or held by your feet. While you can hold them in your hands to add light resistance during squats, lunges, or leg lifts, they do not provide the secure, hands-free anchoring required for dynamic lower-body footwork. Attempting to strap or tape handheld sticks to your feet is highly unsafe, as they can easily slip off, create a tripping hazard, or cause uneven weight distribution. For lower-body resistance, always use dedicated foot-anchored tools designed for that purpose.
What type of footwear is best when using foot toning sticks?
When using foot toning sticks, choose cross-training shoes or specialized dance sneakers that offer excellent lateral support and pivot points. These shoes provide the stability needed for side-to-side movements while allowing your feet to rotate smoothly on the floor. Avoid running shoes with thick, heavy treads or highly cushioned soles, as they are designed primarily for forward motion and can catch on the floor during quick turns, increasing the risk of ankle twisting. Ensure your shoes fit snugly so the equipment straps do not cause the shoe material to bunch or slide.
How often should I include toning sticks in my weekly Zumba schedule?
It is best to integrate foot toning sticks into your routine two to three times per week, always allowing at least 48 hours of recovery between resistance sessions. Alternating your toning days with standard cardio-focused Zumba classes gives your lower-body muscles, tendons, and joints adequate time to repair and rebuild. If you experience persistent muscle soreness or joint fatigue, reduce the frequency of your toning sessions and focus on low-impact cardio until your body fully adapts to the added resistance.
Community discussion
Share your experience or ask a question. Comments are reviewed before publication.