
Properly wrapping your hands is the most critical preventative measure you can take before stepping up to a heavy bag, focus mitts, or an opponent. Using rigid athletic tape offers unmatched skeletal support, locking the 27 small bones of the hand into a single, cohesive structure that can safely absorb and distribute high-impact forces. While traditional elasticated cotton wraps are excellent for everyday training, athletic tape provides the uncompromising rigidity preferred by professional boxers and mixed martial artists (MMA) globally.
However, wrapping with tape is an exacting skill that demands attention to detail. Applying rigid tape incorrectly can lead to severe issues, ranging from restricted blood circulation and hand cramping to skin abrasions and joint sprains. It is vital to remember that protective gear, including tape, is designed to support your body but cannot substitute for proper striking mechanics, structured coaching, and personal athletic judgment.
Why Use Athletic Tape Instead of Traditional Hand Wraps?
Rigid athletic tape, typically manufactured from woven cotton coated with a strong zinc oxide adhesive, differs fundamentally from standard Mexican-style elastic wraps. The primary benefit of athletic tape is its complete lack of elasticity. When applied, it creates a non-yielding cast around the wrist and hand, preventing joint hyperextension and hyperflexion during heavy impact. This makes it highly effective for fighters recovering from minor wrist strains or those engaging in high-velocity sparring where maximum joint stabilization is paramount.
Products mentioned in this guide
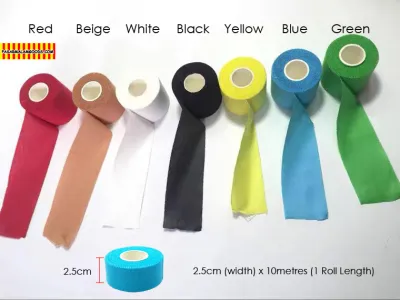
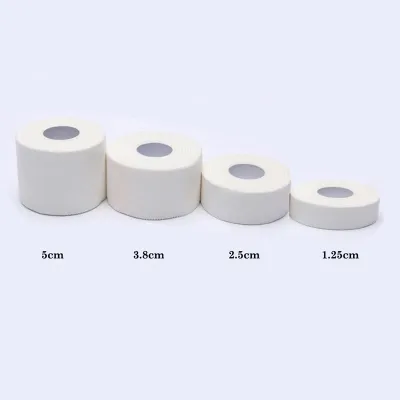
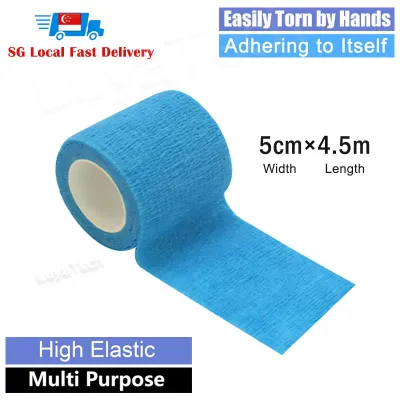
Prices are valid at publication and may change. Please refer to the product page for the latest price.
Furthermore, athletic tape allows you to build a highly customized, secure knuckle pad that will not shift or bunch up inside your gloves. In MMA, where gloves are significantly smaller (typically 4 ounces) and offer minimal built-in padding, a tailored tape-and-gauze wrap is often the only way to safeguard the metacarpals without adding excessive bulk. In professional boxing, locking in a traditional wrap with strategic layers of athletic tape ensures the entire system remains perfectly intact through hours of heavy sweating.
It is important to recognize that athletic tape changes the overall feel of your fist. Because the material does not stretch, the wrap must be applied with the hand in a neutral, semi-active position. While elastic wraps can forgive a slightly tight application by stretching as you clench your fist, rigid tape will simply pinch, restrict blood flow, or prevent you from closing your fist entirely if applied with too much tension.
What You Need: Materials and Skin Preparation
Before you begin the wrapping process, gather all necessary supplies to ensure a seamless application. You will need high-quality, rigid athletic tape (ideally 1.5 inches or approximately 3.8 centimeters wide), medical-grade cotton gauze rolls or foam pre-wrap (underwrap), and a pair of blunt-nose medical scissors. The 1.5-inch tape width is the industry standard for combat sports, offering the perfect balance between structural coverage and maneuverability around the fingers and thumb.

Prior to applying any materials, thoroughly inspect your hands. Check for open cuts, blisters, skin tears, or any swelling from previous training sessions. If you have active skin infections or unhealed wounds, consult a medical professional before proceeding with training. Ensure your hands are completely clean and dry; any residual sweat, lotion, or oils will compromise the adhesive properties of the tape, causing the wrap to unravel mid-workout.
Because rigid athletic tape features a highly aggressive adhesive, you should never apply it directly to bare skin over large areas. This is especially true in tropical environments like Singapore, where high humidity and intense sweating soften the skin, making it highly susceptible to painful tearing and blistering during tape removal. Utilizing a thin layer of foam pre-wrap or wrapping the hand first with lightweight medical gauze creates an essential protective barrier that safeguards your skin while still allowing the tape to provide structural integrity.
Step-by-Step Hand Wrapping Technique
The primary objective of this wrapping sequence is to construct a protective framework that stabilizes the wrist joint, secures the thumb, aligns the metacarpal bones, and cushions the primary striking knuckles. Throughout this process, keep your hand relaxed but keep your fingers slightly spread. Spreading your fingers ensures that the hand remains wide enough during the wrapping process to allow for natural muscle expansion and blood flow when you clench your fist during training.
Step 1: Securing the Wrist for Maximum Stability
Begin by establishing a solid anchor point. If you are using a gauze underwrap, wrap it around your wrist two to three times first. Next, take your athletic tape and apply the starting end on the back of your wrist. It is crucial to start on the back of the hand rather than the palm side, as this direction naturally pulls the wrist into an extended, strong position rather than a flexed, vulnerable one.
Carefully wind the tape around your wrist joint two to three times, ensuring each pass overlaps the previous one by about half the tape’s width. Keep your wrist in a perfectly neutral, straight alignment—do not allow it to bend forward or backward while applying the tape. The tape must feel snug, but you should not pull it taut with maximum force; instead, lay the tape flat against the skin barrier, smoothing out any wrinkles with your free hand as you go.
This foundational wrist wrap acts as a rigid splint. By overlapping the passes directly over the joint line where the hand meets the forearm, you limit lateral movement and prevent the wrist from folding upon impact. This is the single most important step for preventing the common “bent-wrist” sprains that occur when landing hooks or off-center straight punches.
Step 2: Anchoring the Thumb and Palm
Once the wrist is securely anchored, bring the tape diagonally across the back of your hand toward the base of your thumb. The thumb is highly susceptible to hyperextension and joint jamming, particularly during uppercuts or when catching punches on the mitts. To protect it, loop the tape carefully around the thumb, starting from the inside and wrapping outward.
After wrapping the thumb once, bring the tape back down diagonally across the back of the hand to the opposite side of the wrist, forming a clean figure-eight pattern. This diagonal path anchors the thumb directly to the rigid wrist support, preventing it from being pushed backward or sideways upon impact. Ensure the tape sits flat in the web space between the thumb and index finger without pinching the skin.
Next, run the tape across the palm to the outer edge of the hand, just below the pinky finger. When wrapping across the palm, it is vital to keep your hand relaxed and slightly open. If you pull the tape tight across the palm, you will find it nearly impossible to make a proper, tight fist inside your glove, which can lead to hand fatigue and injury. The tape across the palm should act as a flat, supportive bridge, not a tight band.
Step 3: Building Knuckle Protection and Padding
To protect your primary striking surfaces—specifically the knuckles of your index and middle fingers—you must construct a dedicated padding layer. You can achieve this by folding a section of medical gauze back and forth until you have a pad that is roughly four to six layers thick and wide enough to cover your knuckles. Alternatively, you can use a pre-cut piece of high-density foam underwrap.
Place this pad directly over your knuckles while your fingers are extended. To lock this pad in place, hold it down with your thumb and bring the athletic tape up from the wrist, wrapping it horizontally over the pad and around the hand two to three times. Make sure the padding sits directly on the front of the knuckles where your fist makes contact with the target, rather than riding up onto the fingers or slipping back onto the hand.
To prevent the knuckle pad from shifting during training, you must secure it using vertical “interstitials” or finger weaves. Tear or cut narrower strips of tape (or split your 1.5-inch tape lengthwise if needed). Thread a strip between your pinky and ring finger, run it down to the palm, and secure it at the wrist anchor. Repeat this process between the ring and middle fingers, and finally between the middle and index fingers. These vertical strips lock the horizontal knuckle pad down, ensuring it remains perfectly positioned even after hundreds of impacts inside your glove.
Step 4: Locking the Wrap and Finishing
With the knuckles padded and the fingers woven, bring the main roll of tape back to the wrist to initiate the final locking phase. Run the tape diagonally from the knuckles down to the wrist, crossing the back of the hand to create an “X” pattern over the previously applied layers. This binds the knuckle padding, finger weaves, and wrist support into a single, unified system.
Apply one or two final circular passes around the wrist to cover all the loose ends of the diagonal wraps and finger strips. To finish, tear the tape cleanly. High-quality athletic tape usually features a zig-zag edge designed for easy tearing by hand; simply grip the tape firmly with both hands close together and rip it with a quick, snapping motion. If your tape does not tear easily, use your blunt-nose medical scissors to cut it cleanly.
Press the torn end of the tape down firmly against the underlying layers, smoothing it out to ensure there are no loose edges or bulky folds. Avoid creating thick, overlapping knots of tape on the palm or the underside of the wrist, as these can cause uncomfortable pressure points and friction blisters when compressed inside a tight boxing or MMA glove.
Common Wrapping Mistakes and Safety Warnings
Even experienced athletes can make critical errors when wrapping their hands with rigid athletic tape. Awareness of these common pitfalls is essential for maintaining both hand health and training longevity.
- Circulation Restriction: The most frequent mistake is applying the rigid tape with too much tension. Unlike elastic wraps, athletic tape has zero give. If wrapped too tightly around the wrist or palm, it will compress the blood vessels and nerves, leading to rapid numbness, cold fingers, or a throbbing sensation during training. Always lay the tape flat rather than pulling it tight.
- Skin Tearing: Applying aggressive zinc oxide tape directly to bare skin is a recipe for painful abrasions. When the tape is removed post-workout, the strong adhesive can pull away the outer layers of skin, particularly over the knuckles and the back of the hand. Always use a barrier such as foam pre-wrap or medical gauze.
- Misaligned Padding: If the knuckle pad is secured too high (closer to the fingers) or too low (on the back of the hand), your striking surface remains completely unprotected. This misalignment often happens when athletes wrap with a tightly clenched fist, causing the pad to shift forward when the hand is opened. Ensure the pad is centered directly over the metacarpophalangeal joints.
- Flexed Wrists: Wrapping the wrist while it is bent forward or backward locks the joint in an anatomically weak position. When you land a punch, the force will travel through a misaligned joint, significantly increasing the risk of severe sprains or fractures. Always keep your wrist straight and rigid during the entire application process.
How to Verify Your Wrap is Safe and Effective
Before you put on your gloves and begin hitting the bag, perform a quick three-step verification to ensure your wraps are safe, supportive, and comfortable.
- The Fist Clench Test: Slowly close your hand into a tight fist. The wrap should feel highly supportive and firm, locking your knuckles and wrist into a solid block. When you open your hand, your fingers should be able to extend fully without painful pinching or excessive resistance. If you cannot close your fist completely, the palm wrap is too tight.
- Capillary Refill Test: Press down firmly on one of your fingernails until the nail bed turns white, then release it immediately. The natural pink color should return to the nail bed within two seconds. If it takes longer, or if your fingertips remain pale or blue, your wrap is restricting arterial blood flow and must be removed and reapplied immediately.
- Sensory Check: Wear the wraps for three to five minutes while shadowboxing or moving around the gym. Monitor your hands closely for any signs of tingling, numbness, coldness, or a deep throbbing sensation. These symptoms indicate nerve compression or venous congestion. Never ignore these warning signs, as training with restricted circulation can cause temporary or permanent nerve damage.
Frequently Asked Questions (FAQ)
Can I apply athletic tape directly to my skin?
While some professional fighters apply tape directly to their skin for a highly customized, low-profile fit, it is not recommended for regular training. Direct skin application carries a high risk of skin tearing, irritation, and allergic reactions to the zinc oxide adhesive, especially when combined with friction and sweat. Always use a thin layer of foam pre-wrap or medical gauze as a protective barrier to keep your skin healthy and intact.
How do I safely remove athletic tape after training?
Never attempt to rip athletic tape off your hands quickly, as this can cause severe skin damage. Instead, use blunt-nose medical scissors to carefully slide under the wrap along the soft, fleshy side of your palm or the underside of your wrist, avoiding the bones. Cut the wrap in a straight line and peel it off gently. To remove any sticky adhesive residue left on your skin, apply a small amount of baby oil, olive oil, or a commercial adhesive remover, then wash your hands with warm water and soap.
Should I wrap both hands for light heavy bag training?
Yes, you must always wrap both hands, regardless of how light or technical your training session is. Wrapping both hands ensures symmetrical muscle memory, maintains balanced wrist support, and protects your non-dominant hand, which is frequently subjected to high-frequency impacts from jabs. Consistent wrapping habits protect you from unexpected slips or off-center impacts that can cause sudden joint injuries even during light drills.
Community discussion
Share your experience or ask a question. Comments are reviewed before publication.